How to Edit Shape Style in Writer
Edit Shape Style in Writer
After drawing a shape in Writer documents, you can add special effects to it. You can change the lines, the fill color, add shading, and add three-dimensional effects. To change the shape settings, follow the steps below:
Change shape lines
Step 1. Click the shapes icon in the Insert tab and choose the shape you wish to draw in the corresponding menu. Then the cursor will change into a cross and you can draw the desired shape.
Step 2. To change the line style of the shape you have drawn, select the shape and open the Shape Outline drop-down menu under the Drawing Tools tab. Then you can choose your preferred line weight in the Weight list.

Step 3. To set the dash style, select the Dashes option and choose a dashed line or dotted line in the Dash list.
Step 4. To set arrow style, select the Arrow Style option at the bottom and choose one of the arrow styles in the drop-down list.
Note: To set the exact width of the line, dash and arrow, you can right-click the shape, select the Format Object option in the context menu, and set the exact width in the opened Formatting task window.
Change the shape fill
To fill in objects with different colors, patterns, textures, and other effects, follow the steps below:
Step 1. Select the shape to open the Drawing Tools tab.
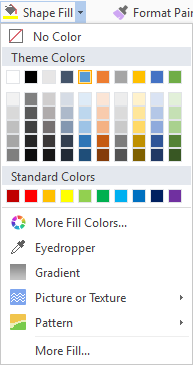
Stepthe 2. Click the Shape Fill icon and select the color you prefer in the drop-down list, shown as below:

Step 3 You can set Gradient, Texture, Pattern, and Picture in the Fill drop-down list.
Step 4 Select the Gradient option and select the Gradient fill check box Fill section under the Formatting task window.
Note: Alternatively, double-click the shape, and open the Formatting task window to set up the appropriate settings.
Not what you're looking for?
 Join our Facebook Group
 Feedback

