How to Insert and Remove a Watermark in Writer
How to Insert and Remove a Watermark in Writer
Watermarks are pictures or texts that you can insert ghosted text and picture behind the content on the page. This is often used to indicate that the document is to be treated specially, such as Encrypted, Confidential and Do not Copy, or to mark the document source such as the addition of copyright logo and author information.
Insert a watermark
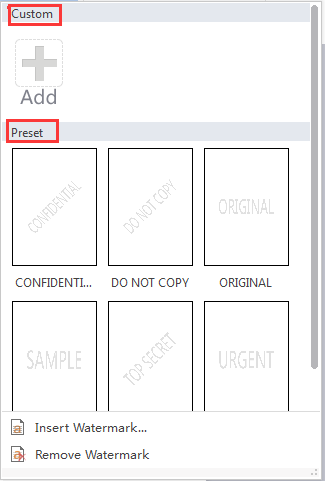
An easy way to insert a watermark is to go to Insert tab > Watermark. It includes Custom Watermark and Preset Watermark. You can choose one of the Watermarks in Preset.

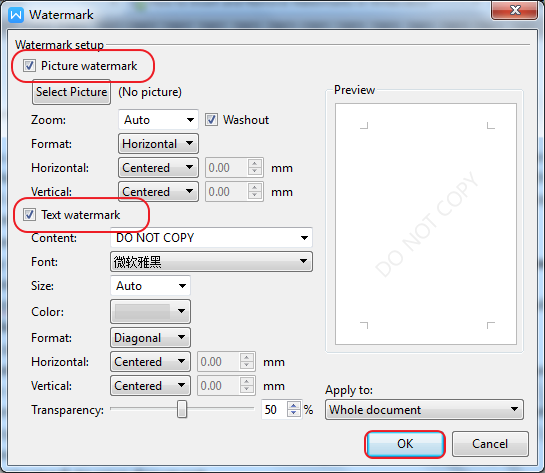
Step 1. A second way is to go to Insert > Watermark > Insert Watermark. Then It will pop up a dialog box like the following.

Step 2. You can choose Picture watermark, or Text watermark, or both.
In Picture watermark part, browse and open an image file from your computer as your watermark. And you can set Zoom Format, Horizontal, Vertical.
In Text Watermark part you can set the Content, Font, Size, Color, Format, Horizontal, Vertical, Transparency.
Writer will automatically apply the watermark to each page except a designed page.
Remove a watermark
Go to Insert tab > Watermark, click Remove Watermark.
Not what you're looking for?
 Join our Facebook Group
 Feedback

