How to Change Row Height and Column Width of Table in Writer
How to Change Row Height and Column Width of Table in Writer
Changing row height and column width of table in writer can make the table better presented. To change row height and column width, follow the steps below:
Change the row height
Change the row height by the mouse
Step 1. Move the cursor to the bottom border line of the row whose height you want to adjust. Then the cursor will change into a double-sided arrow.
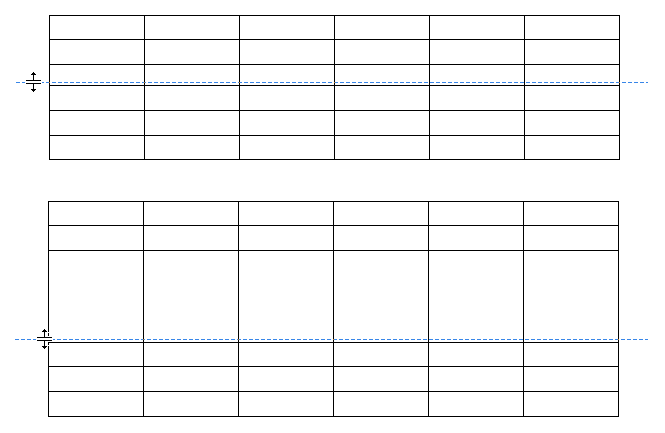
Step 2. Press the left mouse button to drag up and down. A dotted line will appear indicating the intended new line height shown as below:

Step 3. Release the left mouse button when you are satisfied with the new row height.
Change the Row Height by the Table Properties Dialogue Box
Step 1. Select the row that you want to adjust the height.
Step 2. Click the Table Properties icon in the Table Tools tab and the Table Properties dialogue box will open.
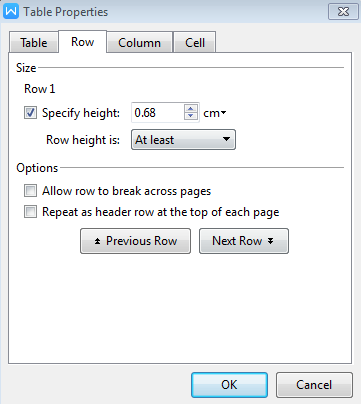
Step 3. Select the Row option in the dialogue box, shown as below:

Step 4. Select the Specify height check box and enter the exact value in the text box.
Step 5. There are two options in the Row height section: At least and Exactly.
Step 6. Click the the Previous Row button or the Next Row button will allow you to set the height of the other rows.
Step 7. Click the OK button to complete this operation.
Change column width
Change Column Width by the mouse
Step 1. Move the cursor to the right border line of the column whose width you want to adjust. Then the cursor will change into a double sided arrow.
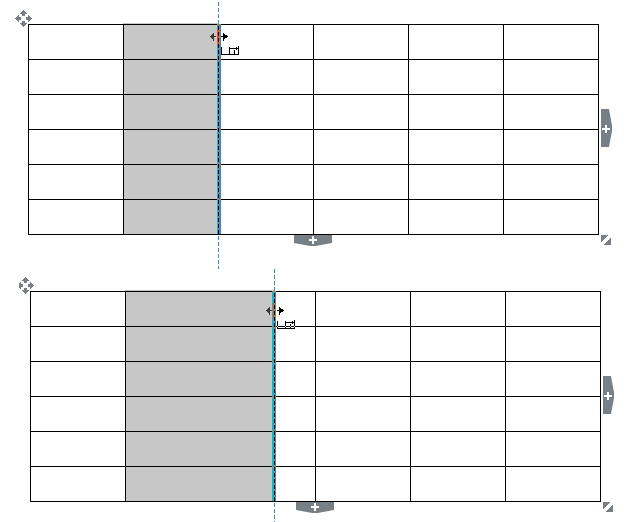
Step 2. Press the left mouse button to drag to the right or to the left. A dotted line will appear indicating the intended width:

Step 3. Release the mouse when you are satisfied with the new column width.
Change the Column Width by the Table Properties Dialogue Box
Step 1. Place the cursor in the cell within the column of which you wish to adjust the width or select one row or several rows that you want to change.
Step 2. Click the Table Properties icon in the Table Tools tab and the Table Properties dialogue box will open.
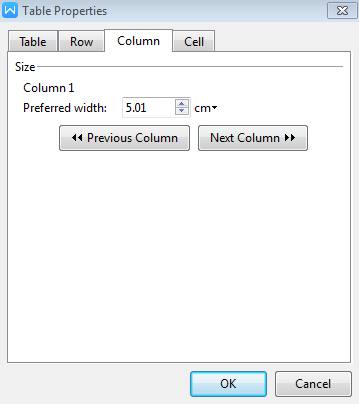
Step 3. Select the Column option in the dialogue box, shown as below:

Step 4. Enter the exact value in the Preferred width.
Step 5. Click the Previous Column button or the Next Column button to set the width of another column.
Step 6. Click the OK button to complete this operation.
Not what you're looking for?
 Join our Facebook Group
 Feedback

