How to Track Changes to Document in WPS Writer 2016
How to Track Changes to Document in WPS Writer
In WPS Writer 2016, you can use the track changes function to track all changes made to the document, including insertions, deletions and formatting changes. It is useful when reviewing documents for colleague.
Tracking changes
To track the changes made in a document, follow the steps below:
Step 1 Select the document that you want to modify.
Step 2 Click the Track Changes icon in the Review tab and choose Track Changes option in the drop-down list, or press Ctrl+Shift+E to enable the tracking changes mode.
Step 3 If you want to cancel the tracking changes mode, select the Tracking Changes icon again in the Track Changes drop-down list.
Changing Tracking Options
To change tracking options, follow the steps as below:
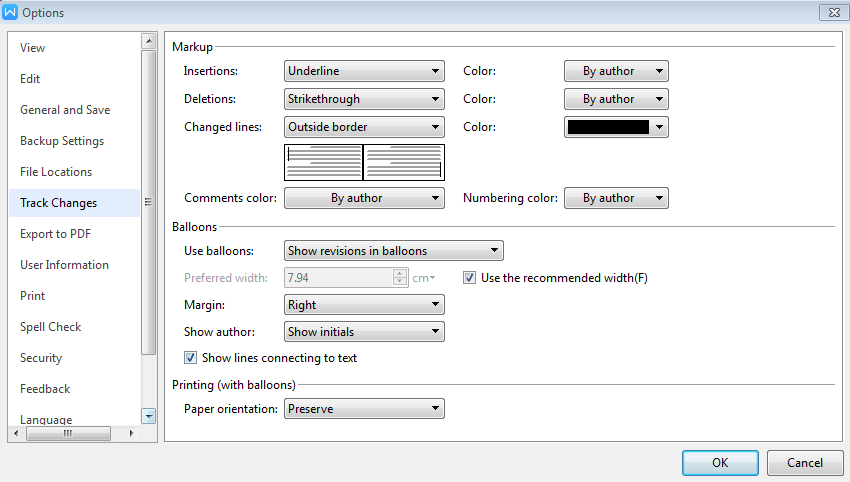
Choose Change Tracking Options in the Track Changes drop-down list and the Options dialogue box will then open, shown as below:

1. In the Markup section, you can adjust the Insertions, Deletions, Changed lines, and Comments Color options.
2. In the Balloons section, you can set the corresponding items.
Changing User Name
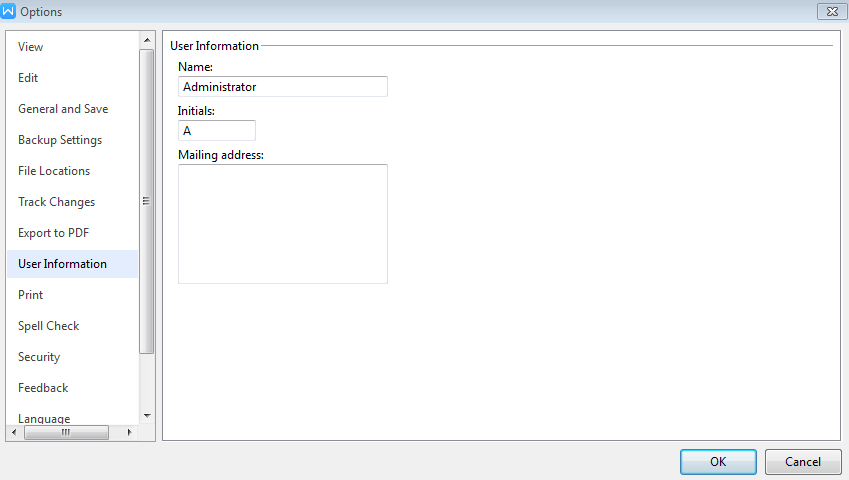
Choose Change User Name in the Track Changes drop-down list and the Options dialogue box will then open, shown as below:

In the dialogue box above, you can set the user information. Then click OK button to complete the operation.
Not what you're looking for?
 Join our Facebook Group
 Feedback

