Mail Merge in WPS Writer
Mail Merge in WPS Writer
In actual work, we often need to edit a lot of the same format. The data fields are the same, but the content is different and each record file needs to be documented separately, such as e-mail, payroll, mass production of labels and so on.With the purchase of WPS Office, Mail Merge feature allows you to send documents to multiple recipients at once with just a few clicks. You can also mass-produce tabs, pay slips, transcripts by this fuction.
Step 1. Create a file you want for mail merge, such as et table, txt format text file, access database file and so on.
Step 2. Go to Reference tab > Mail Merge.

Step 3. In Mailing tab, click Open Data Source button.

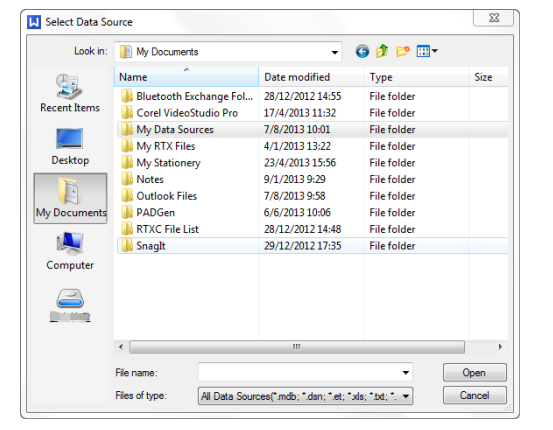
Step 4. Select the data source you want to open.

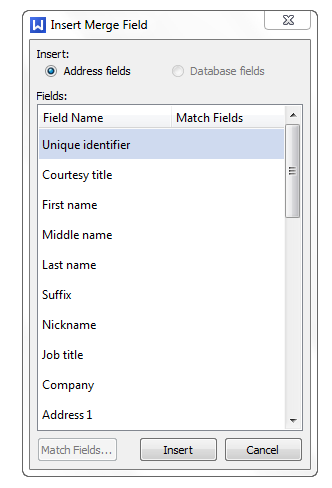
Step 5. In the Mailing tab, click Insert Merge Field to open Insert Field dialog, as shown below:

Step 6. Select the data in Fields box you want to insert.
Step 7. Click Insert button to complete the mail merge.
Step 8. Under the Mailing tab, click Mail Merge Recipients. In the dialog box, select the recipients you want to send the document to, and then you can send the merged email.
Note:1. Mail merge feature in WPS Office derives from the default mail client. When using the mail merge to send mail, you should set the default mail handler first.
2. To use data sourcing in mail merge, you need to create the data sourcing first. The data source supports the import of ODBC data, and supports partial selection or entire selection of the content as well as clear choice and refresh. Import of a database also supports directly importing to Excel and ET table. The data used in mail merge can be processed by text into merge, imported into a recognizable text list, and can be edited and modified.
3. For the specific feature of Mail Merge, there are many items that can be set. for example, the data source import, domain mappings, and data matching including automatic matching, user-defined matching and other options.
Not what you're looking for?
 Join our Facebook Group
 Feedback

