Feature Summary
Configure organization custom sensitive word library, automatically alert on sensitive content
Feature Description
| Feature Dimension | Description |
|---|---|
| Plan Restrictions | No organization plan restrictions |
| Version Restrictions | No version restrictions |
Steps
Add Sensitive Words
Feature Entry
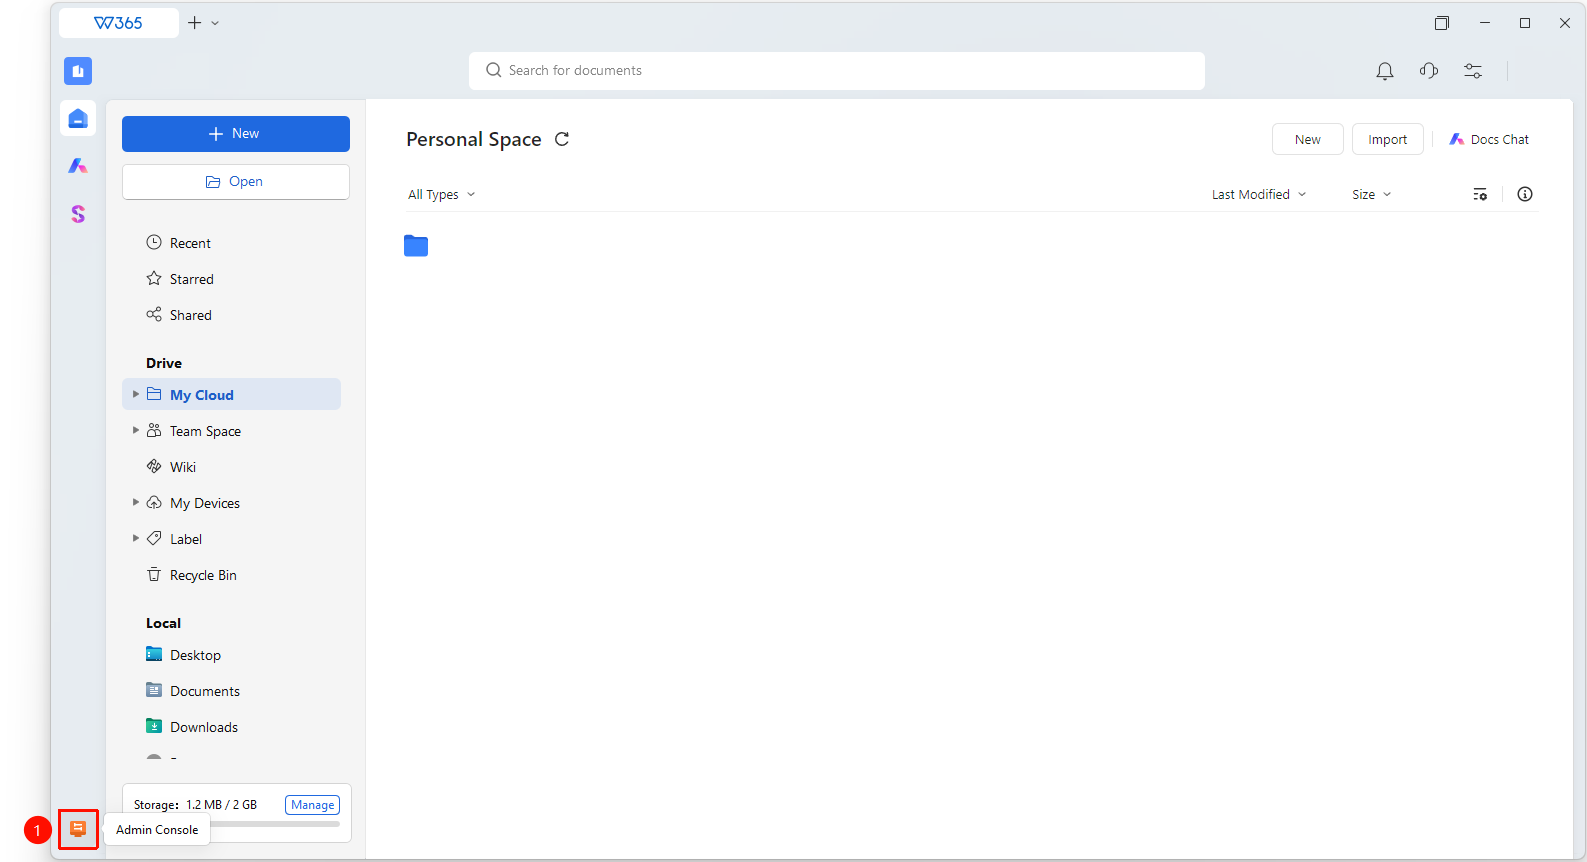
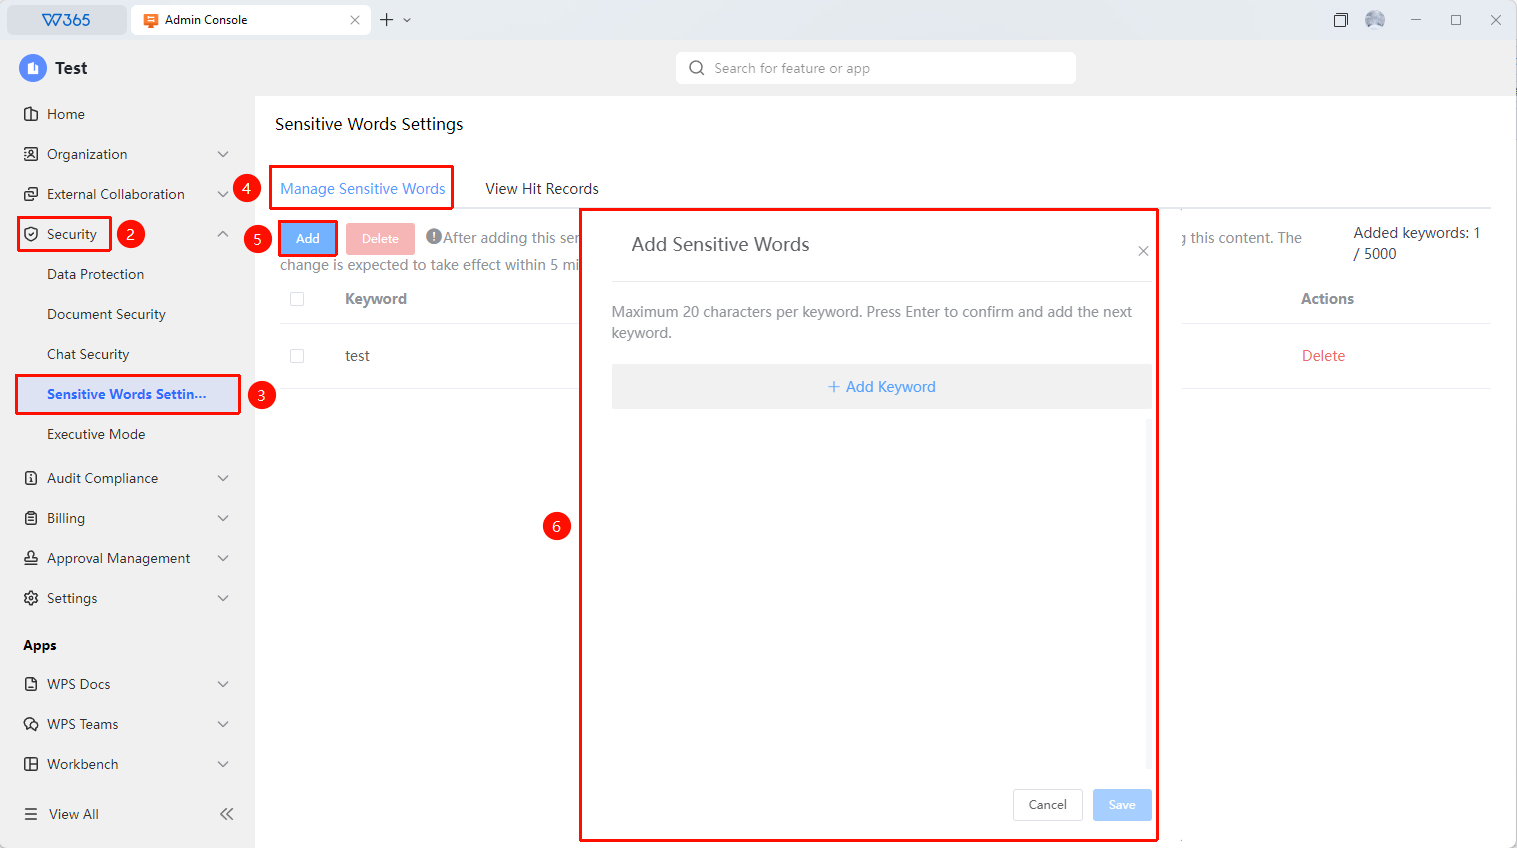
Office Document → Security Control → Sensitive Word Settings → Manage Sensitive Words
- Open the WPS365 client, click Office Document in the lower-left corner of the client homepage
- Find and click 「Security Control」 in the left list to expand the dropdown list
- Click 「Sensitive Word Settings」 in the dropdown list
- Click 「Add Sensitive Words」 in 「Manage Sensitive Words」
- Enter the sensitive words to be monitored (a single sensitive keyword must not exceed 20 characters. After entering, press the Enter key to add the next keyword)
- After clicking 「Save」, organization members will be unable to send text messages containing such content, expected to take effect within 5 minutes
Delete Sensitive Words
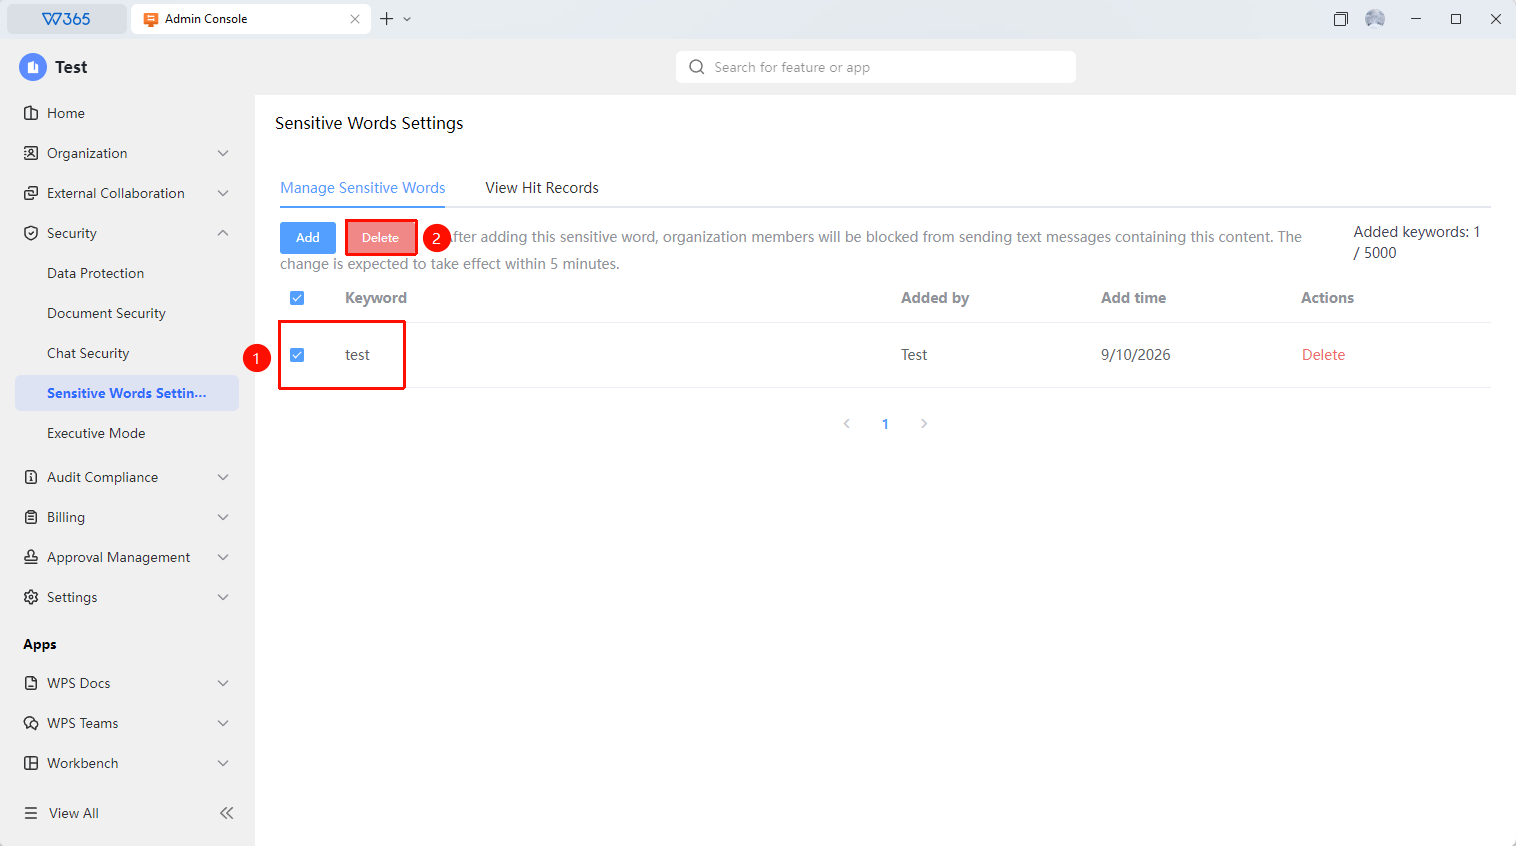
- Find the target word in the sensitive word management list
- Click the 「Delete」 button
- After confirming deletion, it will no longer be triggered
FAQ
Q1: What permissions are required to operate the add/delete sensitive words feature?
- Solution: Requires the Super Admin or a admin who has been assigned the corresponding management permissions.
Q2: How long does it take for the add/delete sensitive words configuration to take effect?
- Solution: Most configurations take effect immediately after modification, some configurations involving data synchronization may take about 5 minutes to complete synchronization.
Q3: What is the upper limit of the sensitive word library?
- Solution: Currently supports adding up to 5000 key sensitive words.
Notes
- Organization Office Document is only accessible to Super Admins and Admins with corresponding permissions
- Configurations involving data security are recommended to be verified in a test team first