Feature Summary
The image feature is used to insert and edit pictures in worksheets. It supports local images and online images, and allows you to adjust size, position, and add effects.
Feature Description
| Feature Dimension | Description |
|---|---|
| Membership Restriction | Some features require a membership |
| Version Restriction | No version restrictions |
Steps
Insert Local Image
Feature Entry
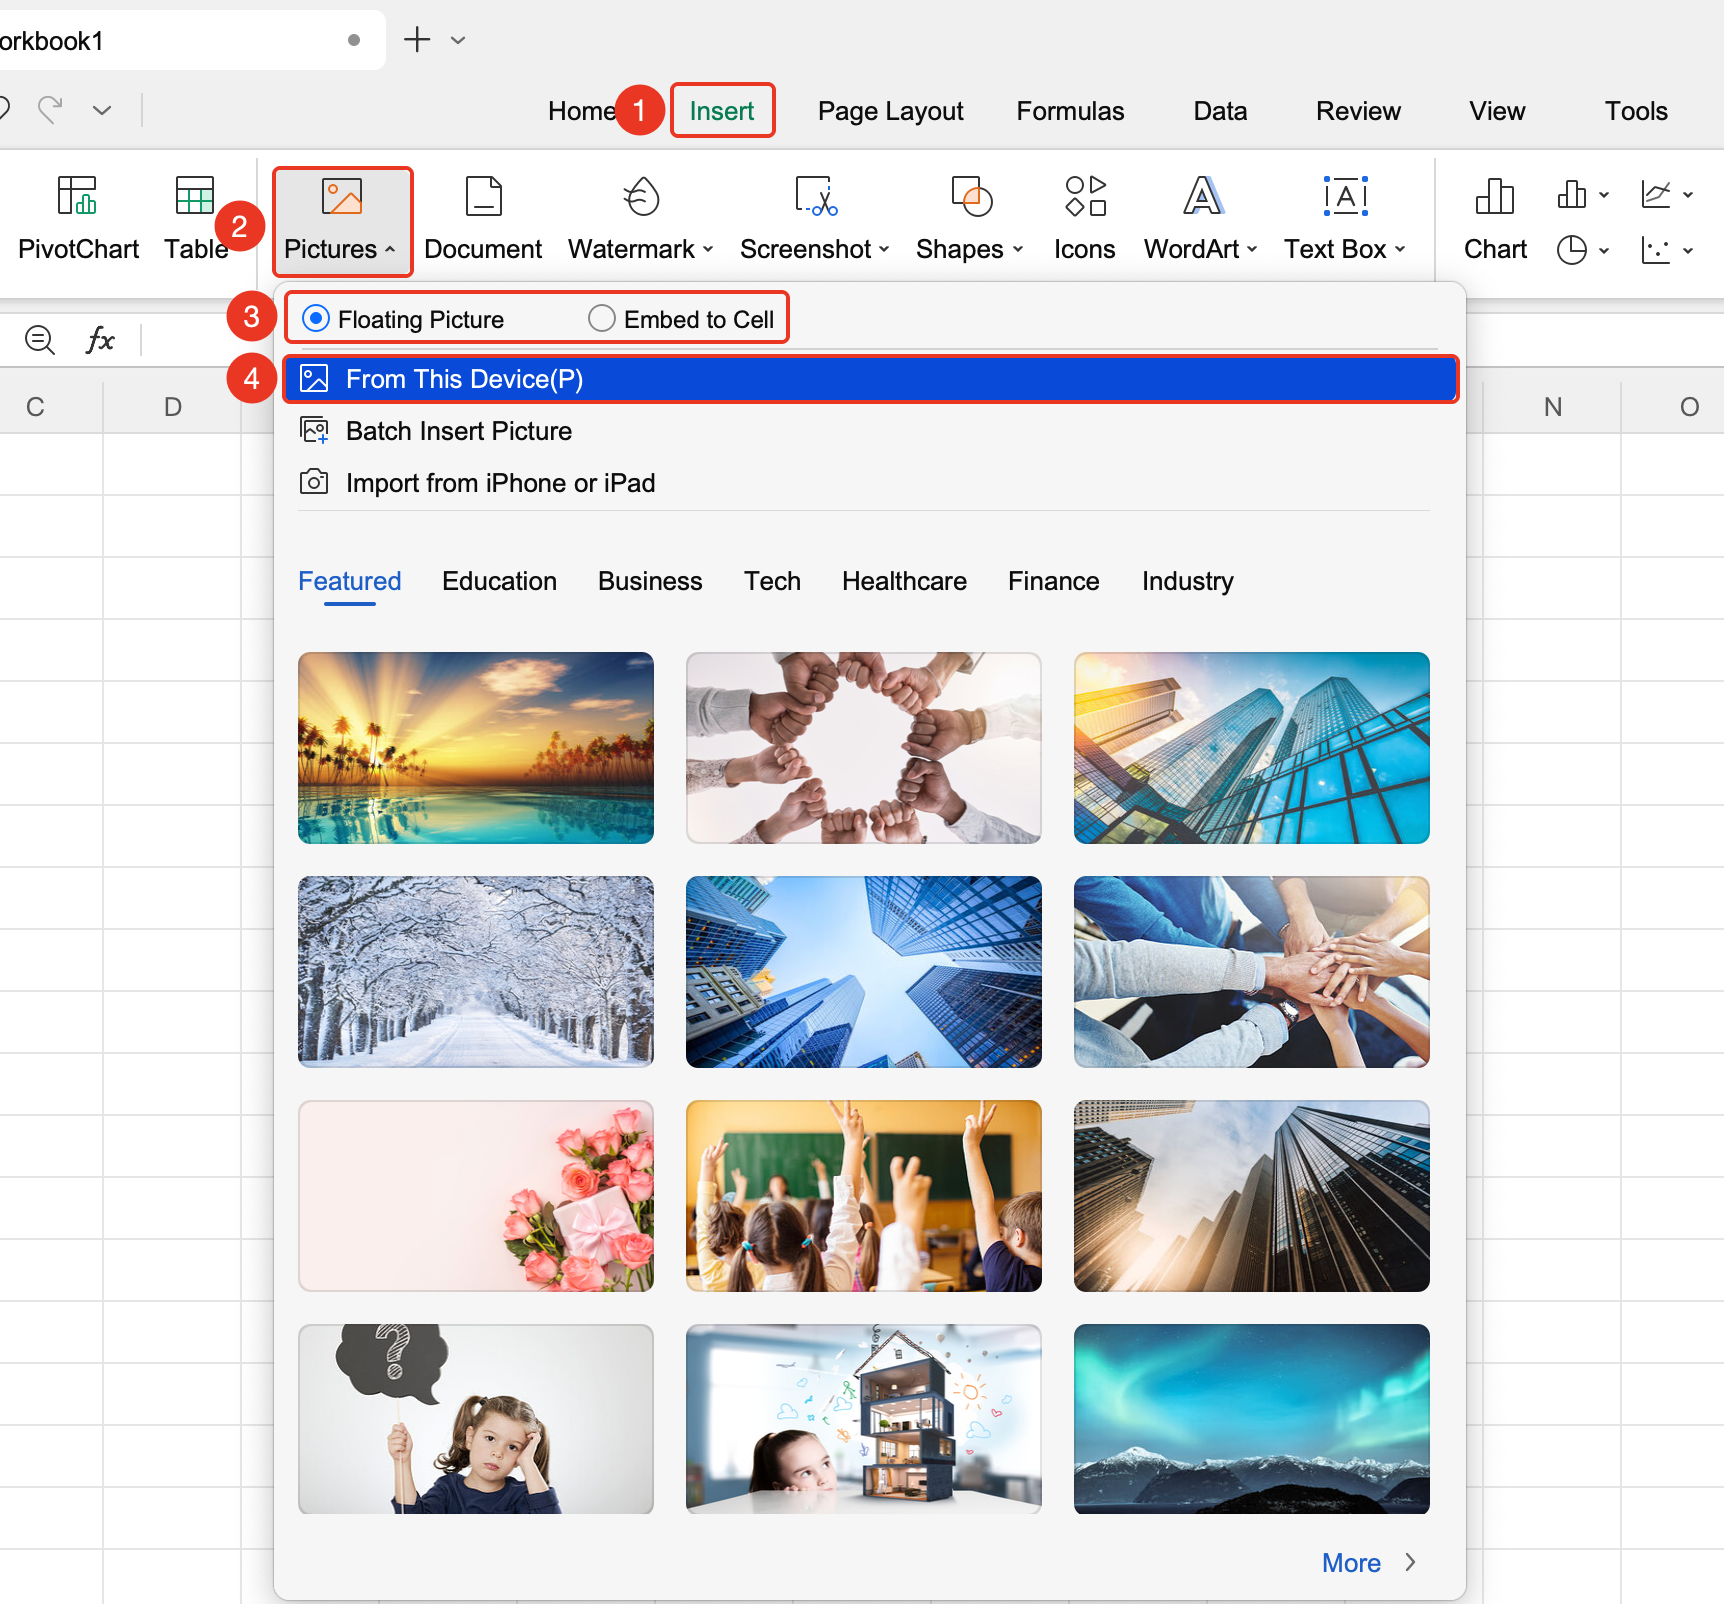
"Insert" tab → "Picture" button
- Click the Picture button in the Insert tab
- Select Floating Picture or Embed in Cell Picture
- Click Local Picture
- Browse and select the image file to insert
- Click Open to complete the insertion
Import Picture from iPad or iPhone
Feature Entry
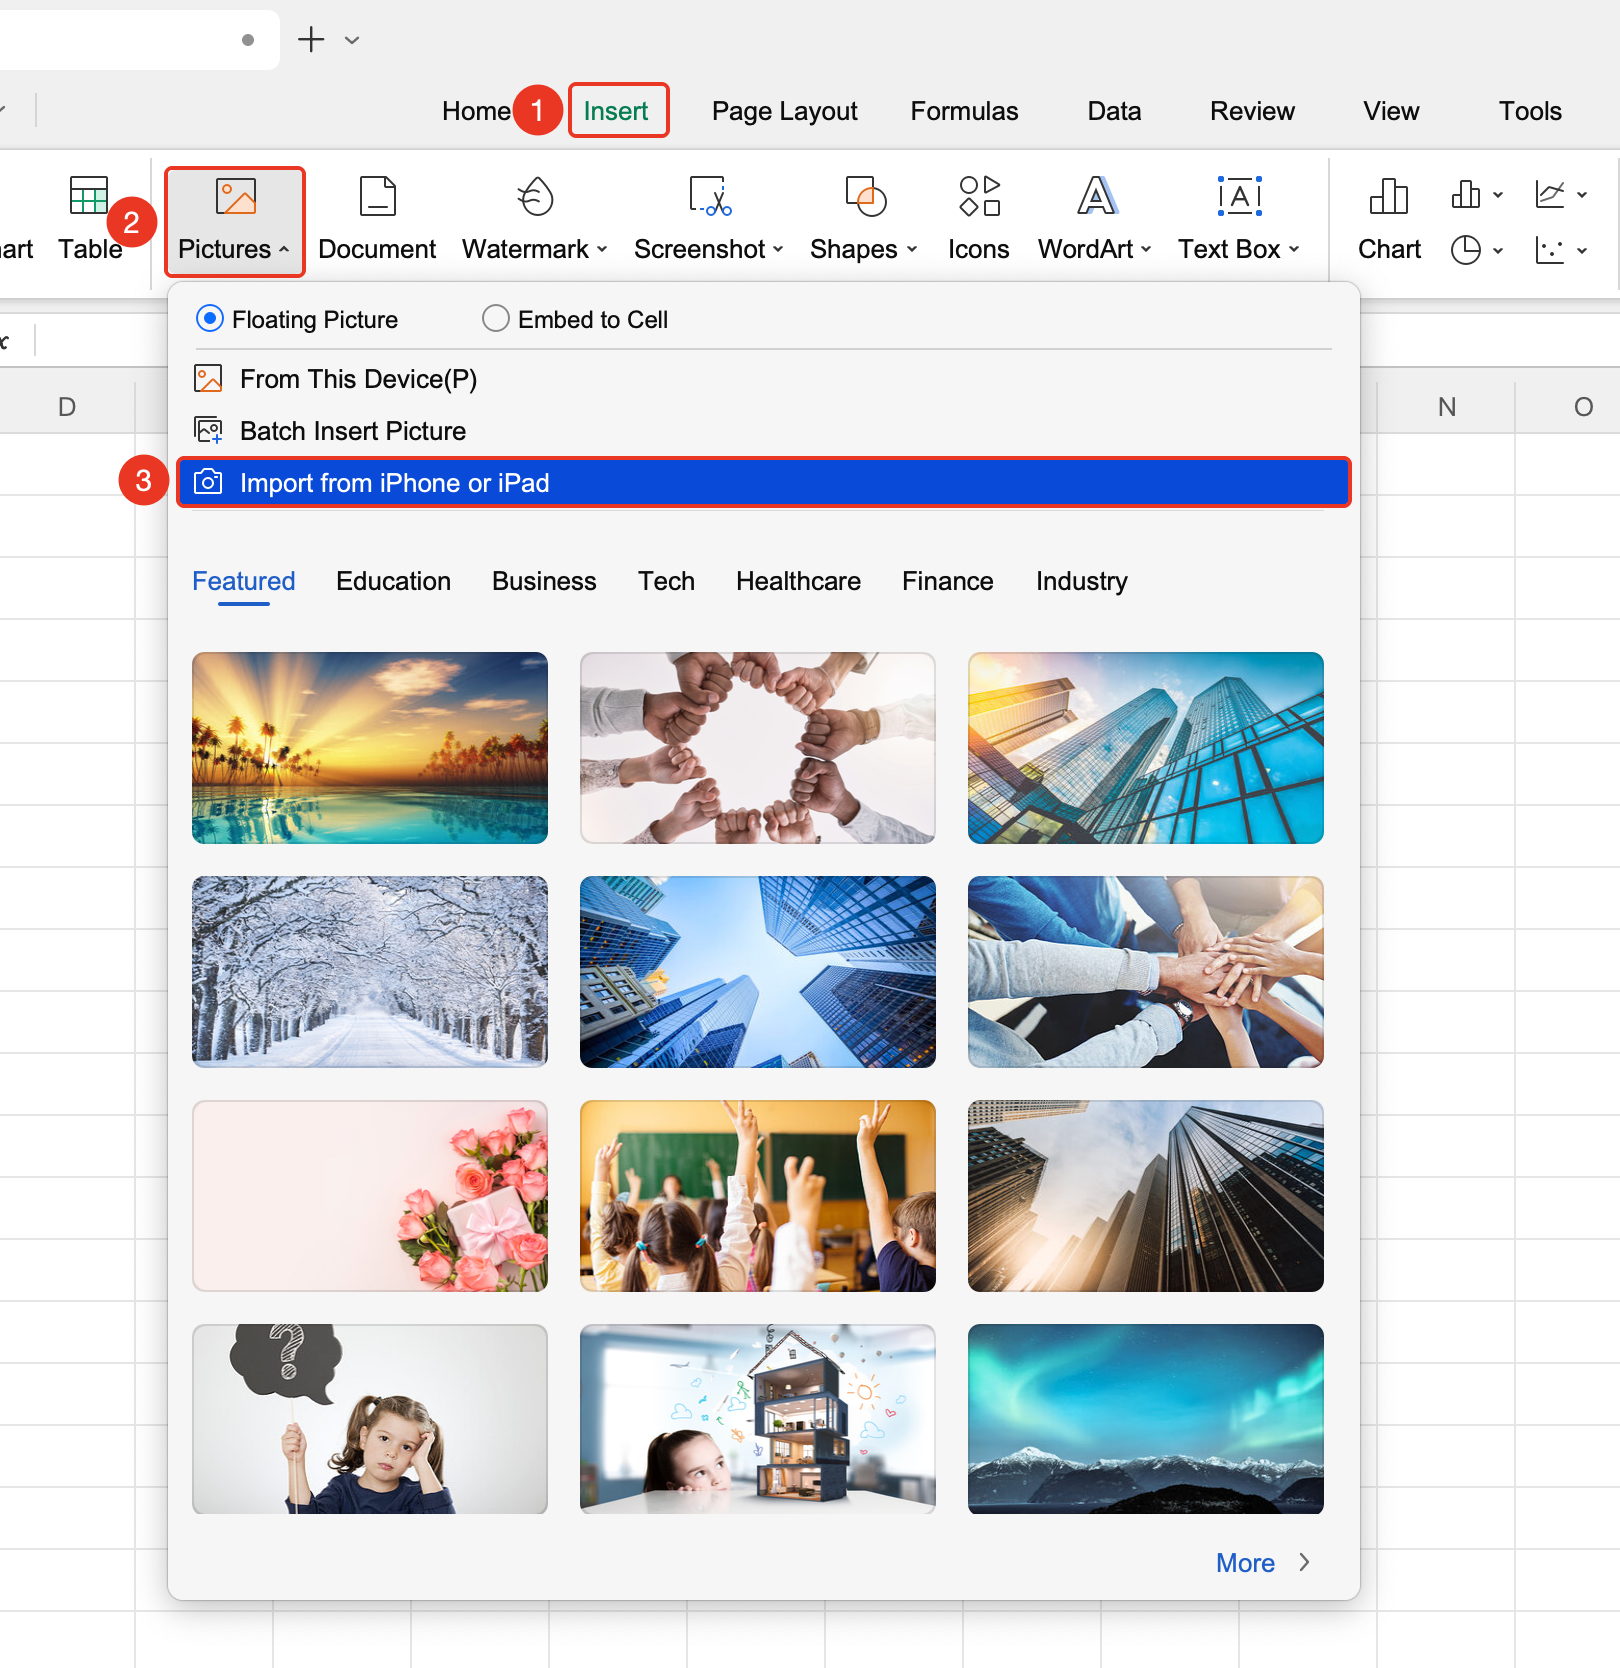
"Insert" tab → "Picture" button → "Import Picture from iPad or iPhone" button
- Click the Picture button in the Insert tab
- Click the Import Picture from iPad or iPhone button
Insert Online Picture (Membership Required)
Feature Entry
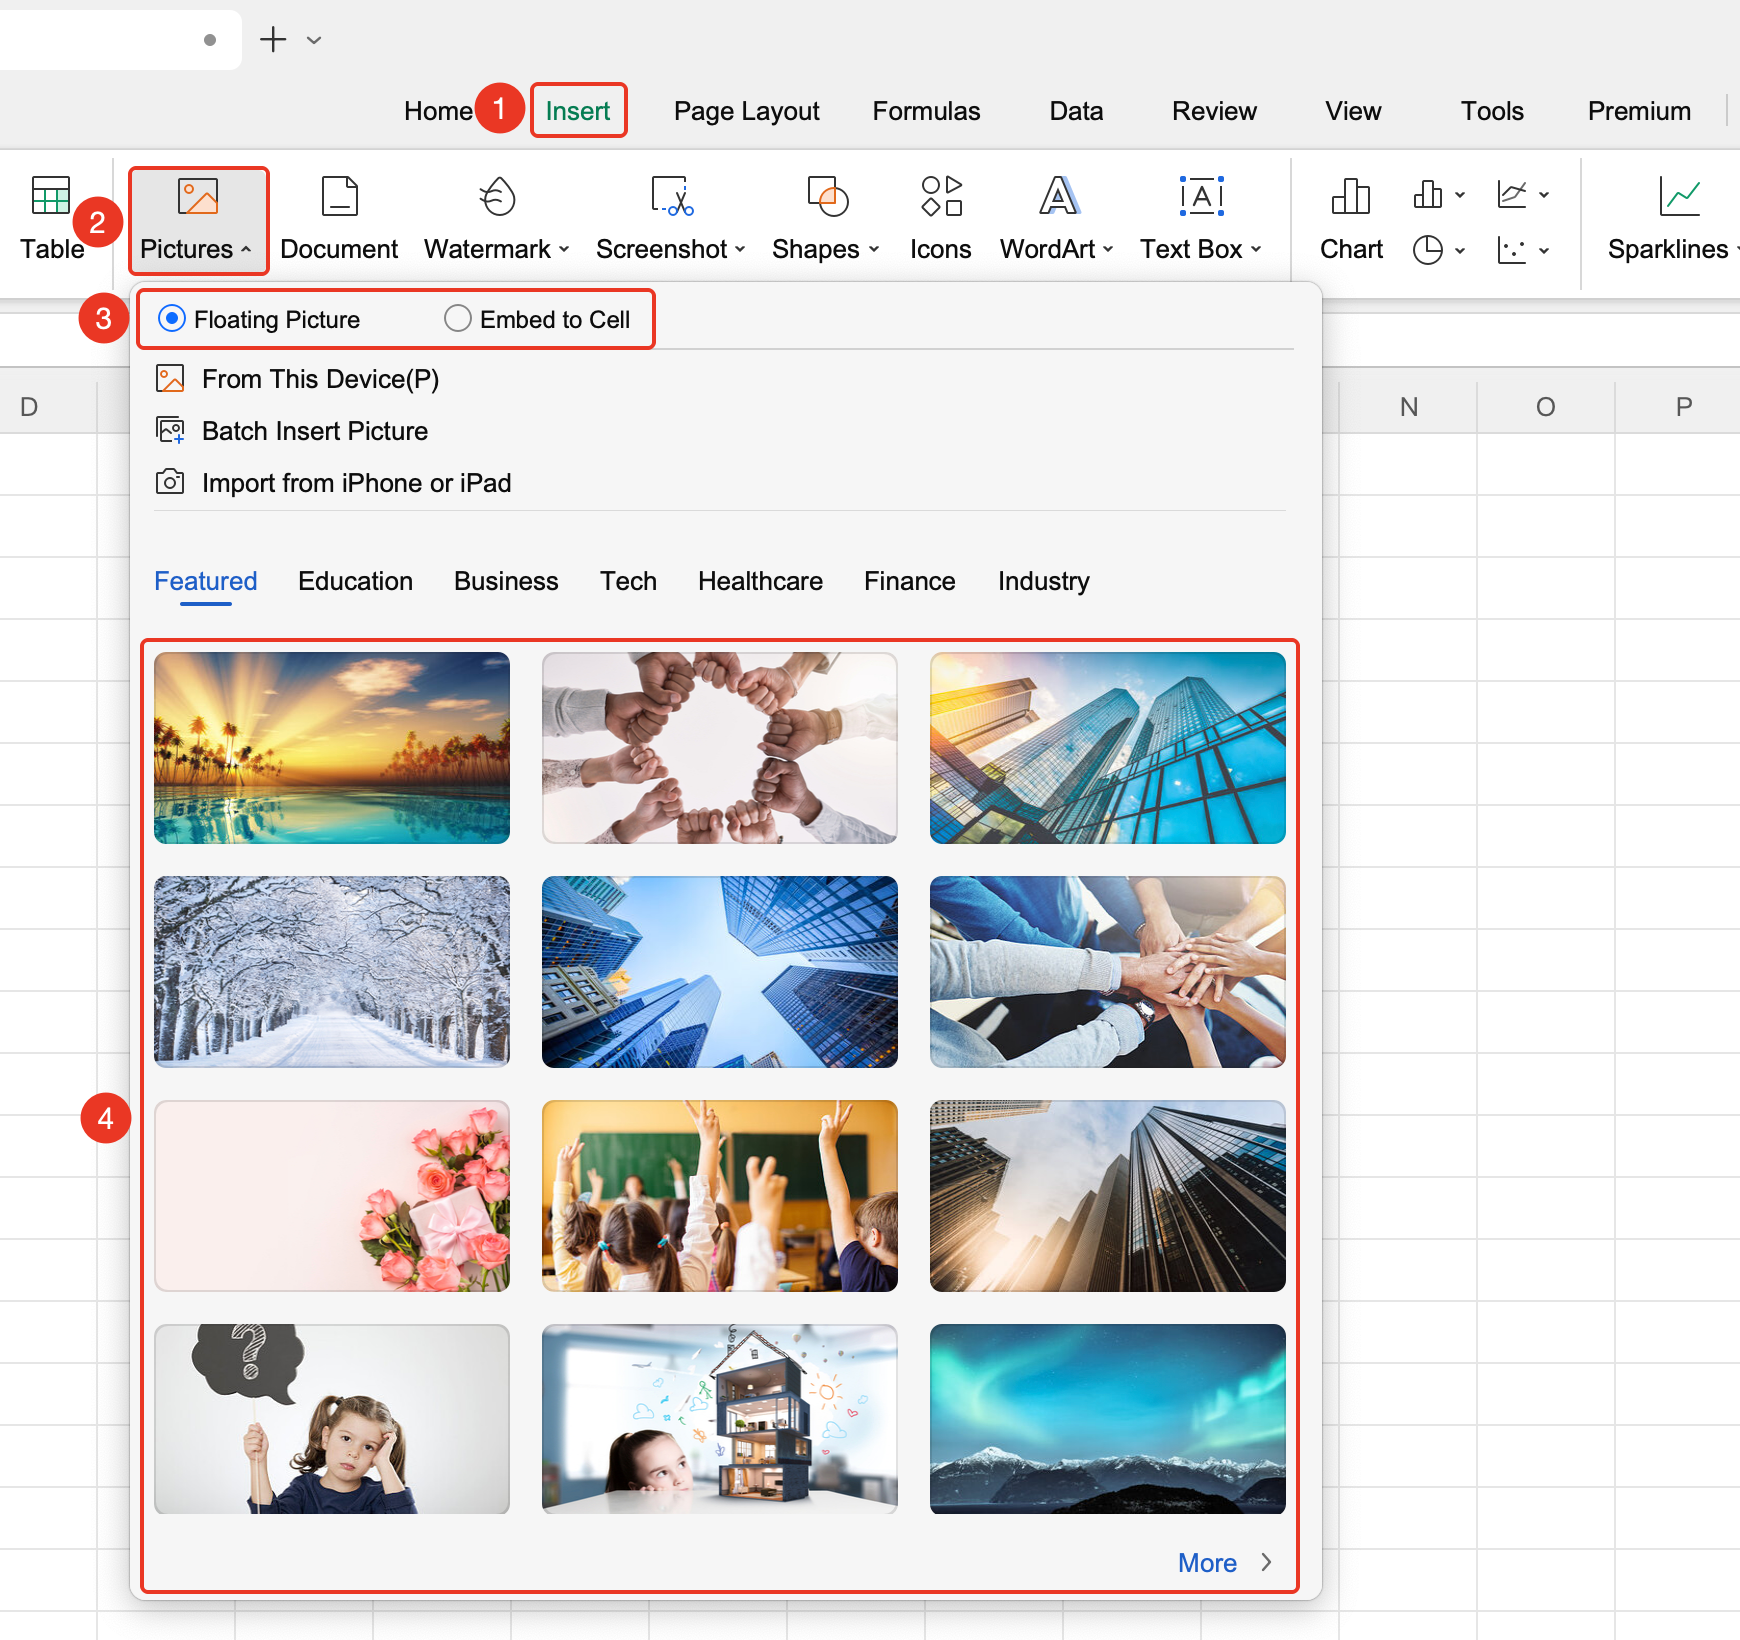
"Insert" tab → "Picture" button → "More Pictures" option
- Click the Picture button in the Insert tab
- Select Floating Picture or Embed in Cell Picture
- Click the More Pictures option
- Select a picture from the pop-up Daoke Gallery
- Click Insert
Edit Picture
Feature Entry
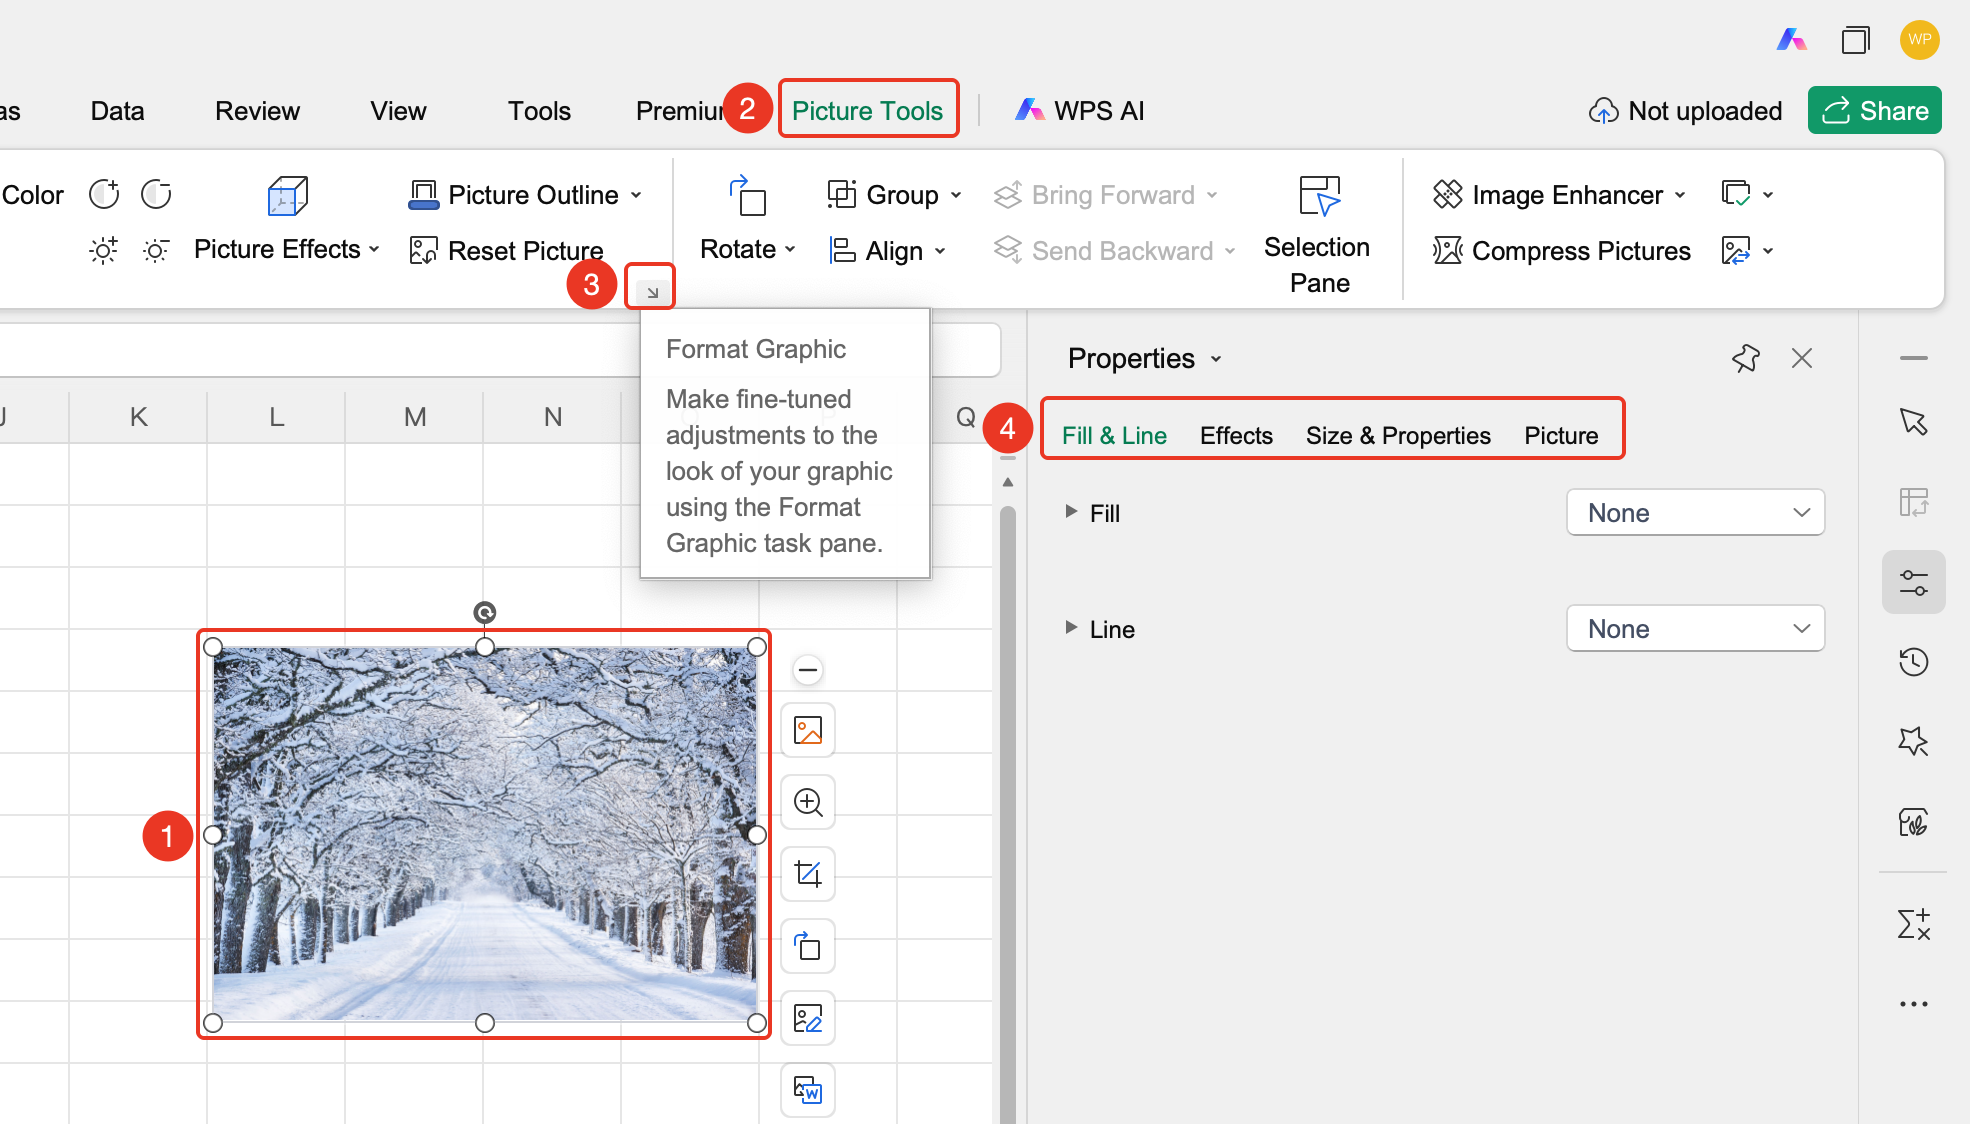
"Picture Tools" tab → "Format Shape" arrow
- Select the picture
- In the Picture Tools tab, click the Format Shape arrow
- Adjust in the task pane that pops up on the right:
- Fill & Line
- Effects
- Size & Properties
- Picture
Convert Floating Picture to Embed in Cell Picture
Feature Entry
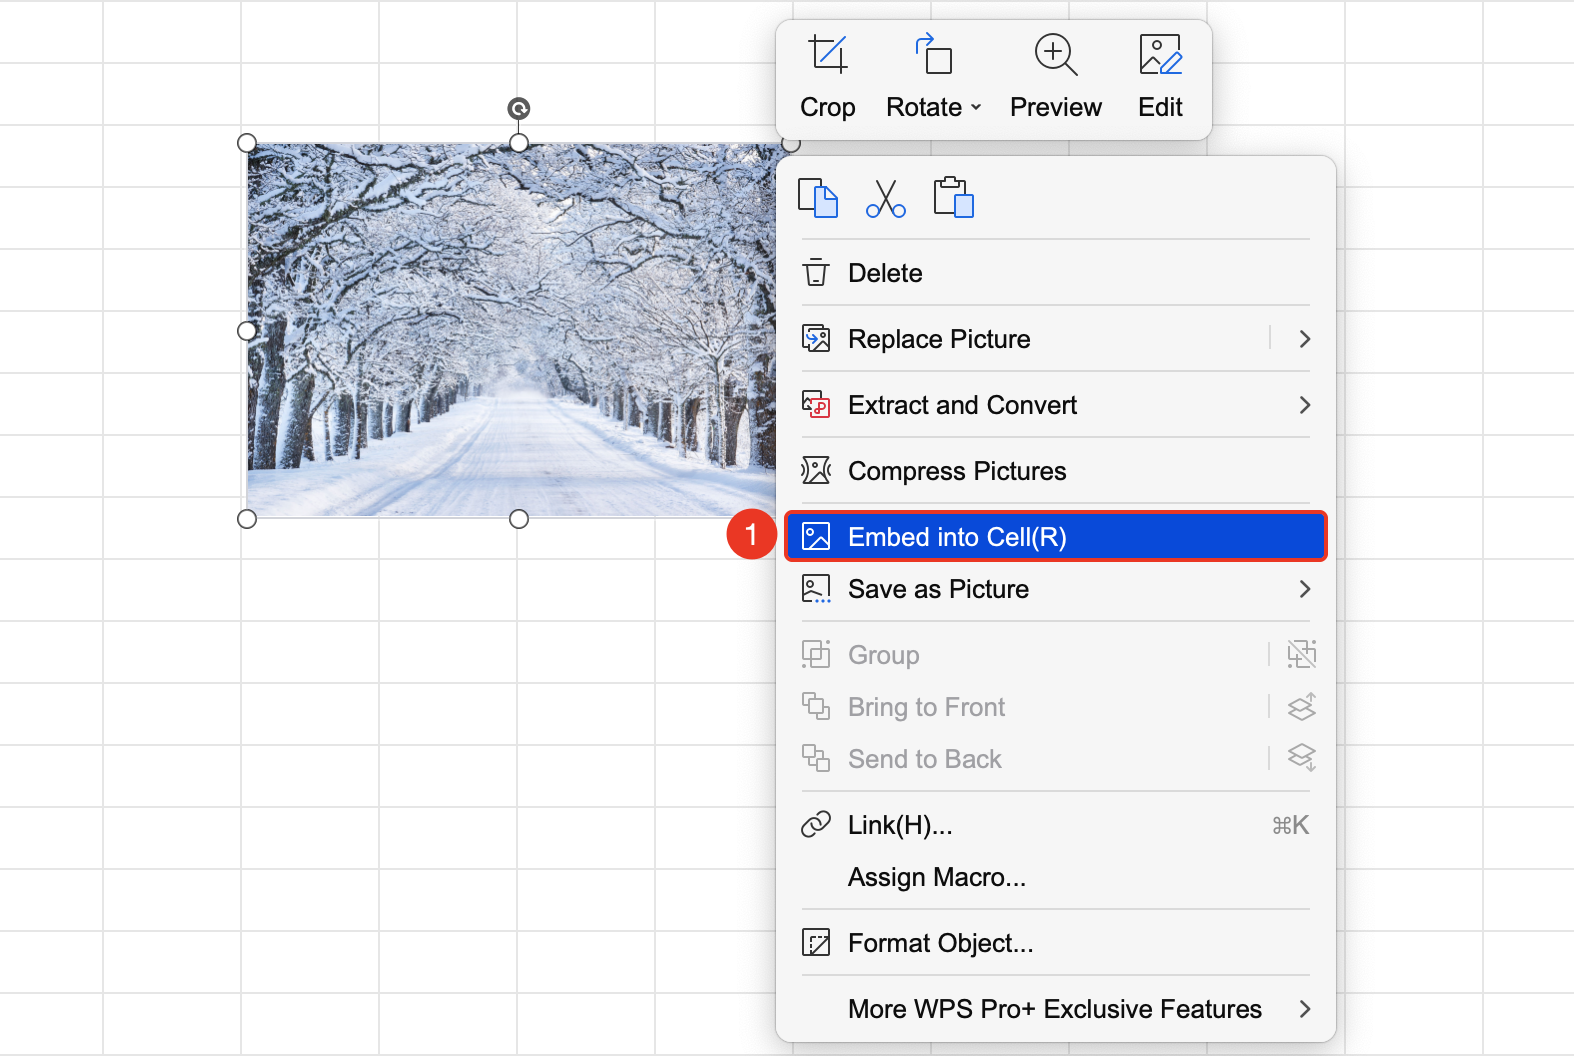
Right-click picture → "Embed Picture in Cell" option
- Select the picture
- Right-click the picture and select the Embed Picture in Cell option
- The picture will be embedded into the cell at the top-left corner area of the picture
Notes
- Pictures can be moved and resized freely
- Multiple image formats are supported (JPG, PNG, GIF, and so on.)
- Pictures can be placed above or below text