Feature Summary
The text box feature is used to add independent text areas in a worksheet. They can be freely placed at any position and support formatting such as borders and fills.
Feature Description
| Feature Dimension | Description |
|---|---|
| Membership Restriction | No membership restriction |
| Version Restriction | No version restriction |
Operation Steps
Insert Text Box
Feature Entry
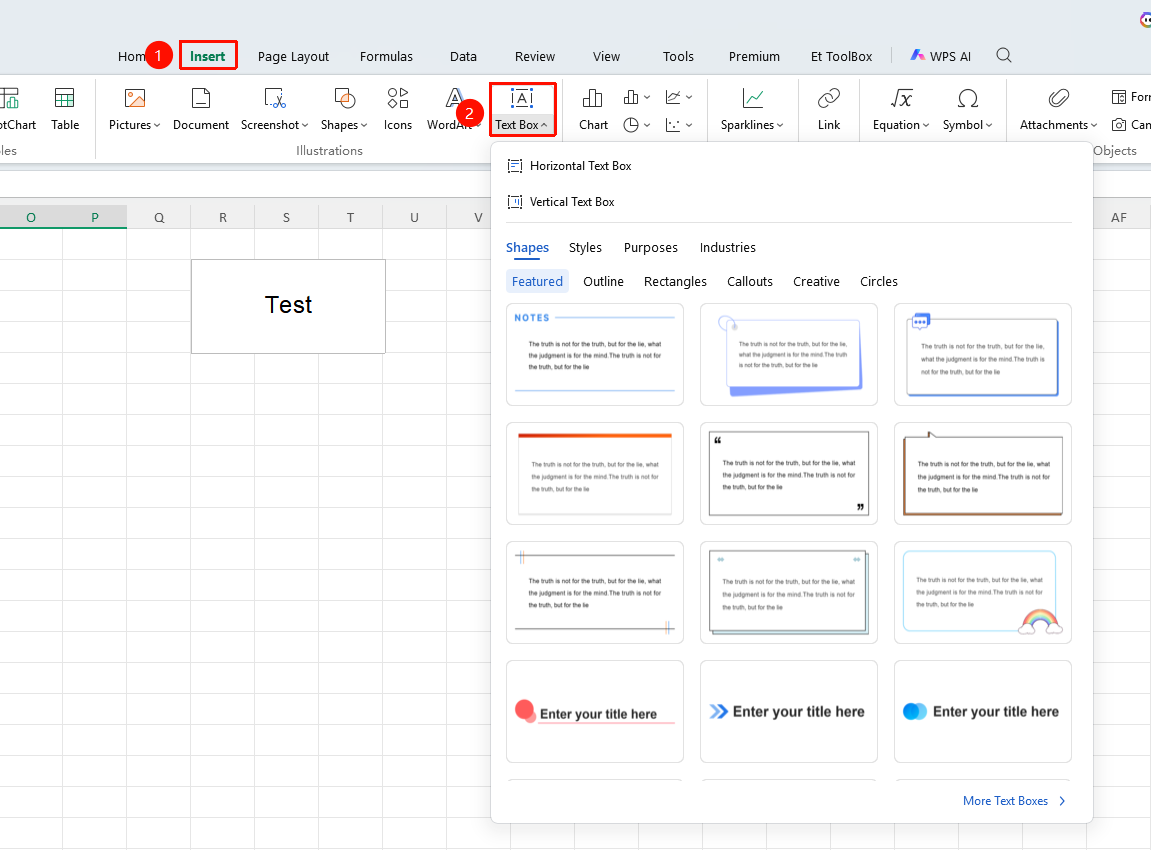
"Insert" tab → "Text Box" button
- Click the "Text Box" button in the Insert tab
- Select "Horizontal Text Box" or "Vertical Text Box"
- Drag the mouse on the worksheet to draw the text box
- Enter text content
Format Text Box
Feature Entry
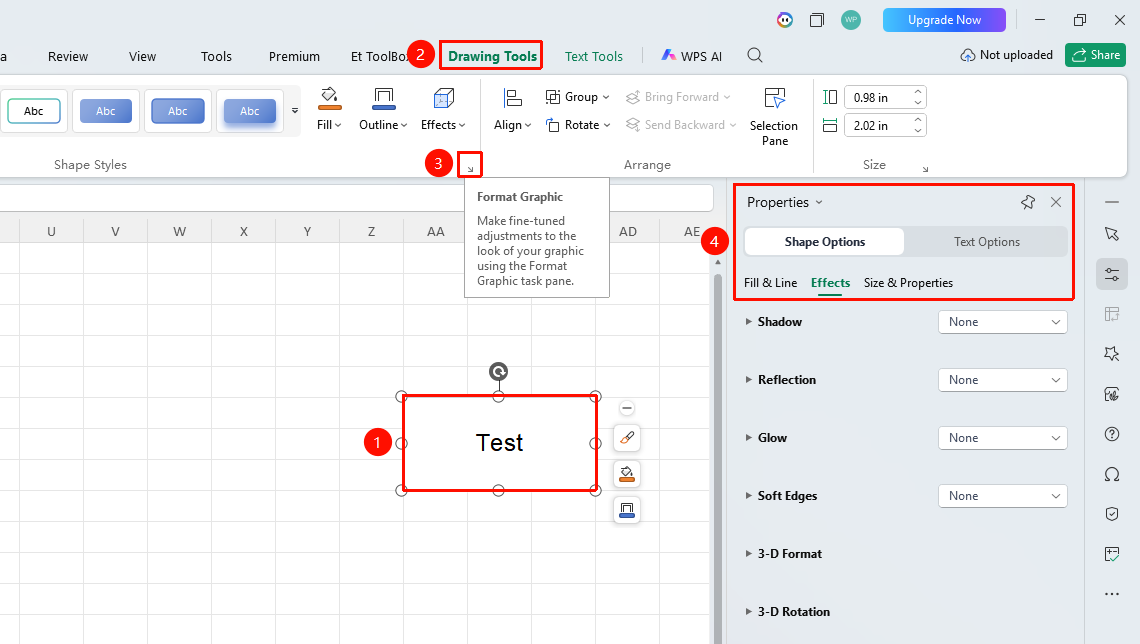
"Drawing Tools" tab → "Format Shape" arrow
- Select the text box
- Click the Drawing Tools tab
- Click the "Format Shape" arrow
- Adjust in the task pane that pops up on the right:
- Fill & Line
- Effects
- Size & Properties
FAQ
Q1: How to make the text box move with cells?
- Solution: Right-click the text box → Format Object → Properties, select "Move and size with cells".
Notes
- Text boxes are graphic objects independent of cells
- Text boxes can be set to have no border and no fill
- Text boxes can be placed anywhere on the worksheet