Feature Summary
The Page Break Preview feature allows you to view how a spreadsheet will be divided across printed pages. It provides a clear visual of the content range on each page and lets you adjust page break positions.
Feature Description
| Feature Dimension | Description |
|---|---|
| Membership Restriction | No membership restriction |
| Version Restriction | No version restriction |
Steps
Entering Page Break Preview
Feature Entry ①
View tab → Page Break Preview
- Click the View tab
- Click the Page Break Preview button
- The worksheet switches to Page Break Preview mode
- Blue dashed lines indicate page break boundaries
- Click the Page Break Preview button again to exit preview mode
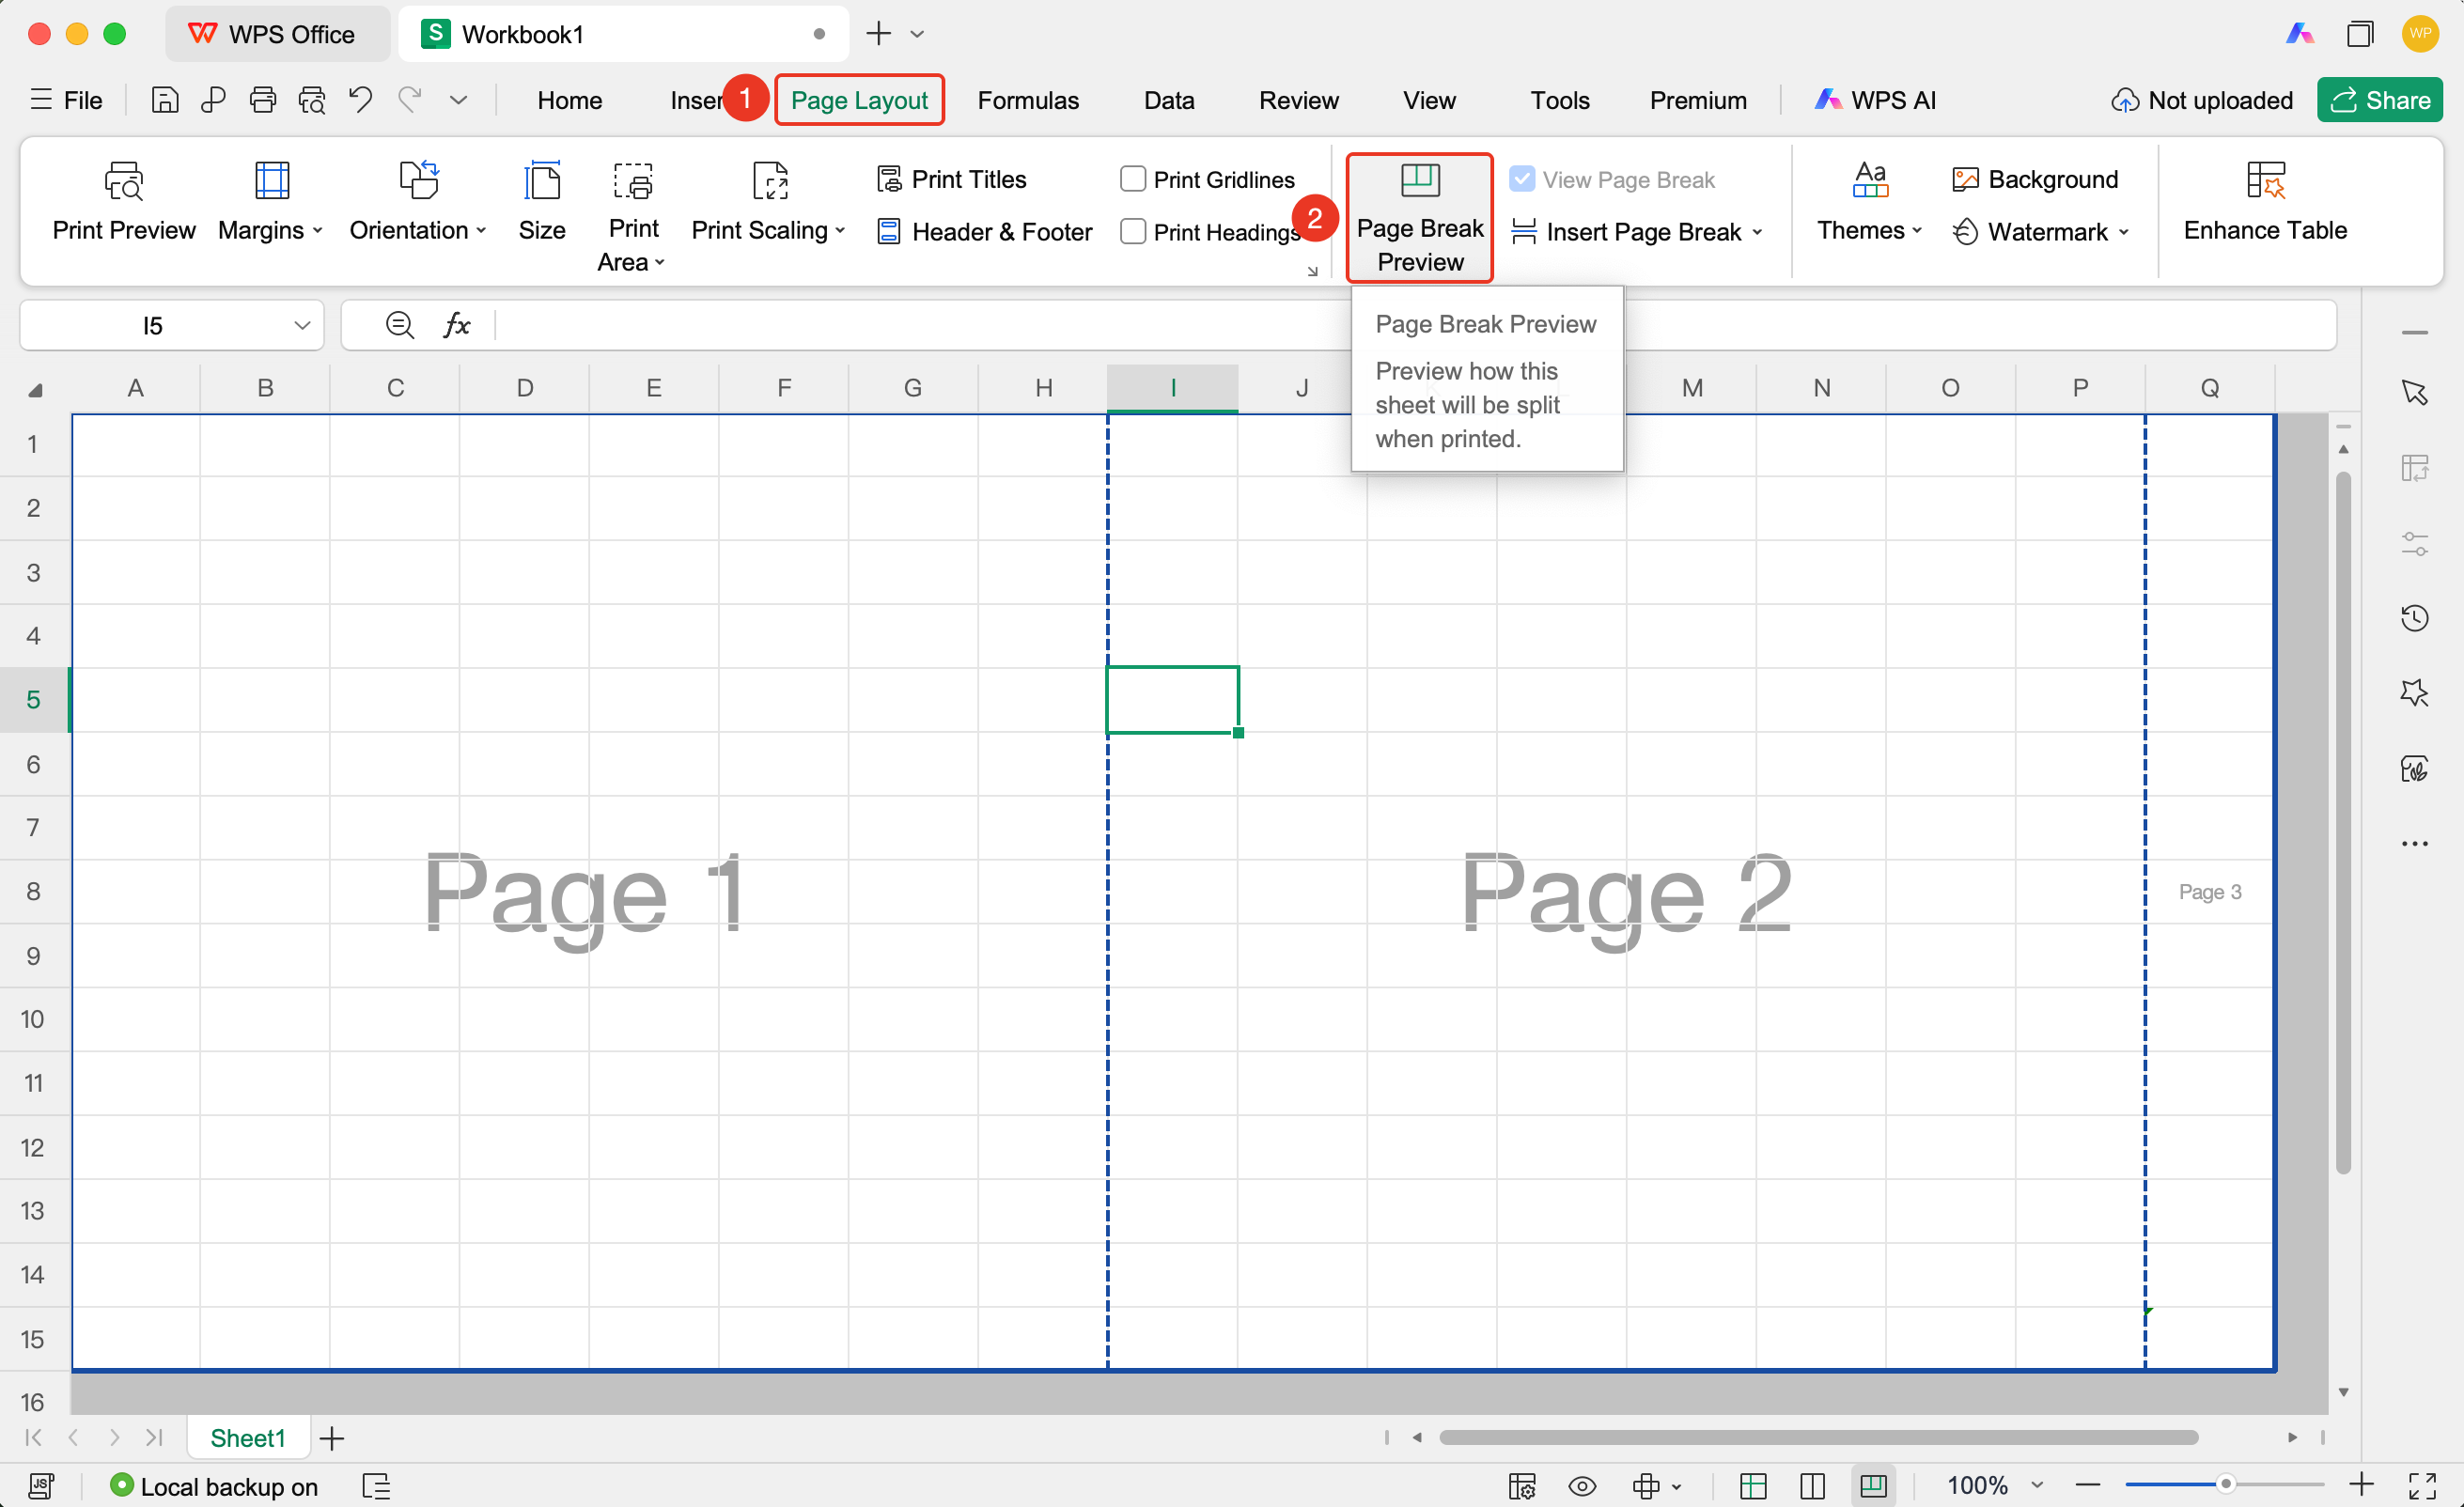
Feature Entry ②
Document bottom status bar → Page Break Preview
- Locate Page Break Preview in the status bar at the bottom of the document
- Click it to enter Page Break Preview mode
- Click Normal View to return to normal editing mode
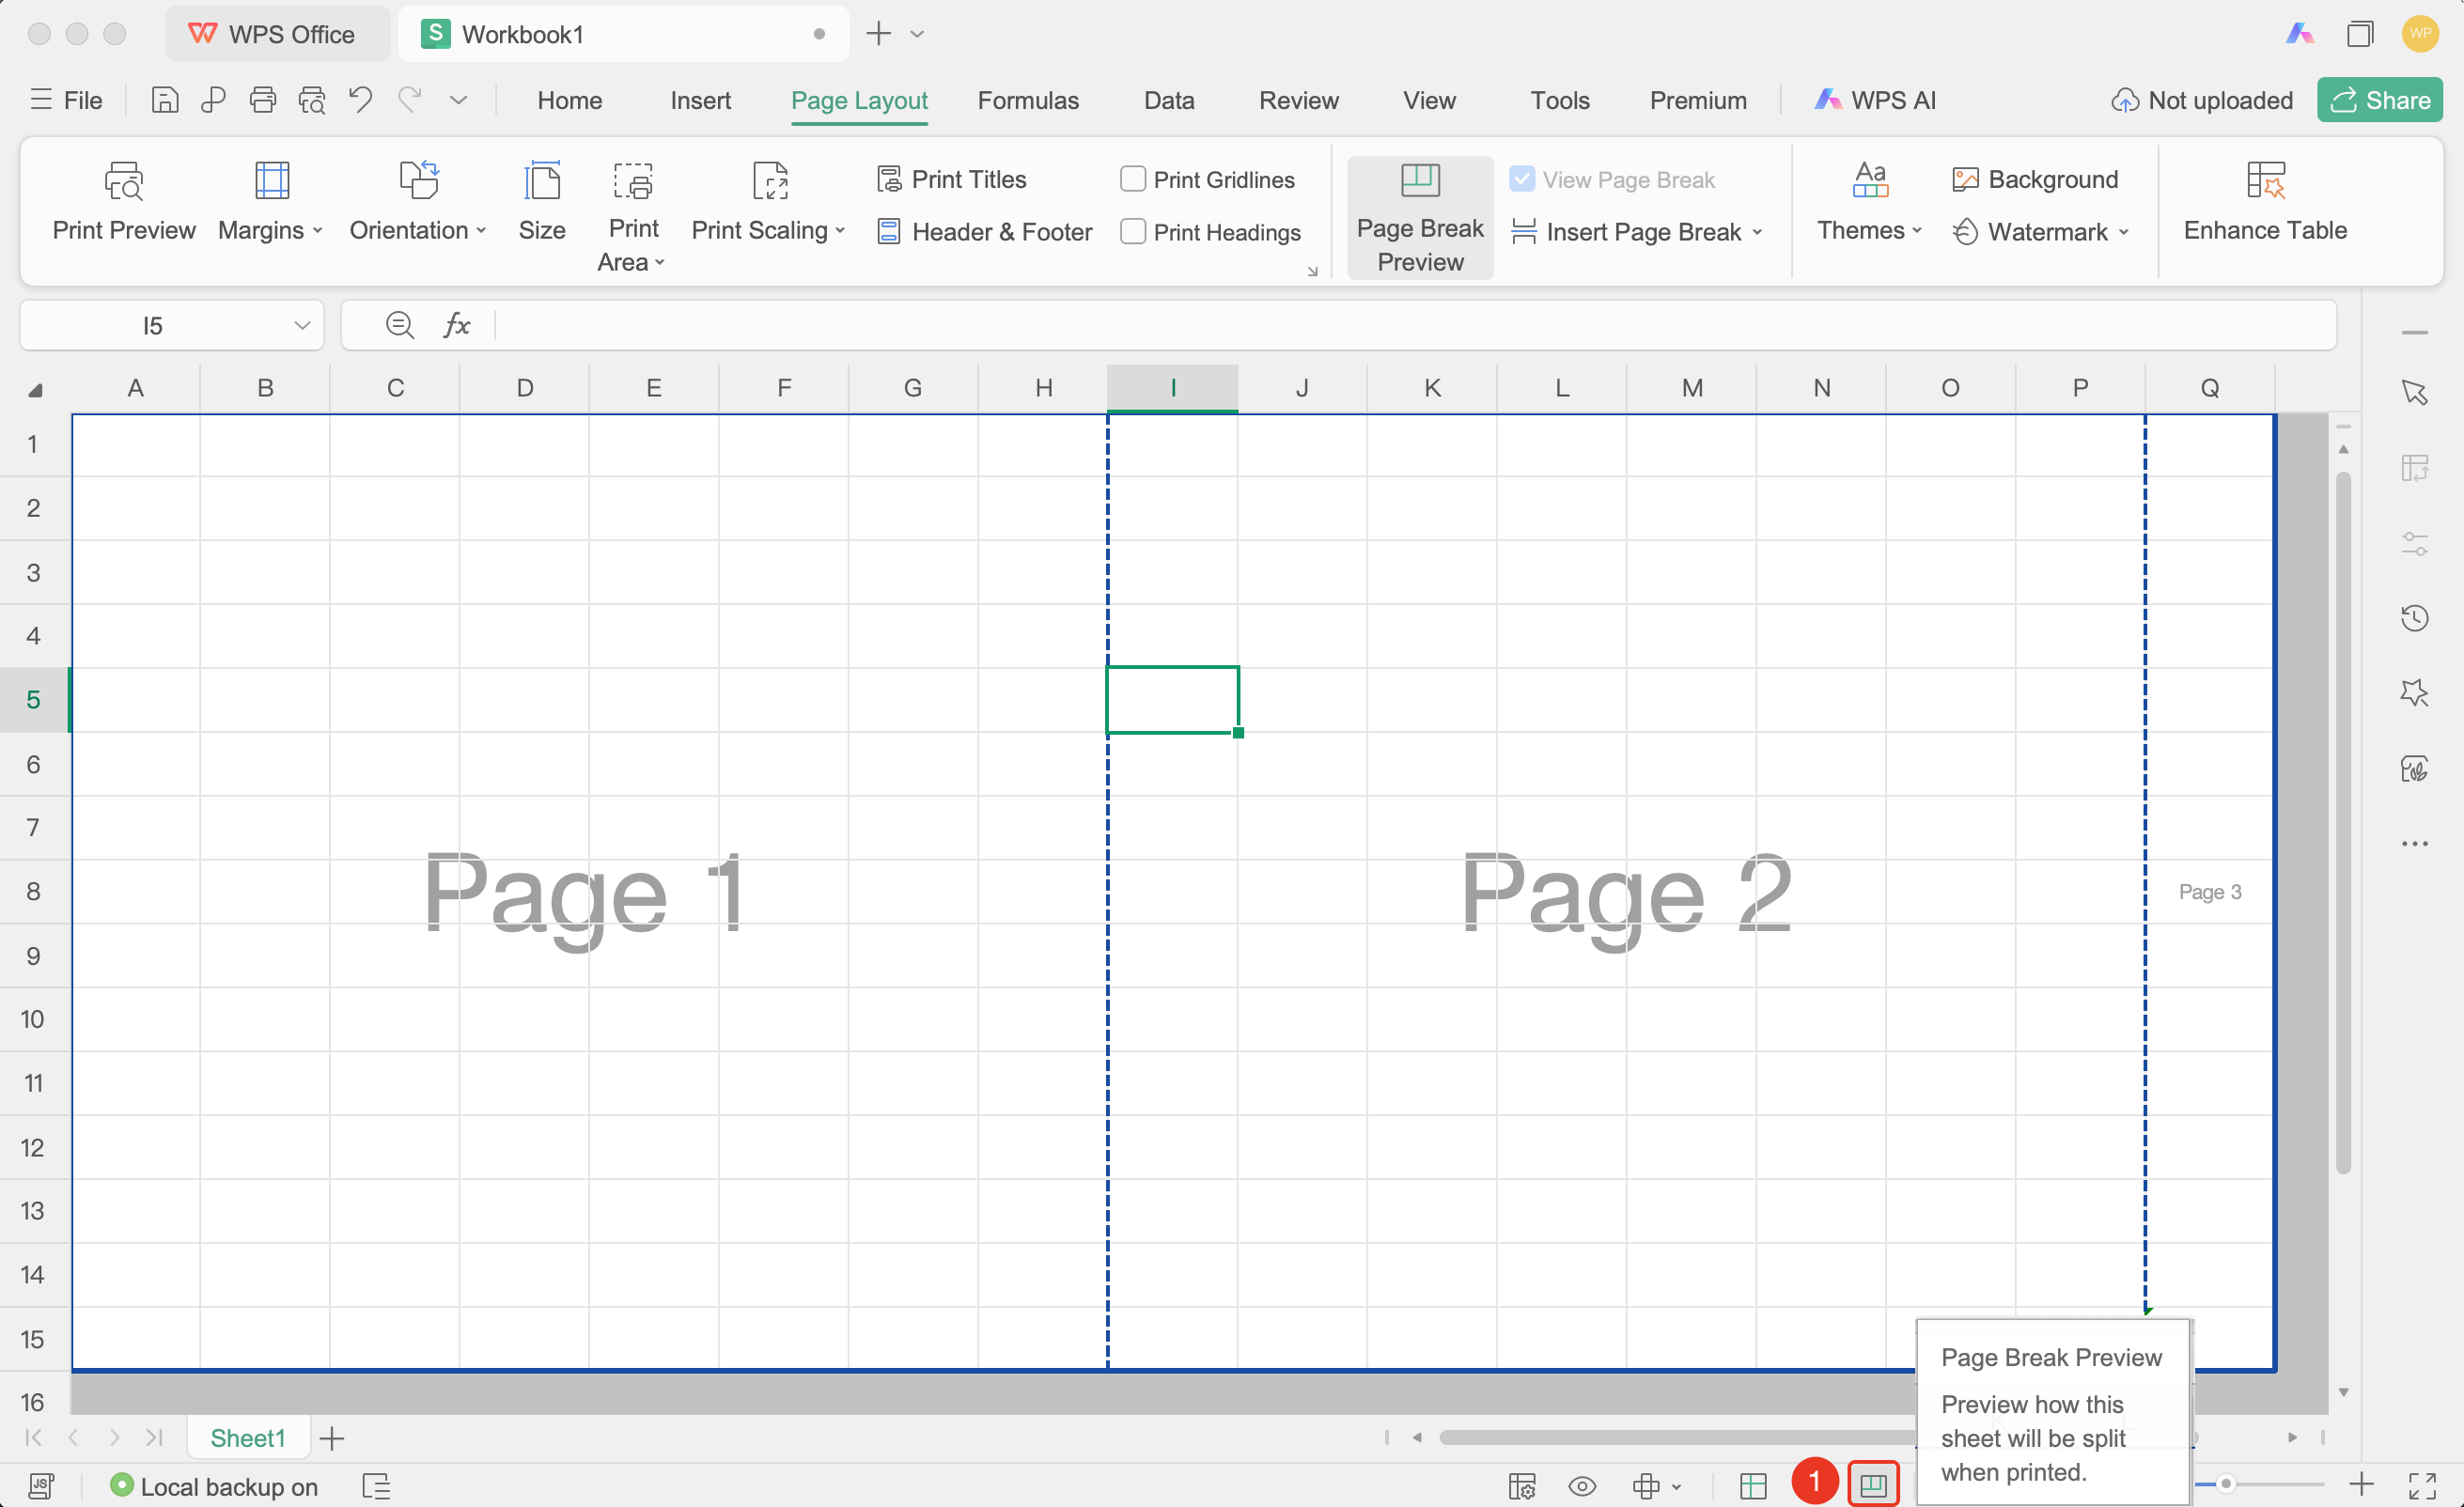
Adjusting Page Break Positions
Feature Entry Blue page break lines in Page Break Preview
- Move the mouse pointer over a blue page break line
- When the pointer changes to a double-headed arrow, drag
- Adjust the page break boundary position
- Release the mouse button to complete the adjustment
FAQ
Q1: What should I do if I cannot see the page break lines in Page Break Preview?
- Solution: Ensure you are in Page Break Preview mode. The page break lines will be displayed automatically.
Q2: What should I do if content is cut off after adjusting page breaks?
- Solution: When dragging page break lines, be careful not to split content. You can adjust column widths or row heights as needed.
Notes
- Adjustments made in Page Break Preview will be reflected in the actual printout
- Gray areas indicate content that will not be printed
- You can quickly switch view modes via the status bar