Feature Summary
The Insert Page Break feature is used to force a page break at a specified location, controlling where content breaks when printing to make the printed output more logical and visually appealing.
Feature Description
| Feature Dimension | Description |
|---|---|
| Membership Restriction | No membership restriction |
| Version Restriction | No version restriction |
Steps
Insert Page Break
Feature Entry
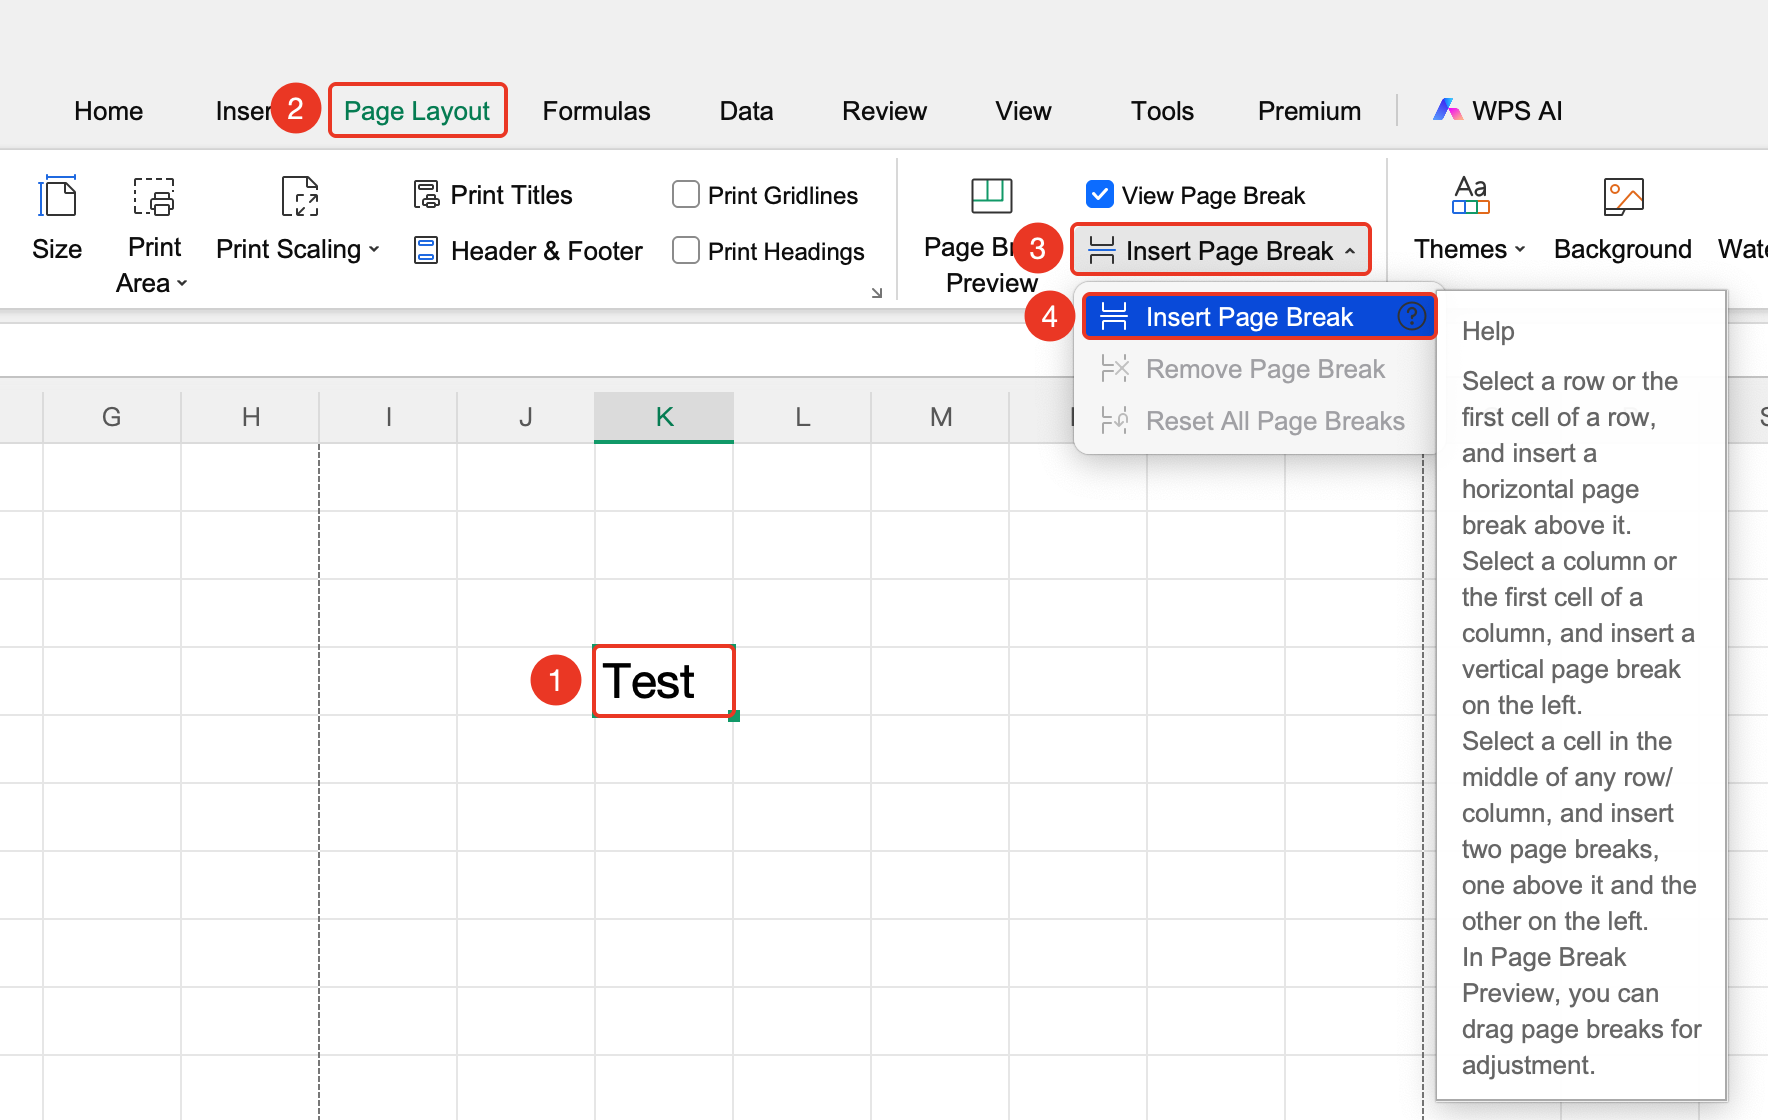
"Page" tab → "Insert Page Break" → "Insert Page Break"
- Select the cell where you want the page break
- Click the Page tab
- Click the Insert Page Break button
- Select Insert Page Break
- A page break is inserted above/to the left of the selected cell
Delete Page Breaks
Feature Entry
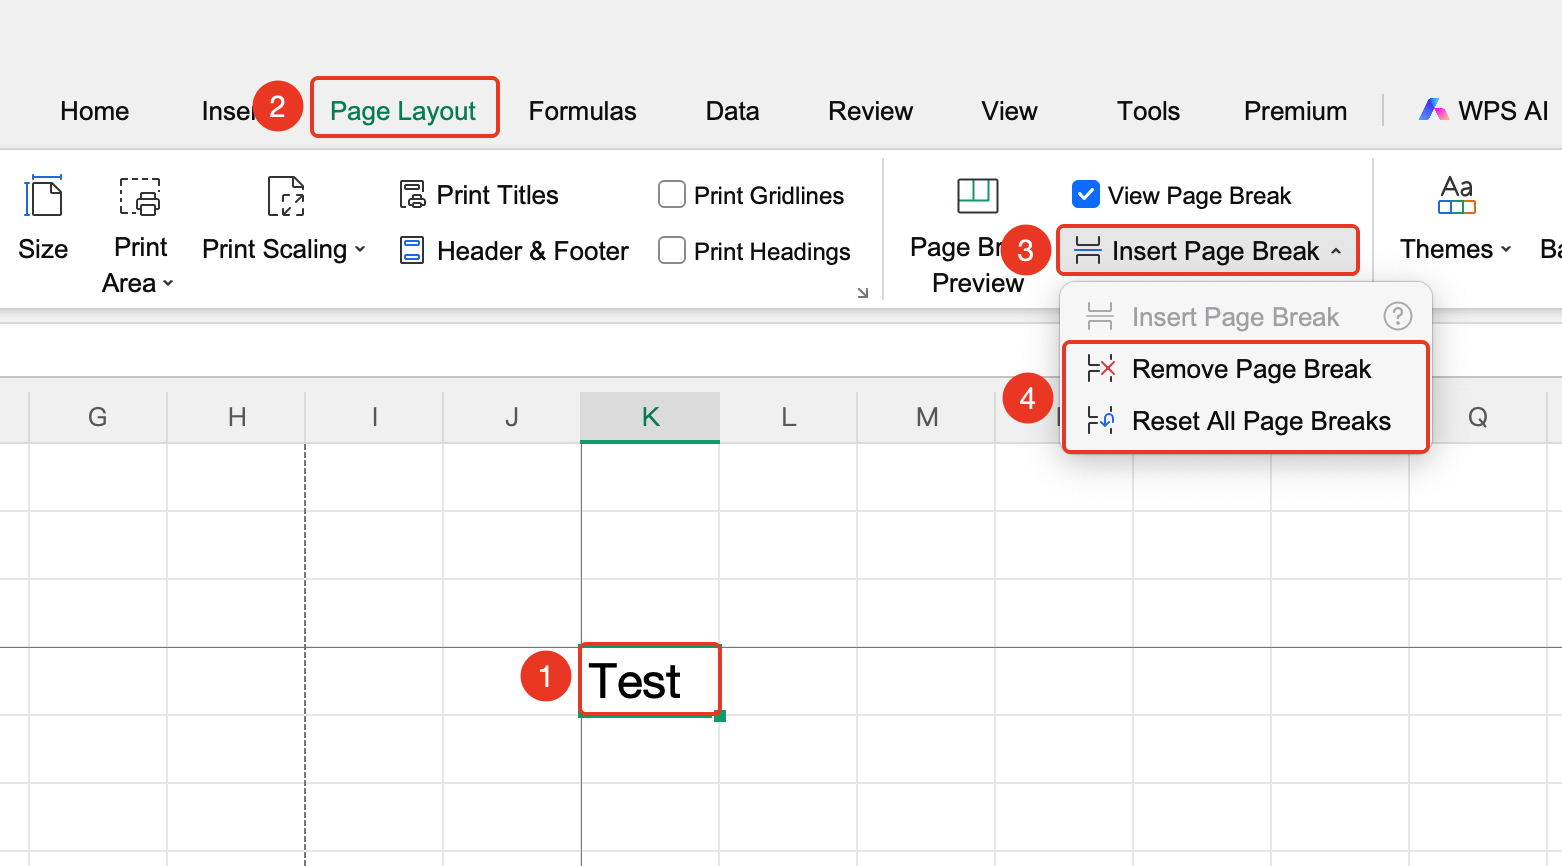
"Page" → "Insert Page Break" → "Delete Page Break" / "Reset All Page Breaks"
- Select a cell adjacent to the page break
- Click the Insert Page Break button
- Select Delete Page Break
- Or select Reset All Page Breaks to delete all page breaks
Notes
- Automatic page breaks are calculated automatically by the system based on page size (dashed lines), while manual page breaks are inserted by the user (solid lines).
- Selecting an entire row or the first cell of a row inserts a horizontal page break above it.
- Selecting an entire column or the first cell of a column inserts a vertical page break to its left.
- Selecting a cell that is not the first in a row or column inserts both horizontal and vertical page breaks above and to the left of the cell.
- Horizontal and vertical page breaks can be inserted simultaneously.
- Resetting all page breaks deletes all manually inserted page breaks.