Feature Summary
The Create/Ungroup feature is used to group data rows/columns, images, graphic objects, or worksheets for management. It supports collapsing detail data, uniformly adjusting multiple objects, and batch-syncing operations across multiple worksheets, improving spreadsheet data management efficiency.
Feature Description
| Feature Dimension | Description |
|---|---|
| Membership Restriction | No membership restriction |
| Version Restriction | No version restriction |
| Create Group Shortcut | Shift+option+Right |
| Ungroup Shortcut | Shift+option+Left |
Steps
Create Group
Feature Entry
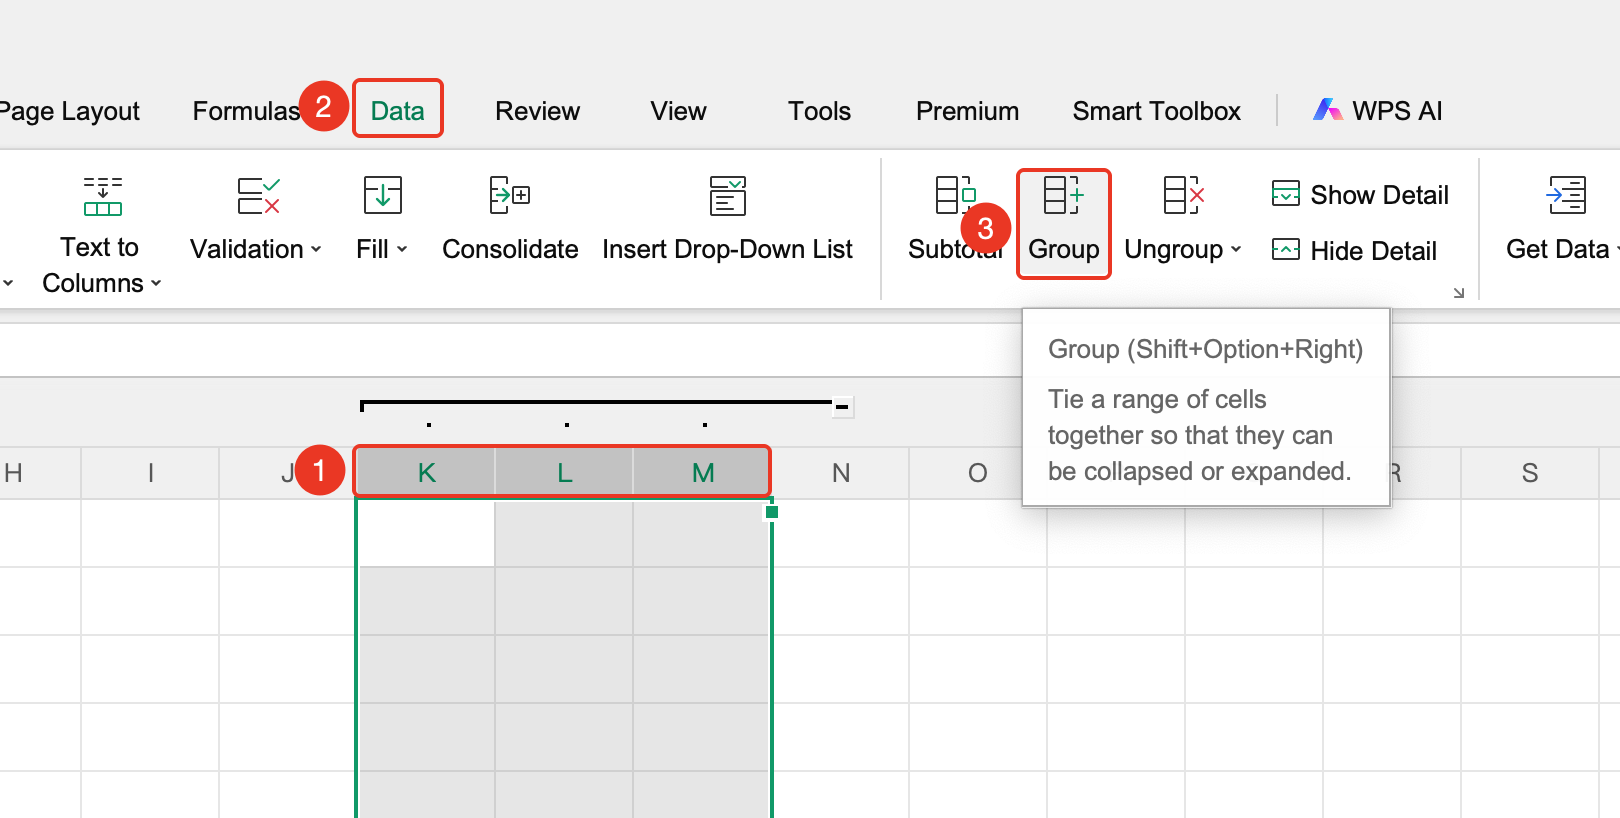
"Data" tab → "Create Group" button
- Select the contiguous rows or columns you want to group (select row area for grouping rows, column area for grouping columns)
- Click the "Create Group" button in the Data tab
- In the pop-up dialog, select the grouping type: choose "Rows" to group by rows, choose "Columns" to group by columns
- Click OK to complete
- If you need to create multiple groups, repeat the steps above
Ungroup Data Rows/Columns
Feature Entry
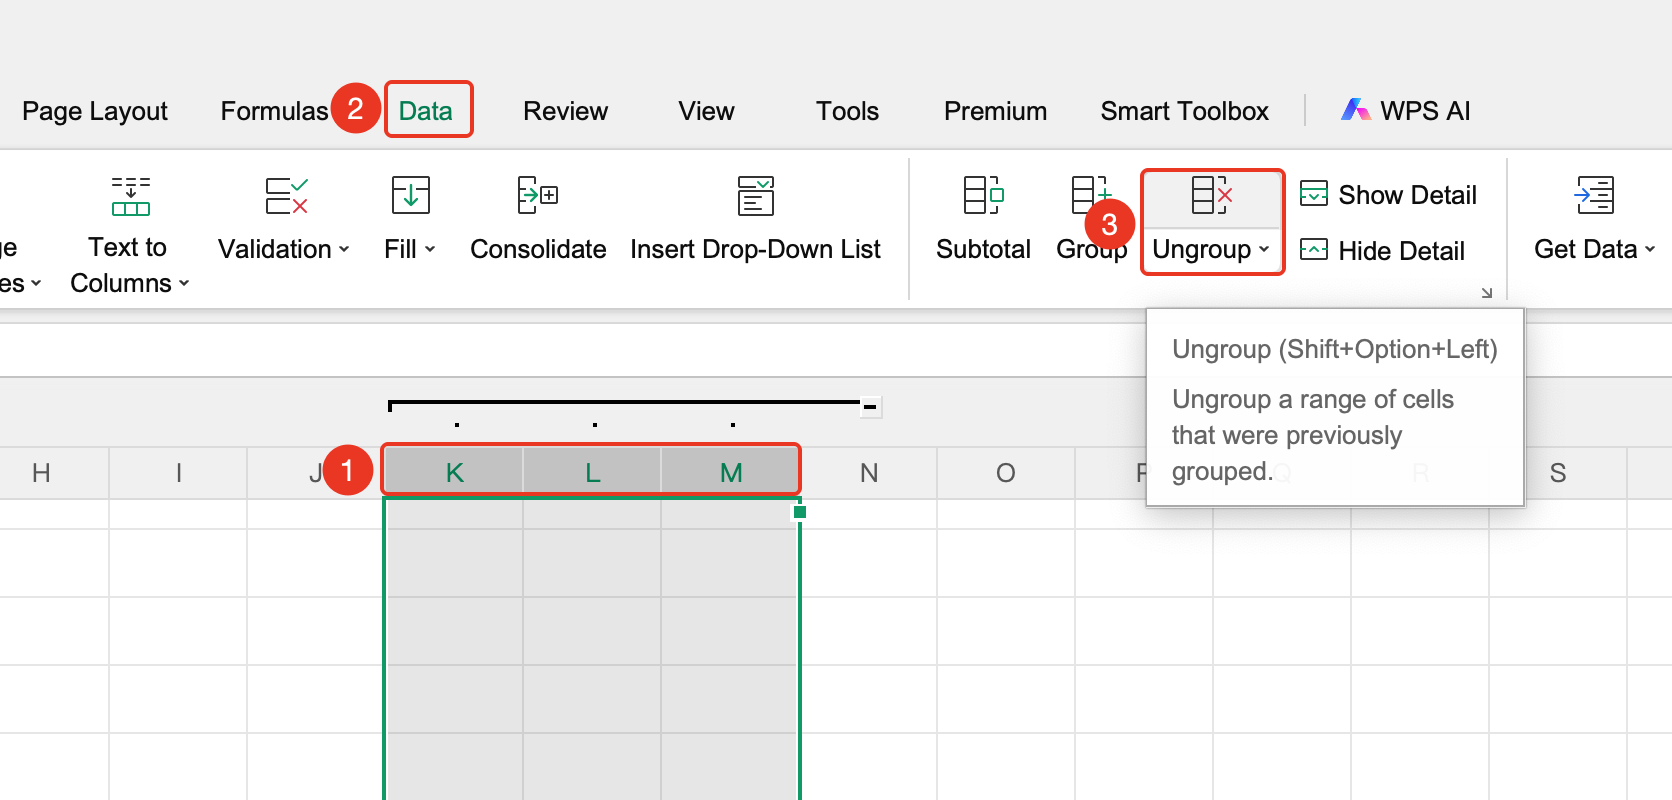
"Data" tab → "Ungroup" button
- Place the cursor in the area you want to ungroup
- Click the "Ungroup" button in the Data tab
- The ungrouping will then be completed
Outline Settings
Feature Entry
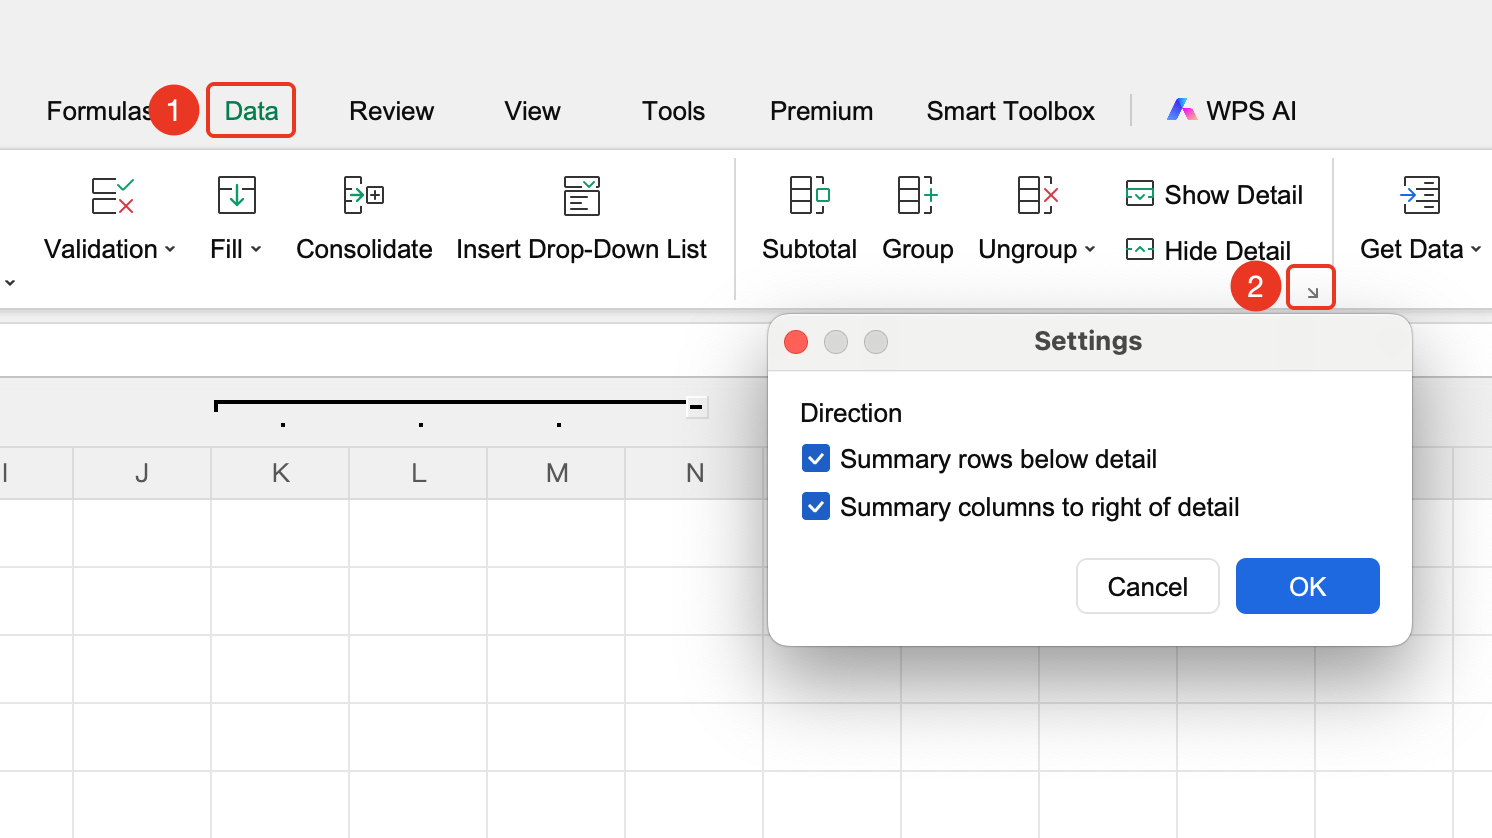
"Data" → "Outline Settings" arrow
- Click the Data tab
- Click the "Outline Settings" arrow
- In the pop-up pane, check or uncheck "Below detail data" or "To the right of detail data"
- Click OK to set the display position of the collapse symbols
Worksheet Grouping (Group Worksheets)
After worksheets are grouped, operations will be synced to all grouped worksheets, suitable for batch processing of worksheets with the same structure
- Hold the
Cmdkey and click the worksheet tabs at the bottom that you want to group to select all target worksheets - Once selected, the grouping is completed
Ungroup Worksheets
Feature Entry
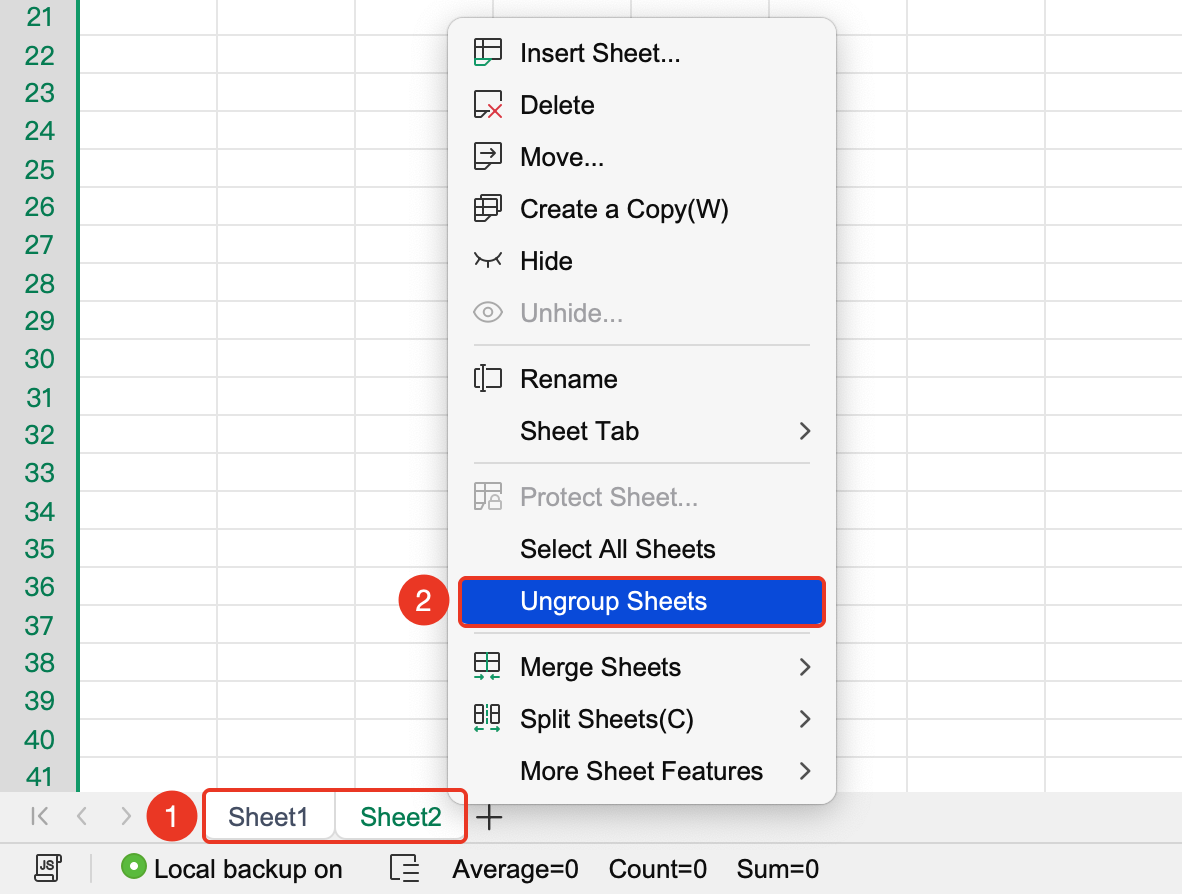
Right-click worksheet tab → "Ungroup Worksheets" option
- Right-click any worksheet tab within the group
- Select the "Ungroup Worksheets" option
- The ungrouping will then be completed
FAQ
Q1: How to quickly collapse/expand detail data after creating a group?
- Solution: After creating a group, outline buttons will appear on the left or top of the sheet. Click the plus/minus signs to quickly collapse/expand detail data.
Notes
- When grouping data rows/columns, a separator area must be kept between groups
- After worksheets are grouped, operations will be synced to all grouped worksheets, suitable for batch processing of worksheets with the same structure