Feature Summary
Locking cells is used to protect specified cells from being edited or modified, working in conjunction with the sheet protection feature to achieve refined data protection.
Feature Description
| Feature Dimension | Description |
|---|---|
| Membership Restriction | No membership restriction |
| Version Restriction | No version restriction |
Operation Steps
Setting Cell Locking
Feature Entry
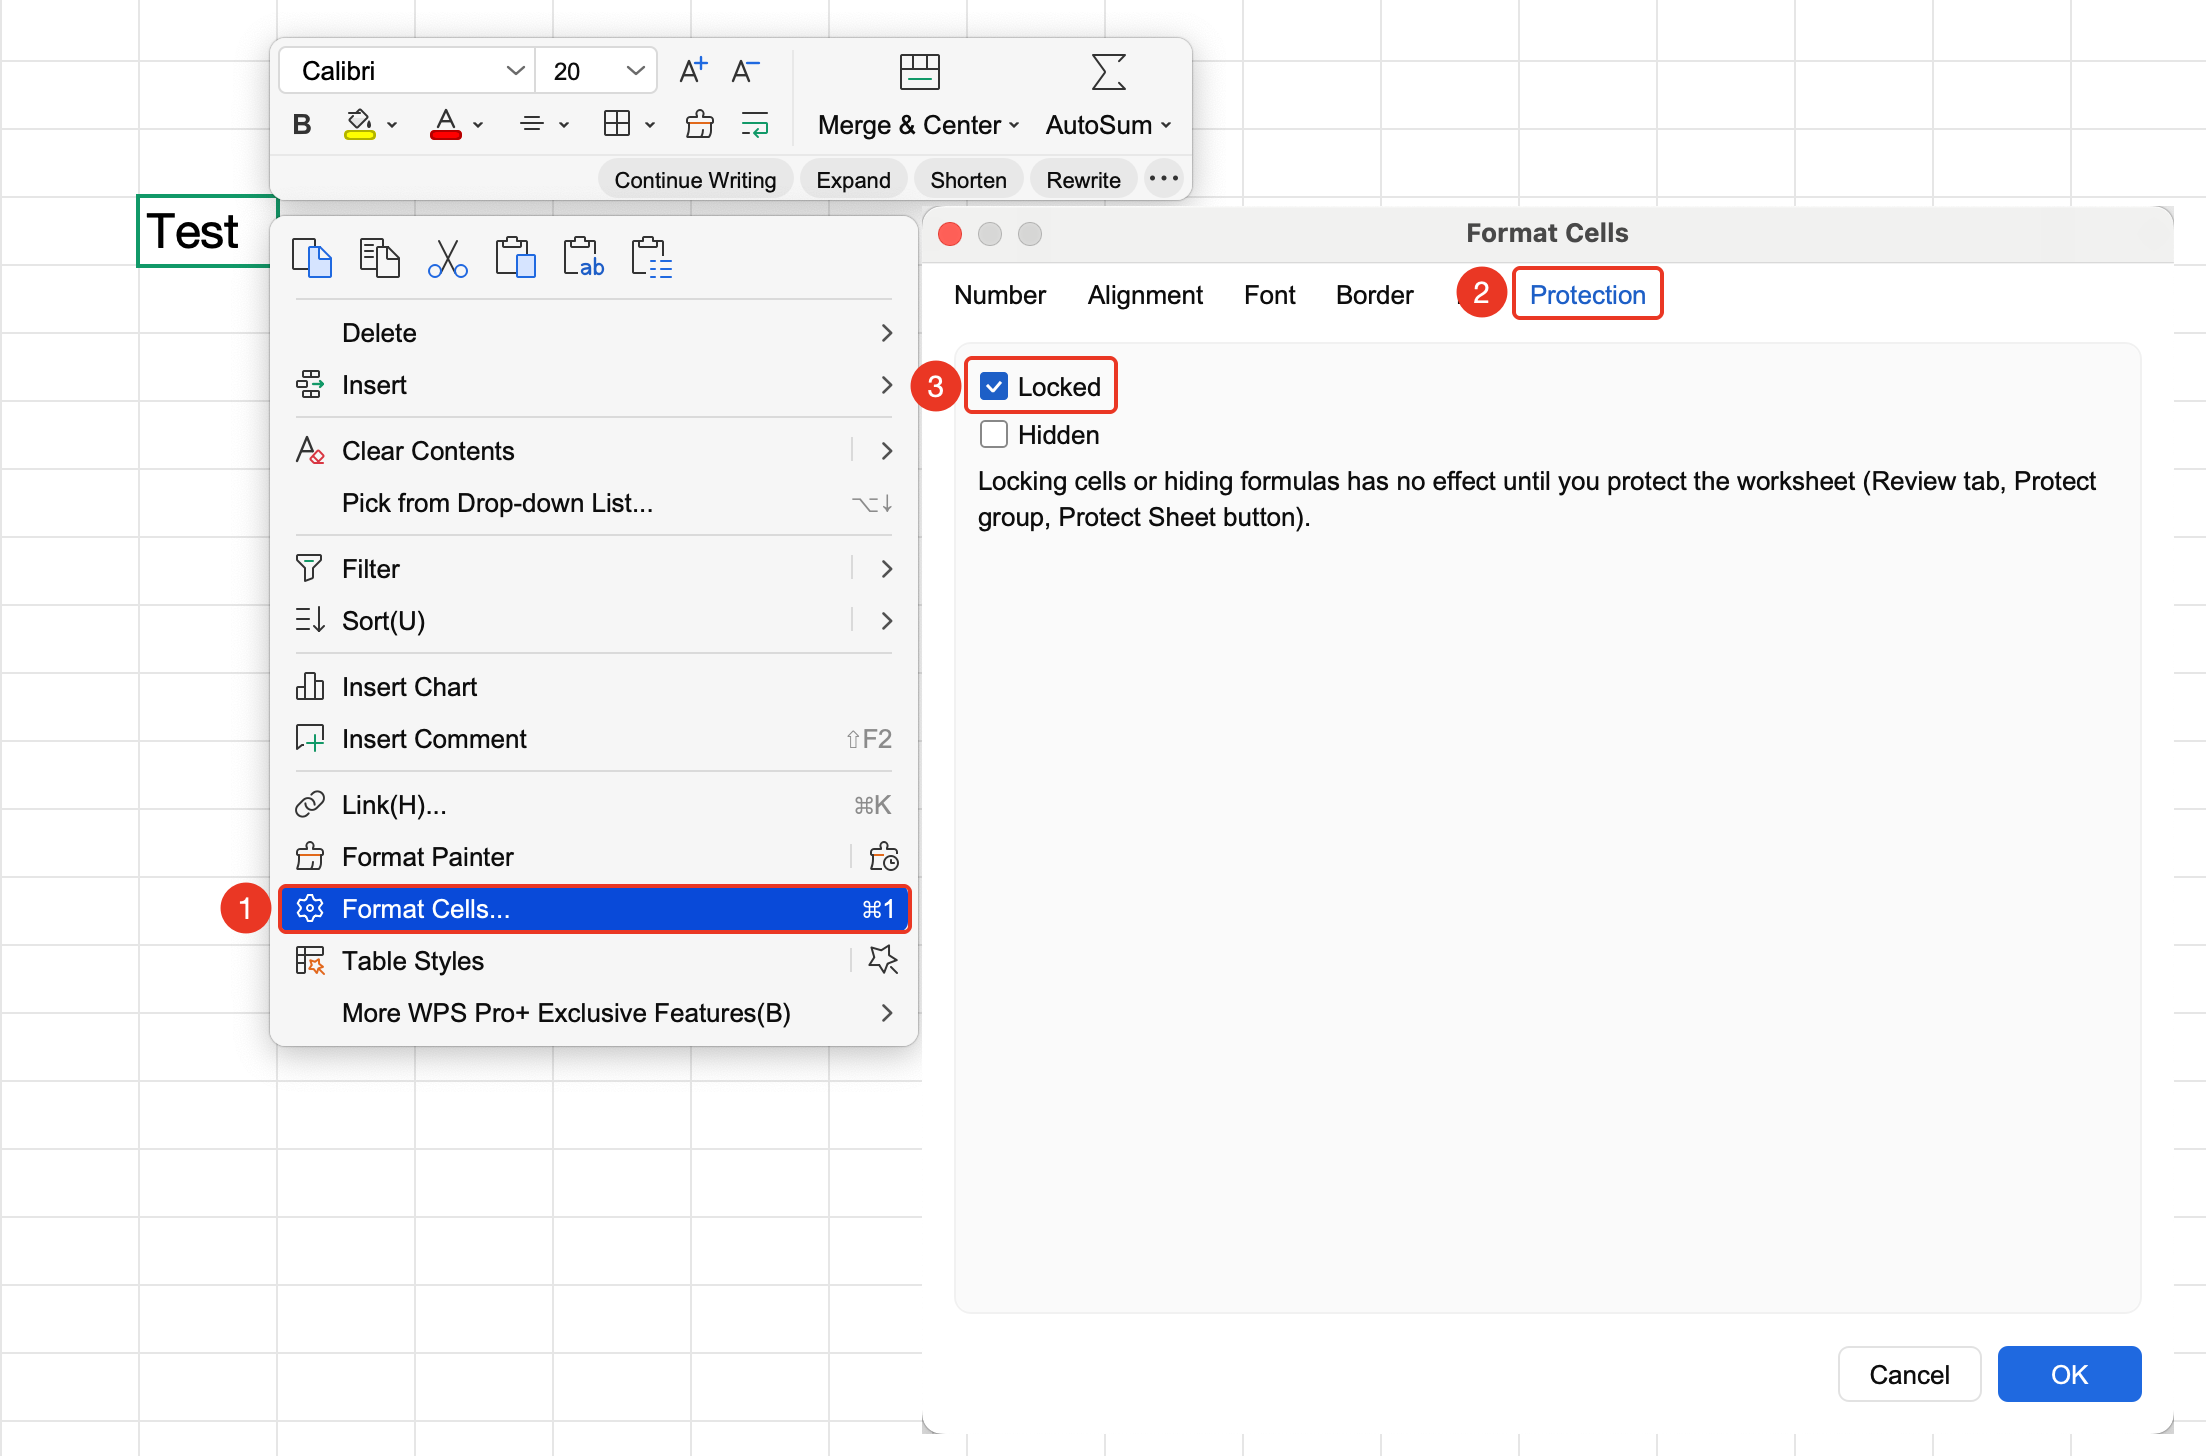
Right-click menu → "Format Cells" option → "Protection" tab
- Select the cell range you want to protect
- Right-click the selected area and choose "Format Cells"
- Switch to the "Protection" tab
- Check "Locked" and click OK
Enabling Protection to Make Locking Effective
Feature Entry
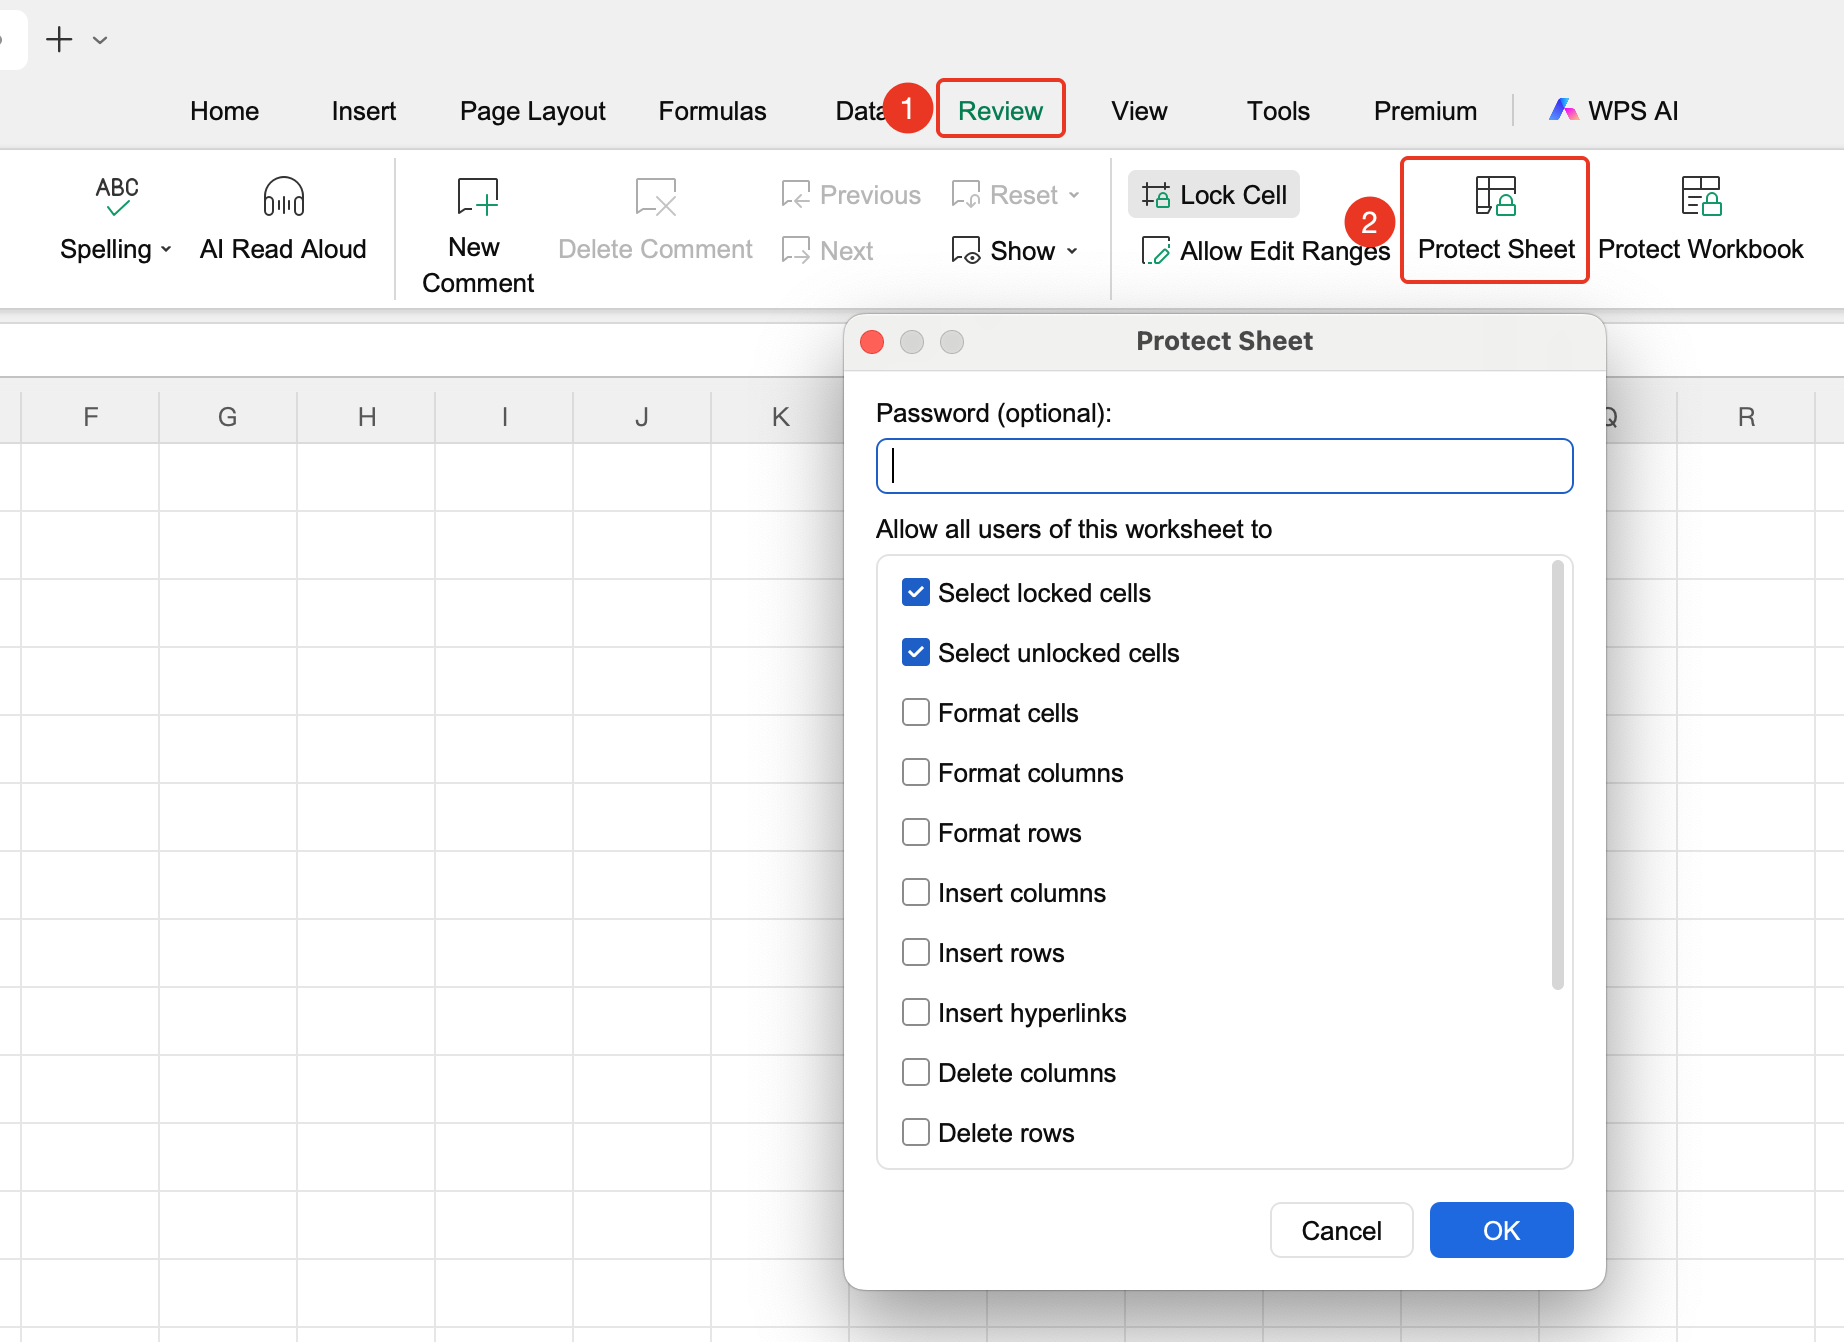
"Review" tab → "Protect Sheet" button
- After setting the lock status, click "Protect Sheet" in the Review tab
- Set a protection password in the pop-up window
- Check the required permissions in the "Allow all users of this worksheet to" list
- Confirm the password and click OK, the locking will take effect immediately
Frequently Asked Questions
Q1: Why can I still edit the cell after setting it to locked?
- Solution: The "Locked" property of a cell is a preset; it only truly takes effect after sheet protection is enabled. You need to perform the "Review" → "Protect Sheet" operation first.
Q2: How do I cancel cell locking?
- Solution: First cancel sheet protection ("Review" → "Unprotect Sheet", enter the password), then select the cell, right-click → "Format Cells" → "Protection" → uncheck "Locked".
Q3: Can I still edit other cells normally after locking cells?
- Solution: Yes. When protecting the sheet, it is recommended to check the "Select unlocked cells" permission, so that users can only select and edit unlocked cells.
Notes
- In WPS Spreadsheets, all cells are in the "Locked" state by default; you need to unlock the areas that do not require protection first
- Operation logic: Set the lock status first → then protect the sheet; both steps are indispensable