Feature Summary
The Name Manager allows you to assign custom names to objects such as cells, cell ranges, formulas, and values, making formulas more intuitive and readable, and improving spreadsheet editing efficiency.
Feature Description
| Feature Dimension | Description |
|---|---|
| Membership Restrictions | No membership restrictions |
| Version Restrictions | No version restrictions |
Operation Steps
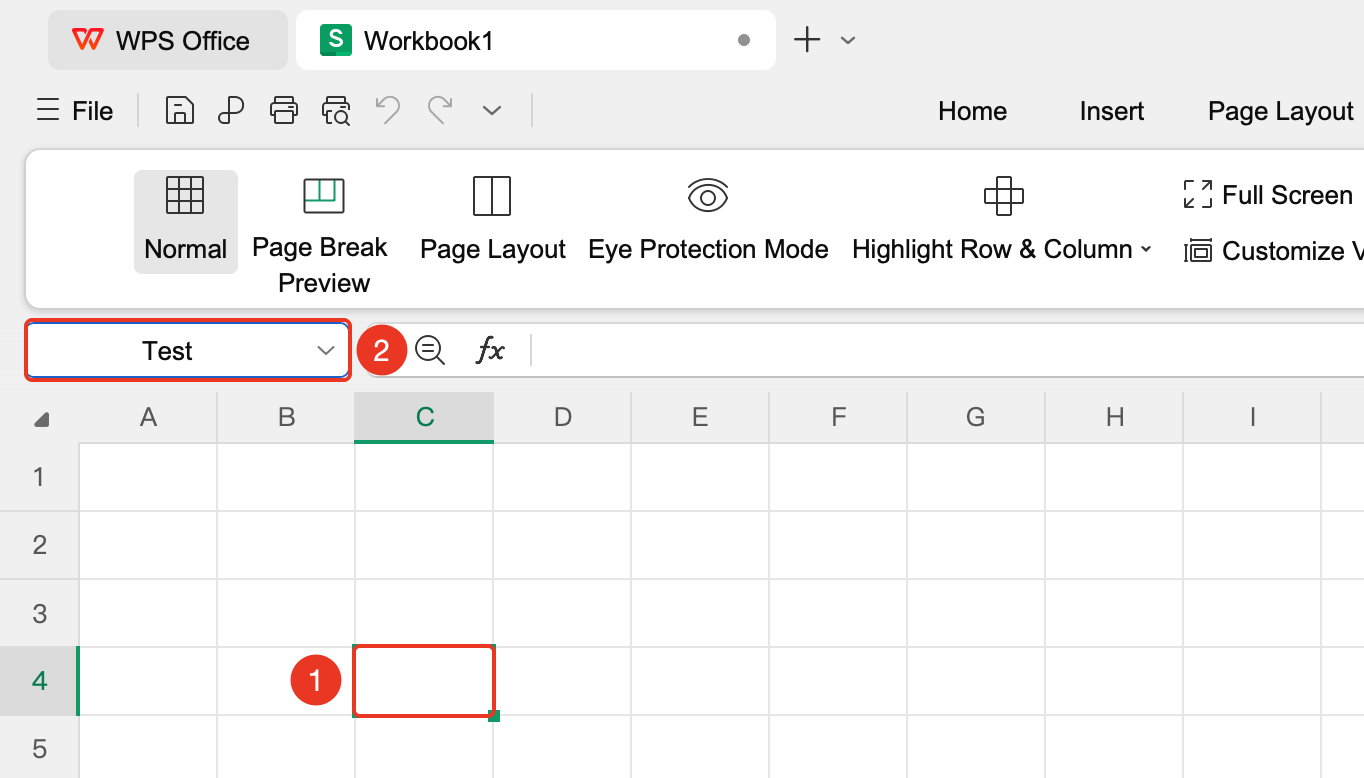
Quick Naming via Name Box
Feature Entry
Left side of the 'Editing Area' → 'Name Box'
- Select the cell, cell range, picture, or other object you want to name
- Enter a custom name in the Name Box at the top left corner of the spreadsheet
- Press Enter to complete the naming
Creating via Name Manager
Feature Entry
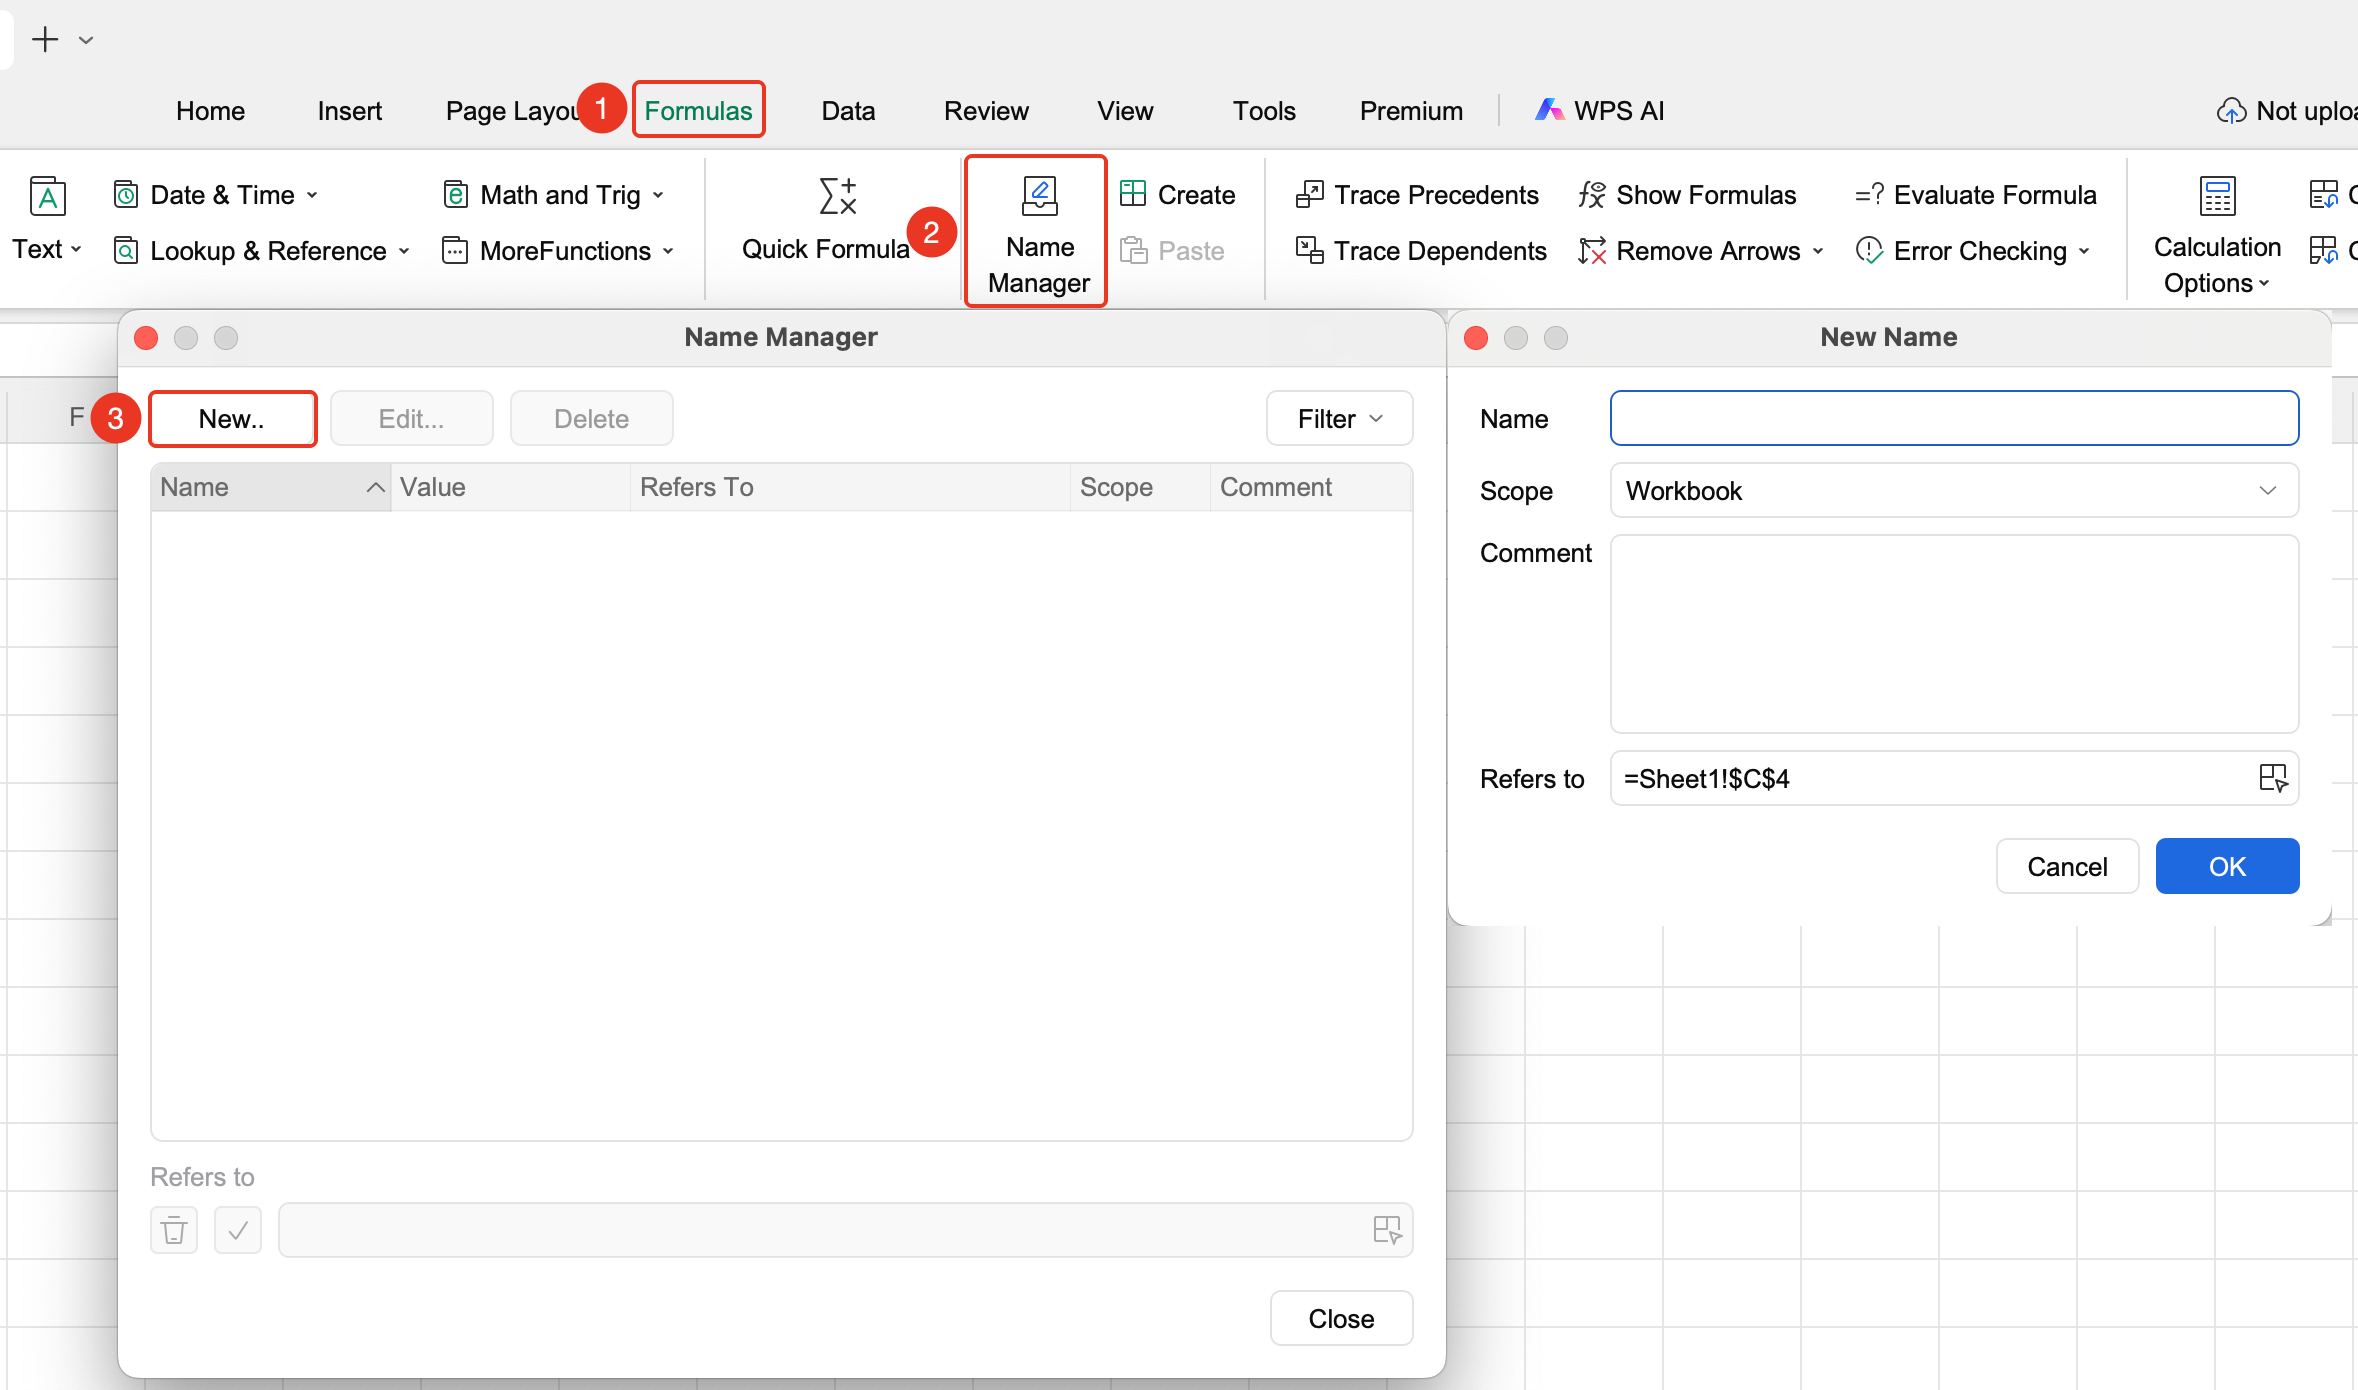
'Formulas' tab → 'Name Manager' option → 'New' button
- Click the 'Name Manager' button in the Formulas tab (or press the
Cmd+F3shortcut) - In the pop-up Name Manager window, click 'New' in the top left corner
- Enter a custom name and select the scope of the name (default is Workbook)
- Fill in the 'Refers to' field (which can be a cell, cell range, constant value, or formula), and add comments as needed
- Click OK to finish creating
Editing and Deleting Names
Feature Entry
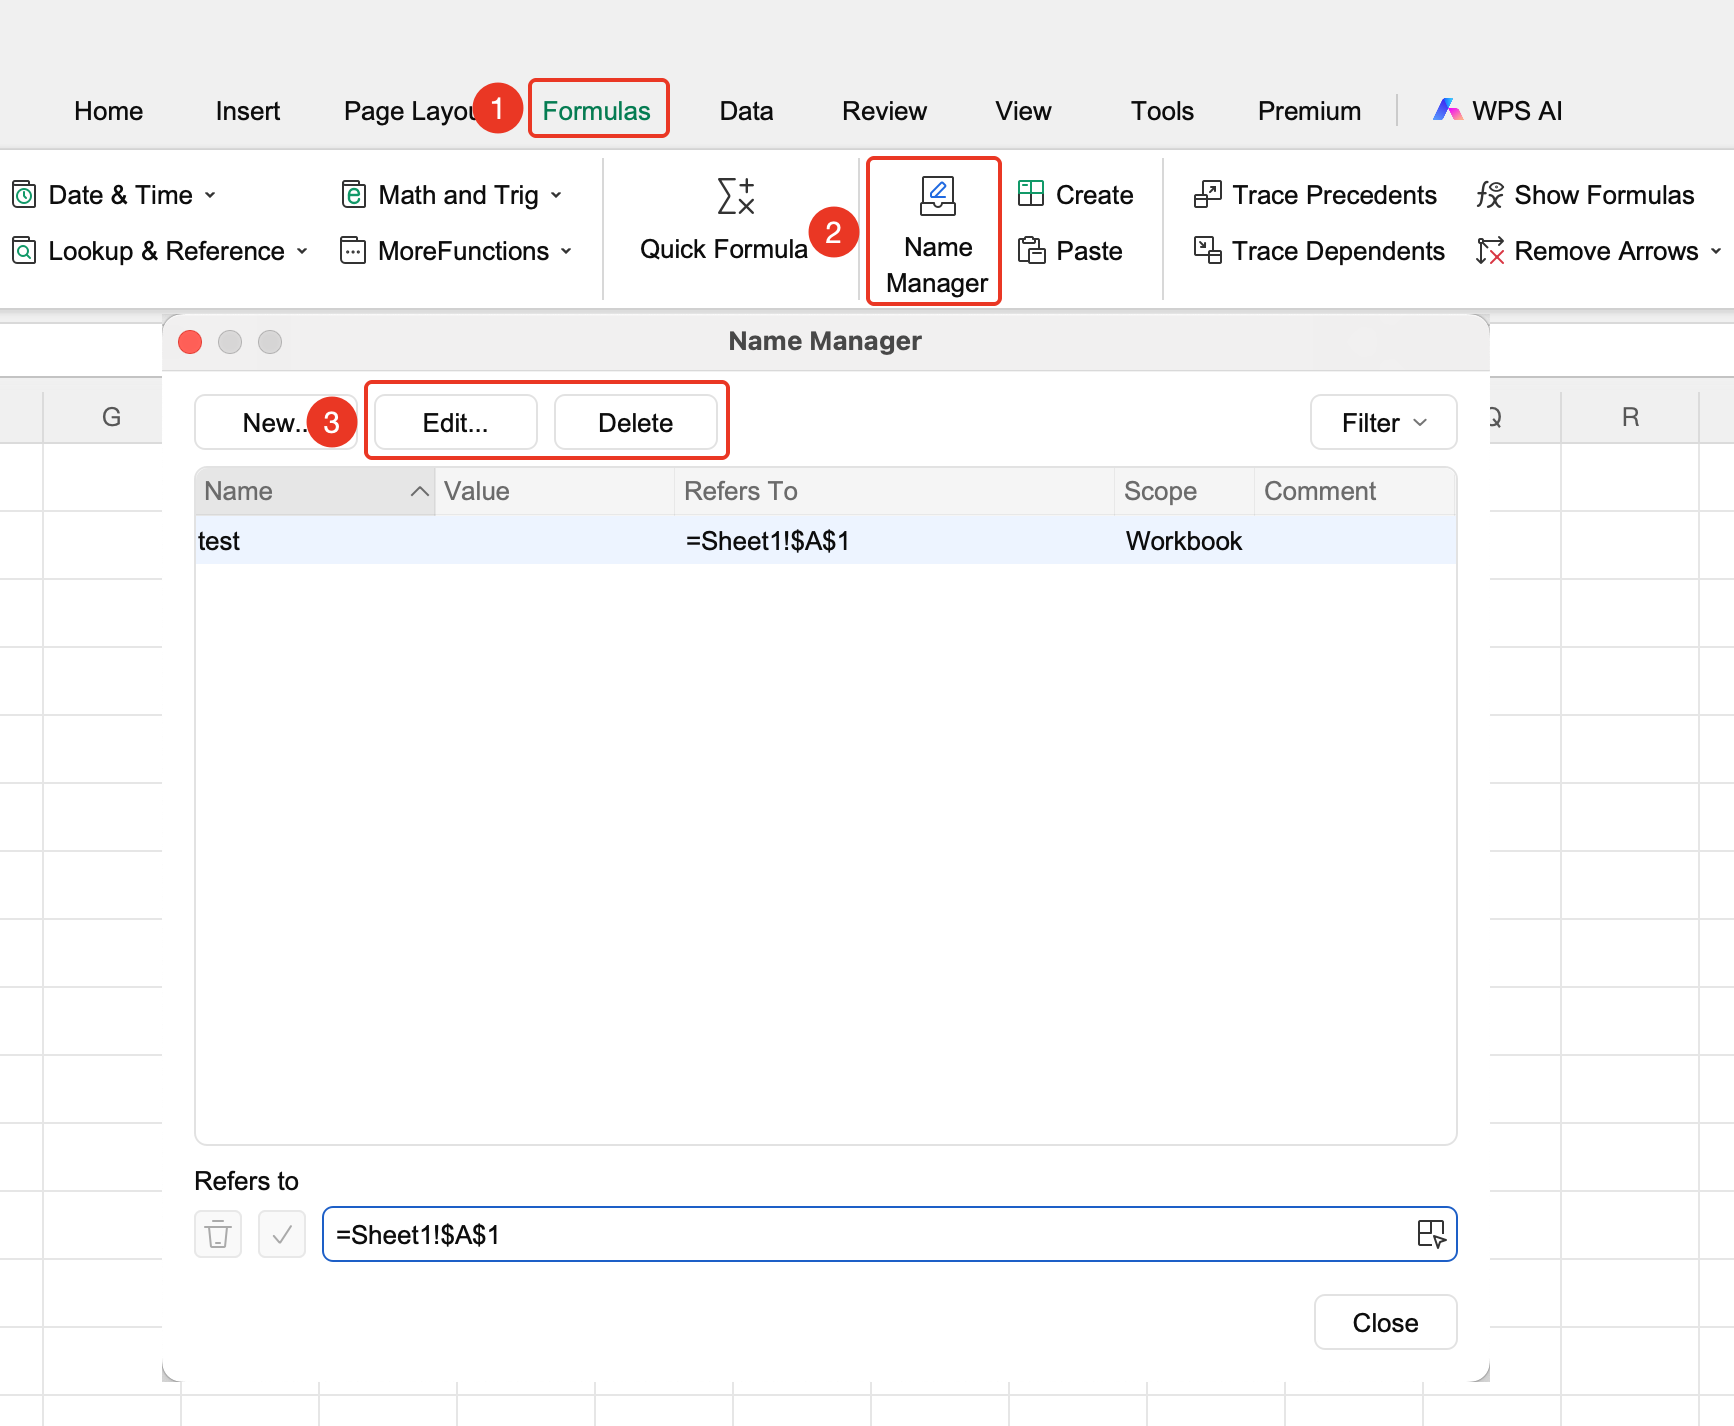
'Formulas' tab → 'Name Manager' option
- Open the Name Manager and select an existing name
- You can directly modify the name and the 'Refers to' field, then click OK to save
- Select the unwanted name and click the 'Delete' button to remove it
Referencing Names in Formulas
- After defining a name, type it directly into a formula
- When the name suggestion appears, press
Tabto insert it - For example:
=SUM(January_Sales, February_Sales)
Frequently Asked Questions
Q1: Why do I get a 'Name is invalid' prompt after entering a name?
- Solution: When naming, avoid using special characters (such as spaces, @, #, etc.). The name cannot start with a number, nor can it conflict with a cell address (such as A1, B2, and so on).
Notes
- When defining a name, if you do not want the reference position to shift with the cell, use
F4(Fn+F4on Mac) to change the reference to an absolute reference (e.g.,$A$1) - It is recommended to save the file in XLSX format to ensure that name definitions are saved properly