Feature Summary
The Export as Image feature allows you to convert WPS Sheets content into image formats (such as PNG, JPG) for easy use in other documents or platforms.
- Supports custom watermark settings (text, color, transparency, style, and so on.)
- Supports multiple output formats and quality options
Feature Description
| Feature Dimension | Description |
|---|---|
| Membership Restriction | Some advanced features require a membership to use |
| Version Restriction | No version restrictions |
Steps
Some features require a membership to use. Before use, check the membership indicator on the feature.
Method 1: Export via the "Member Exclusive" Menu
Feature Entry
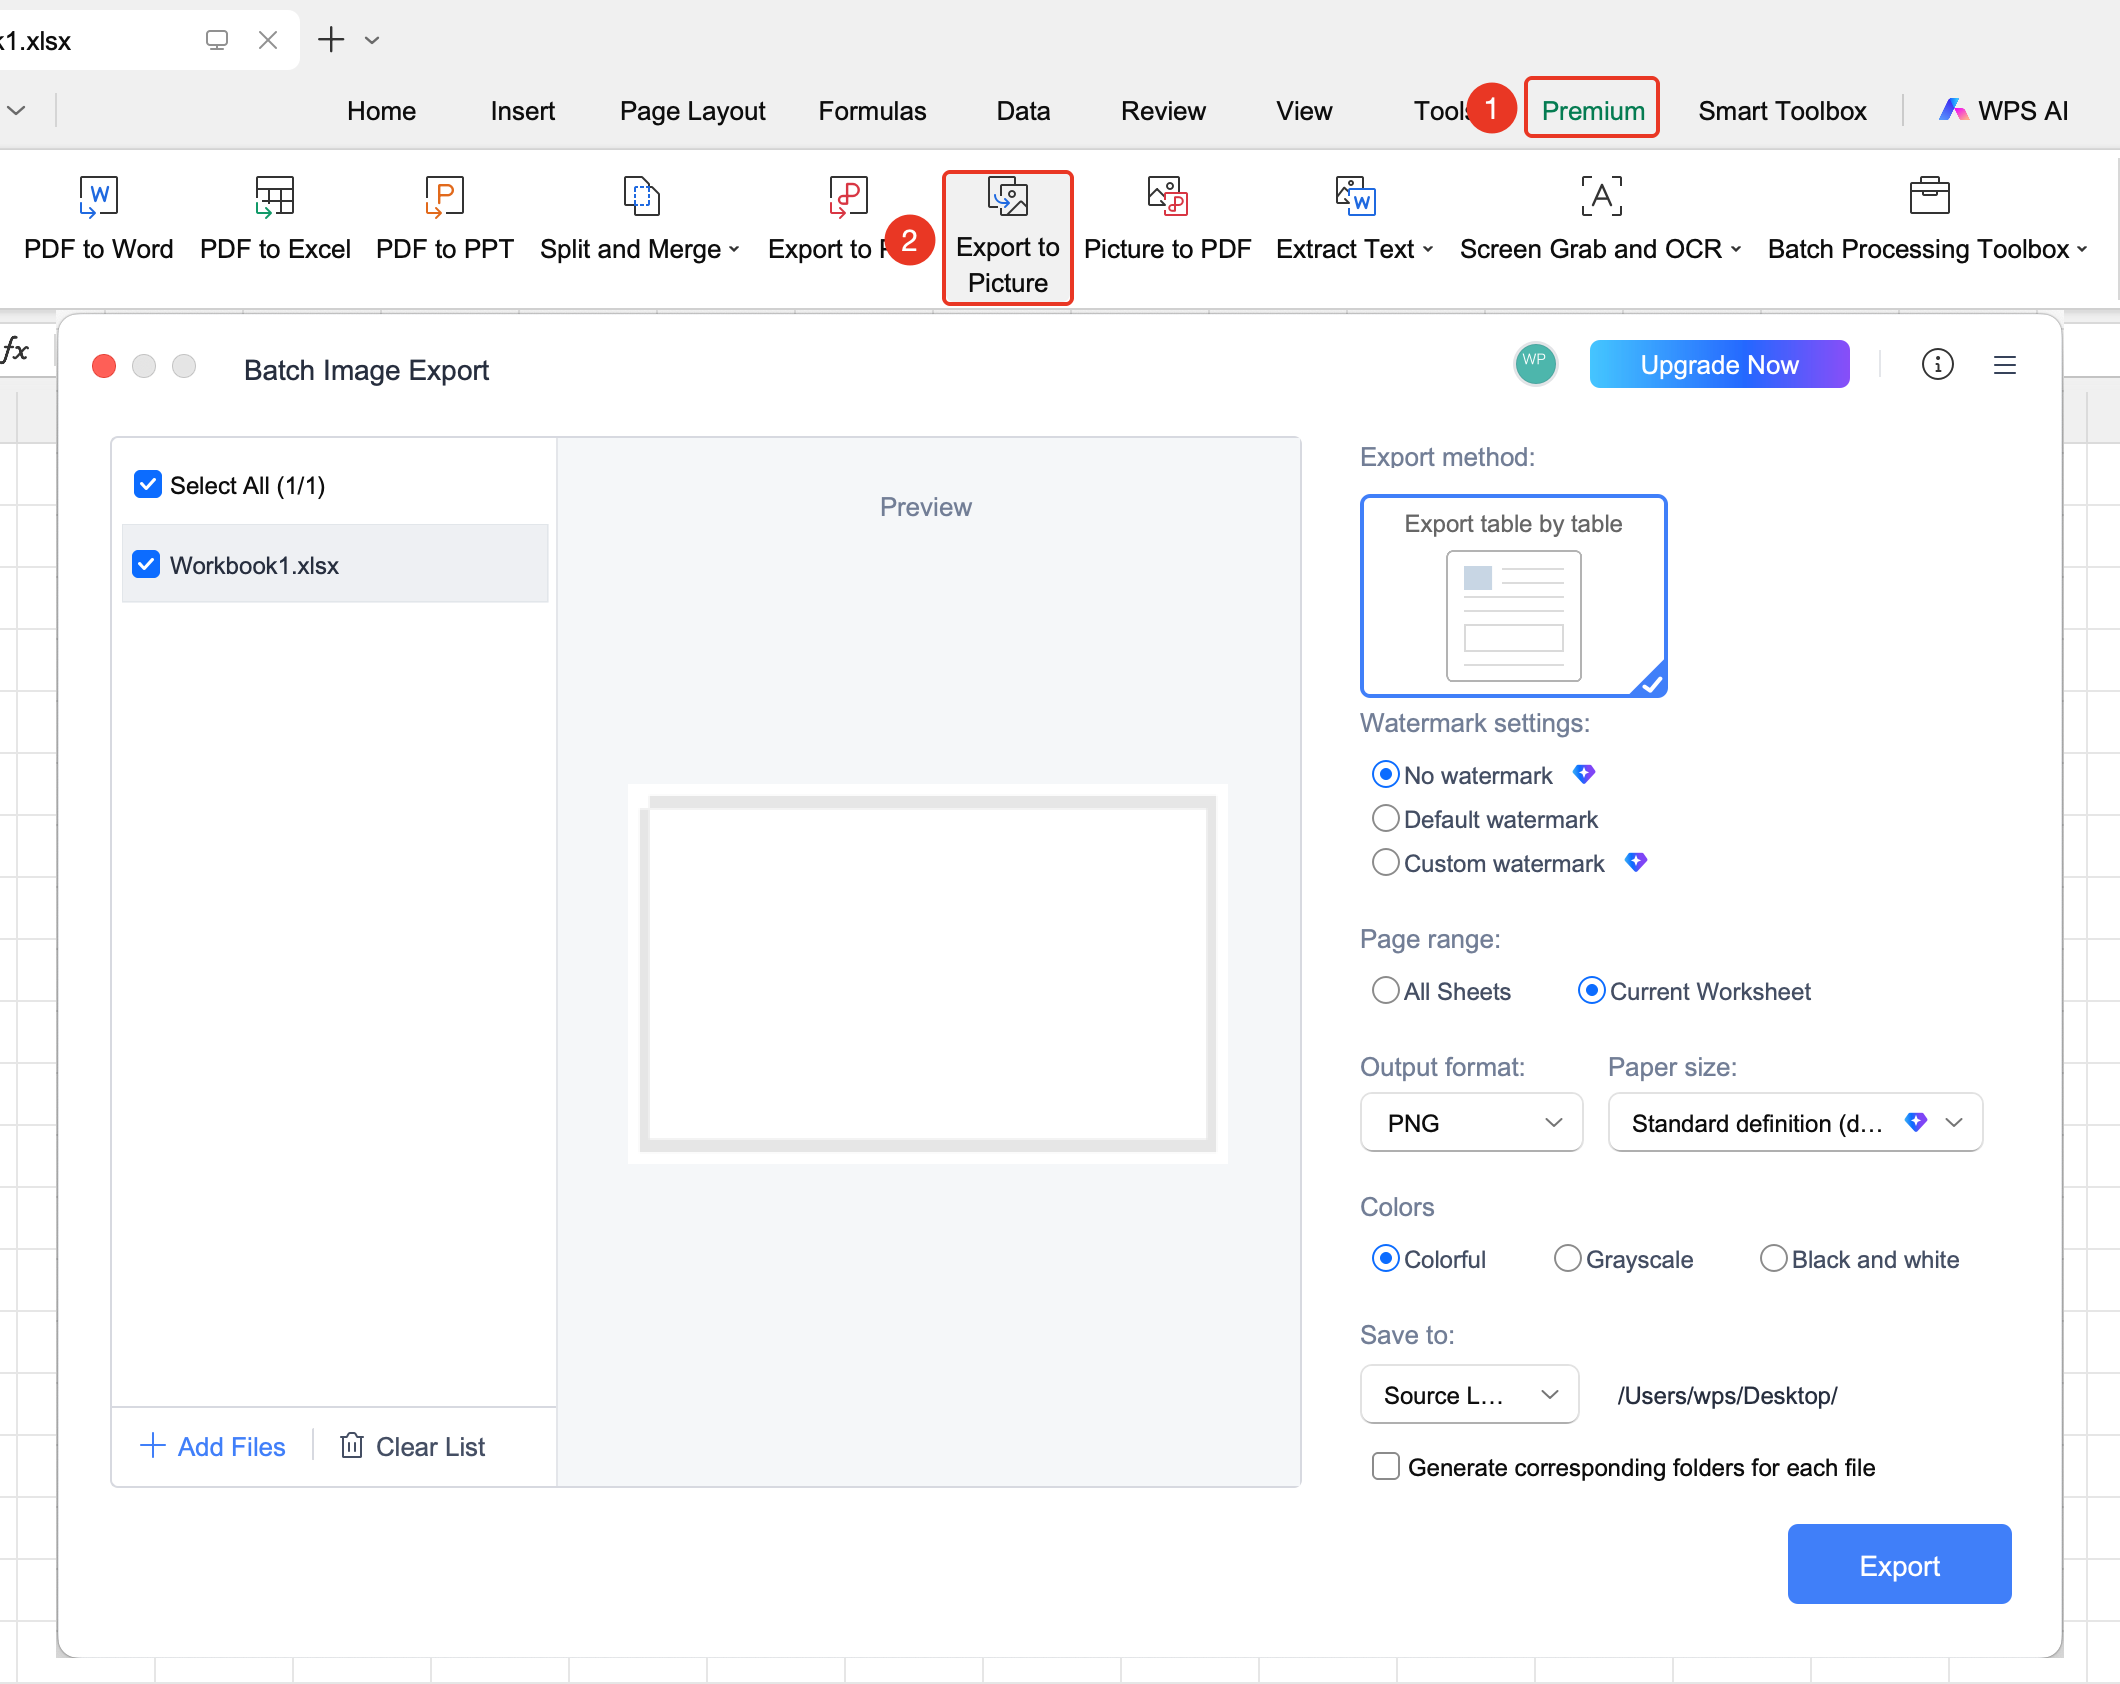
Open Document → "Member Exclusive" Tab → "Export as Image"
- Open the document you want to convert using WPS Office
- Click the "Member Exclusive" tab in the top menu bar, then click "Export as Image"
- In the pop-up dialog box, select the export method and parameters
- Click "Start Export" to complete
Method 2: Export via the "File" Menu
Feature Entry
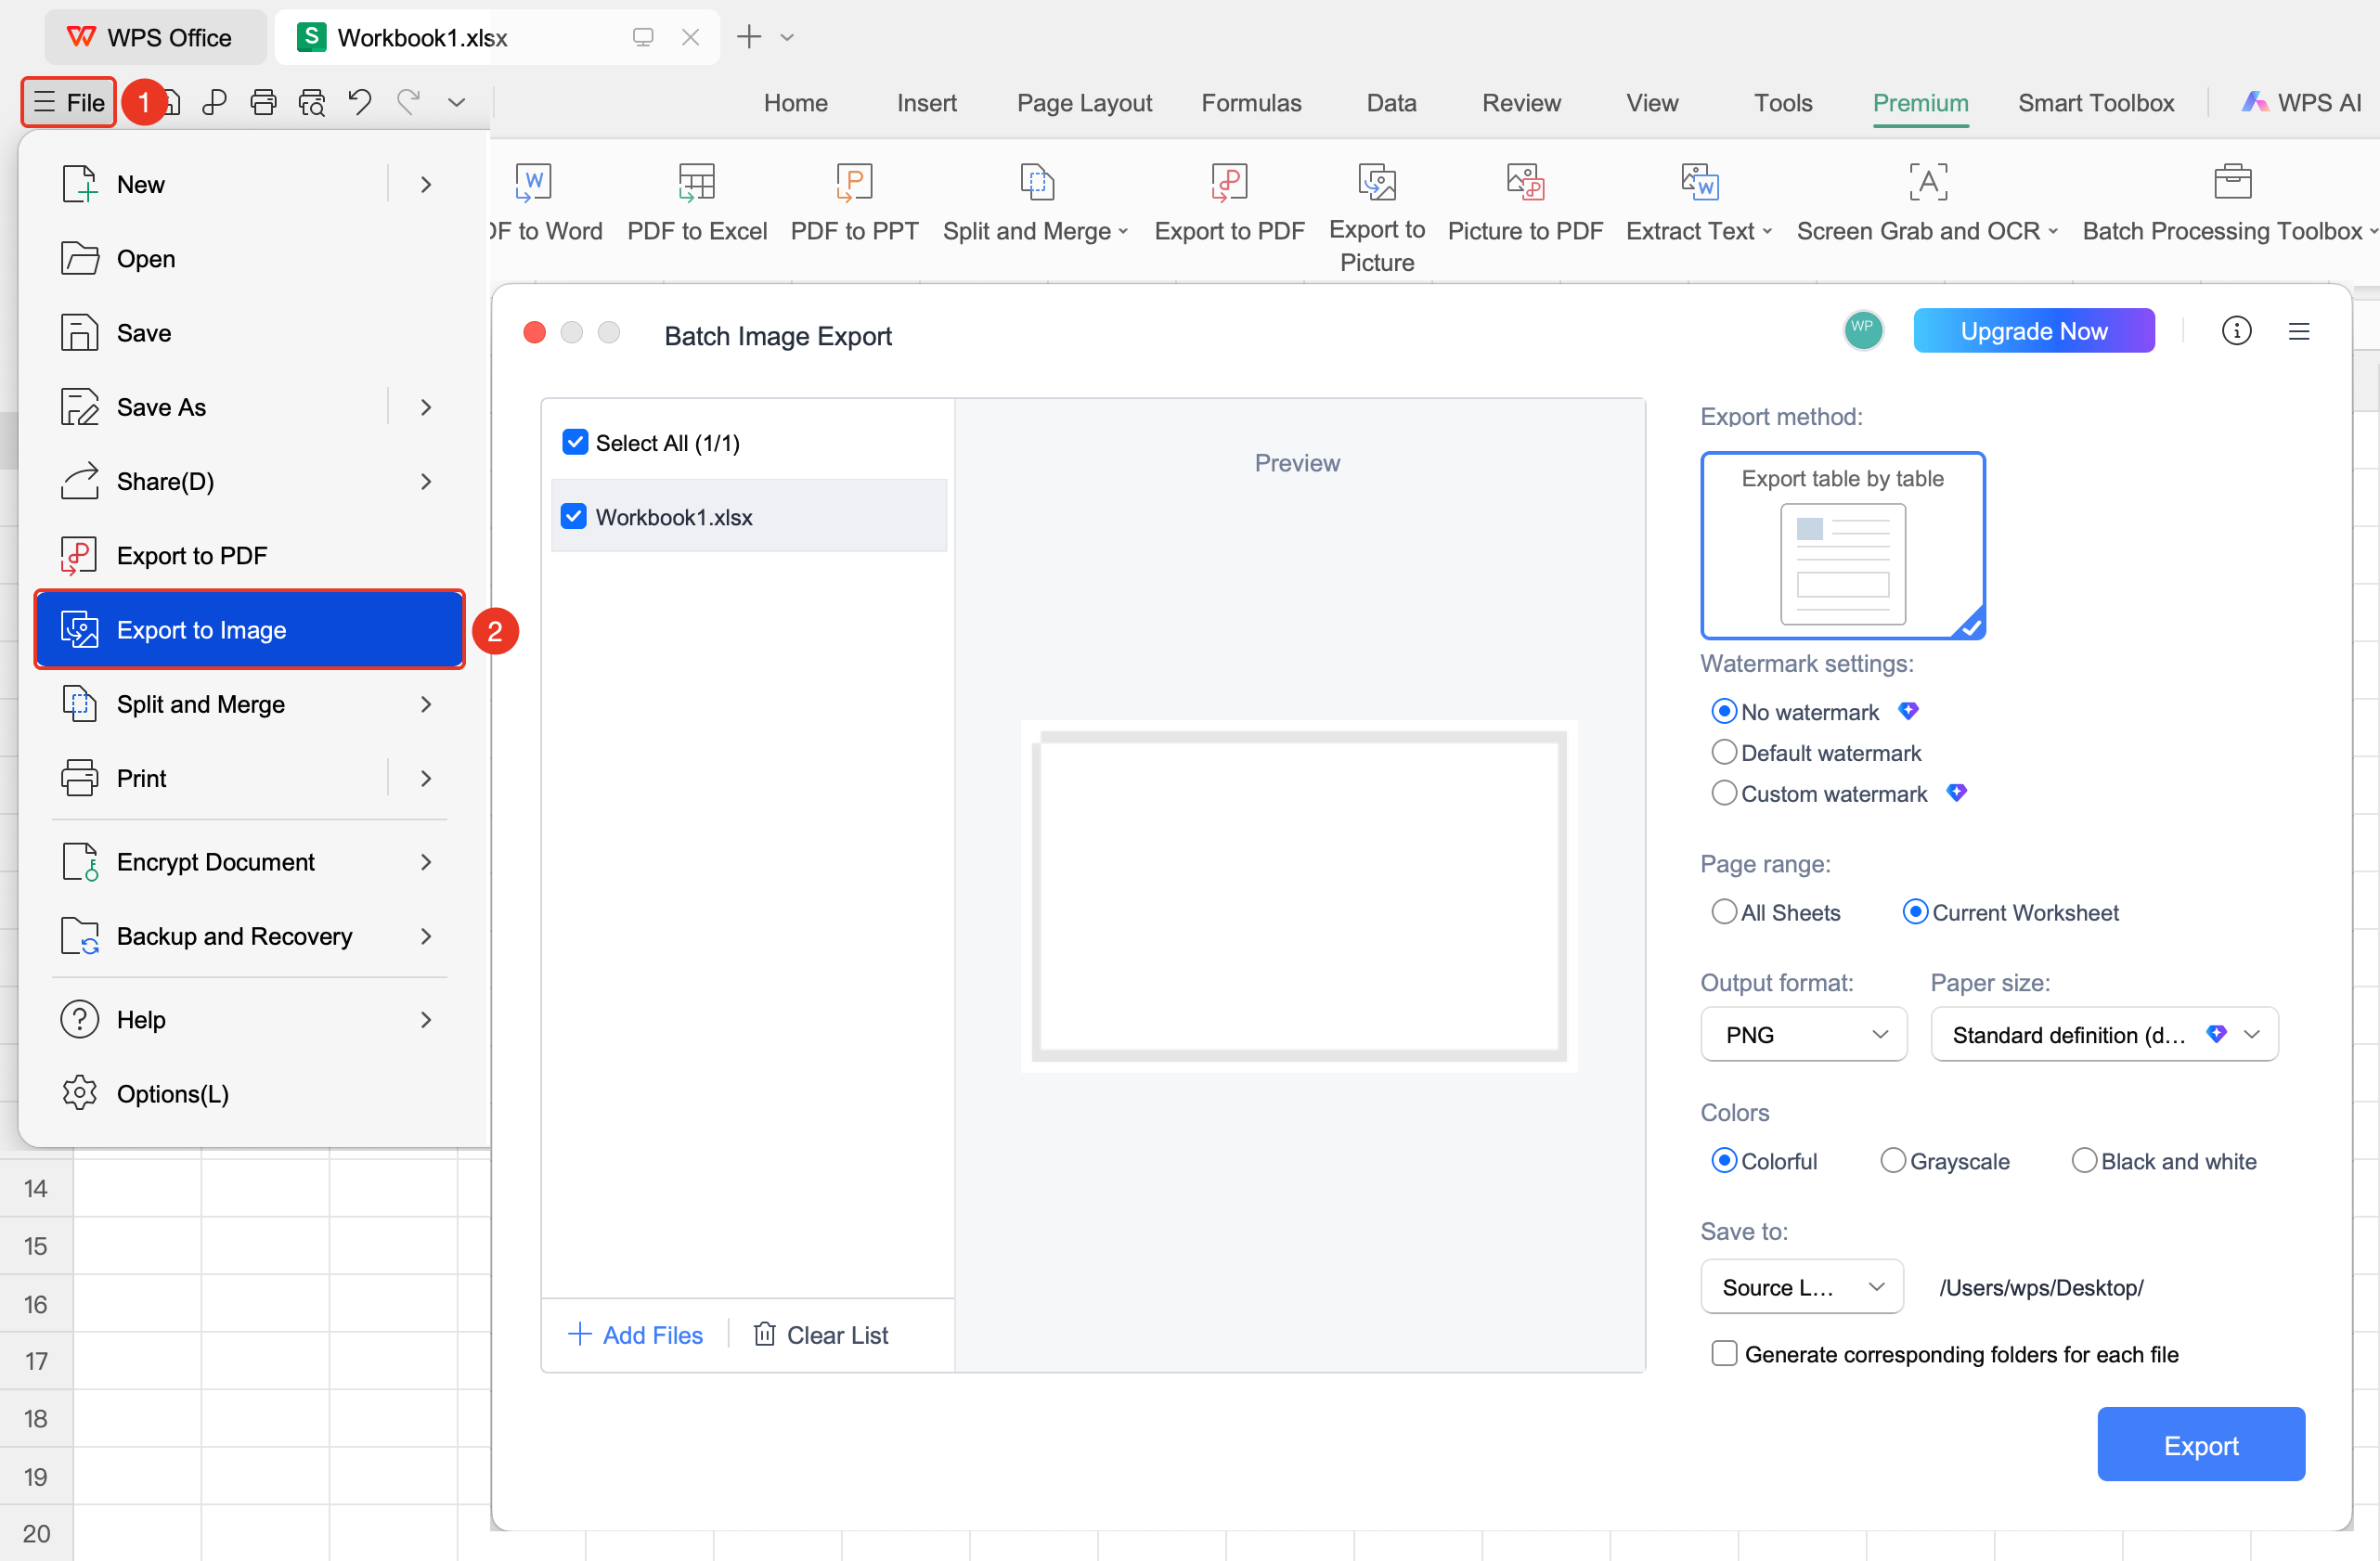
"File" Tab → "Export as Image"
- Open the document you want to convert using WPS Office
- Click the "File" menu in the top left corner
- Select "Export as Image"
- Set the export parameters and click "Start Export"
Parameter Settings
Feature Entry
Open Document → "Member Exclusive" Tab → "Export as Image"
Basic Parameters
- Export Range: Select "All Sheets" or "Current Sheet"
- Export Color: Select "Color", "Grayscale", or "Black & White"
- Export Directory: Select "Original File Location" or "Custom Location" and whether to check "Create Corresponding Folder for Each File"
Custom Watermark Settings (Membership Required)
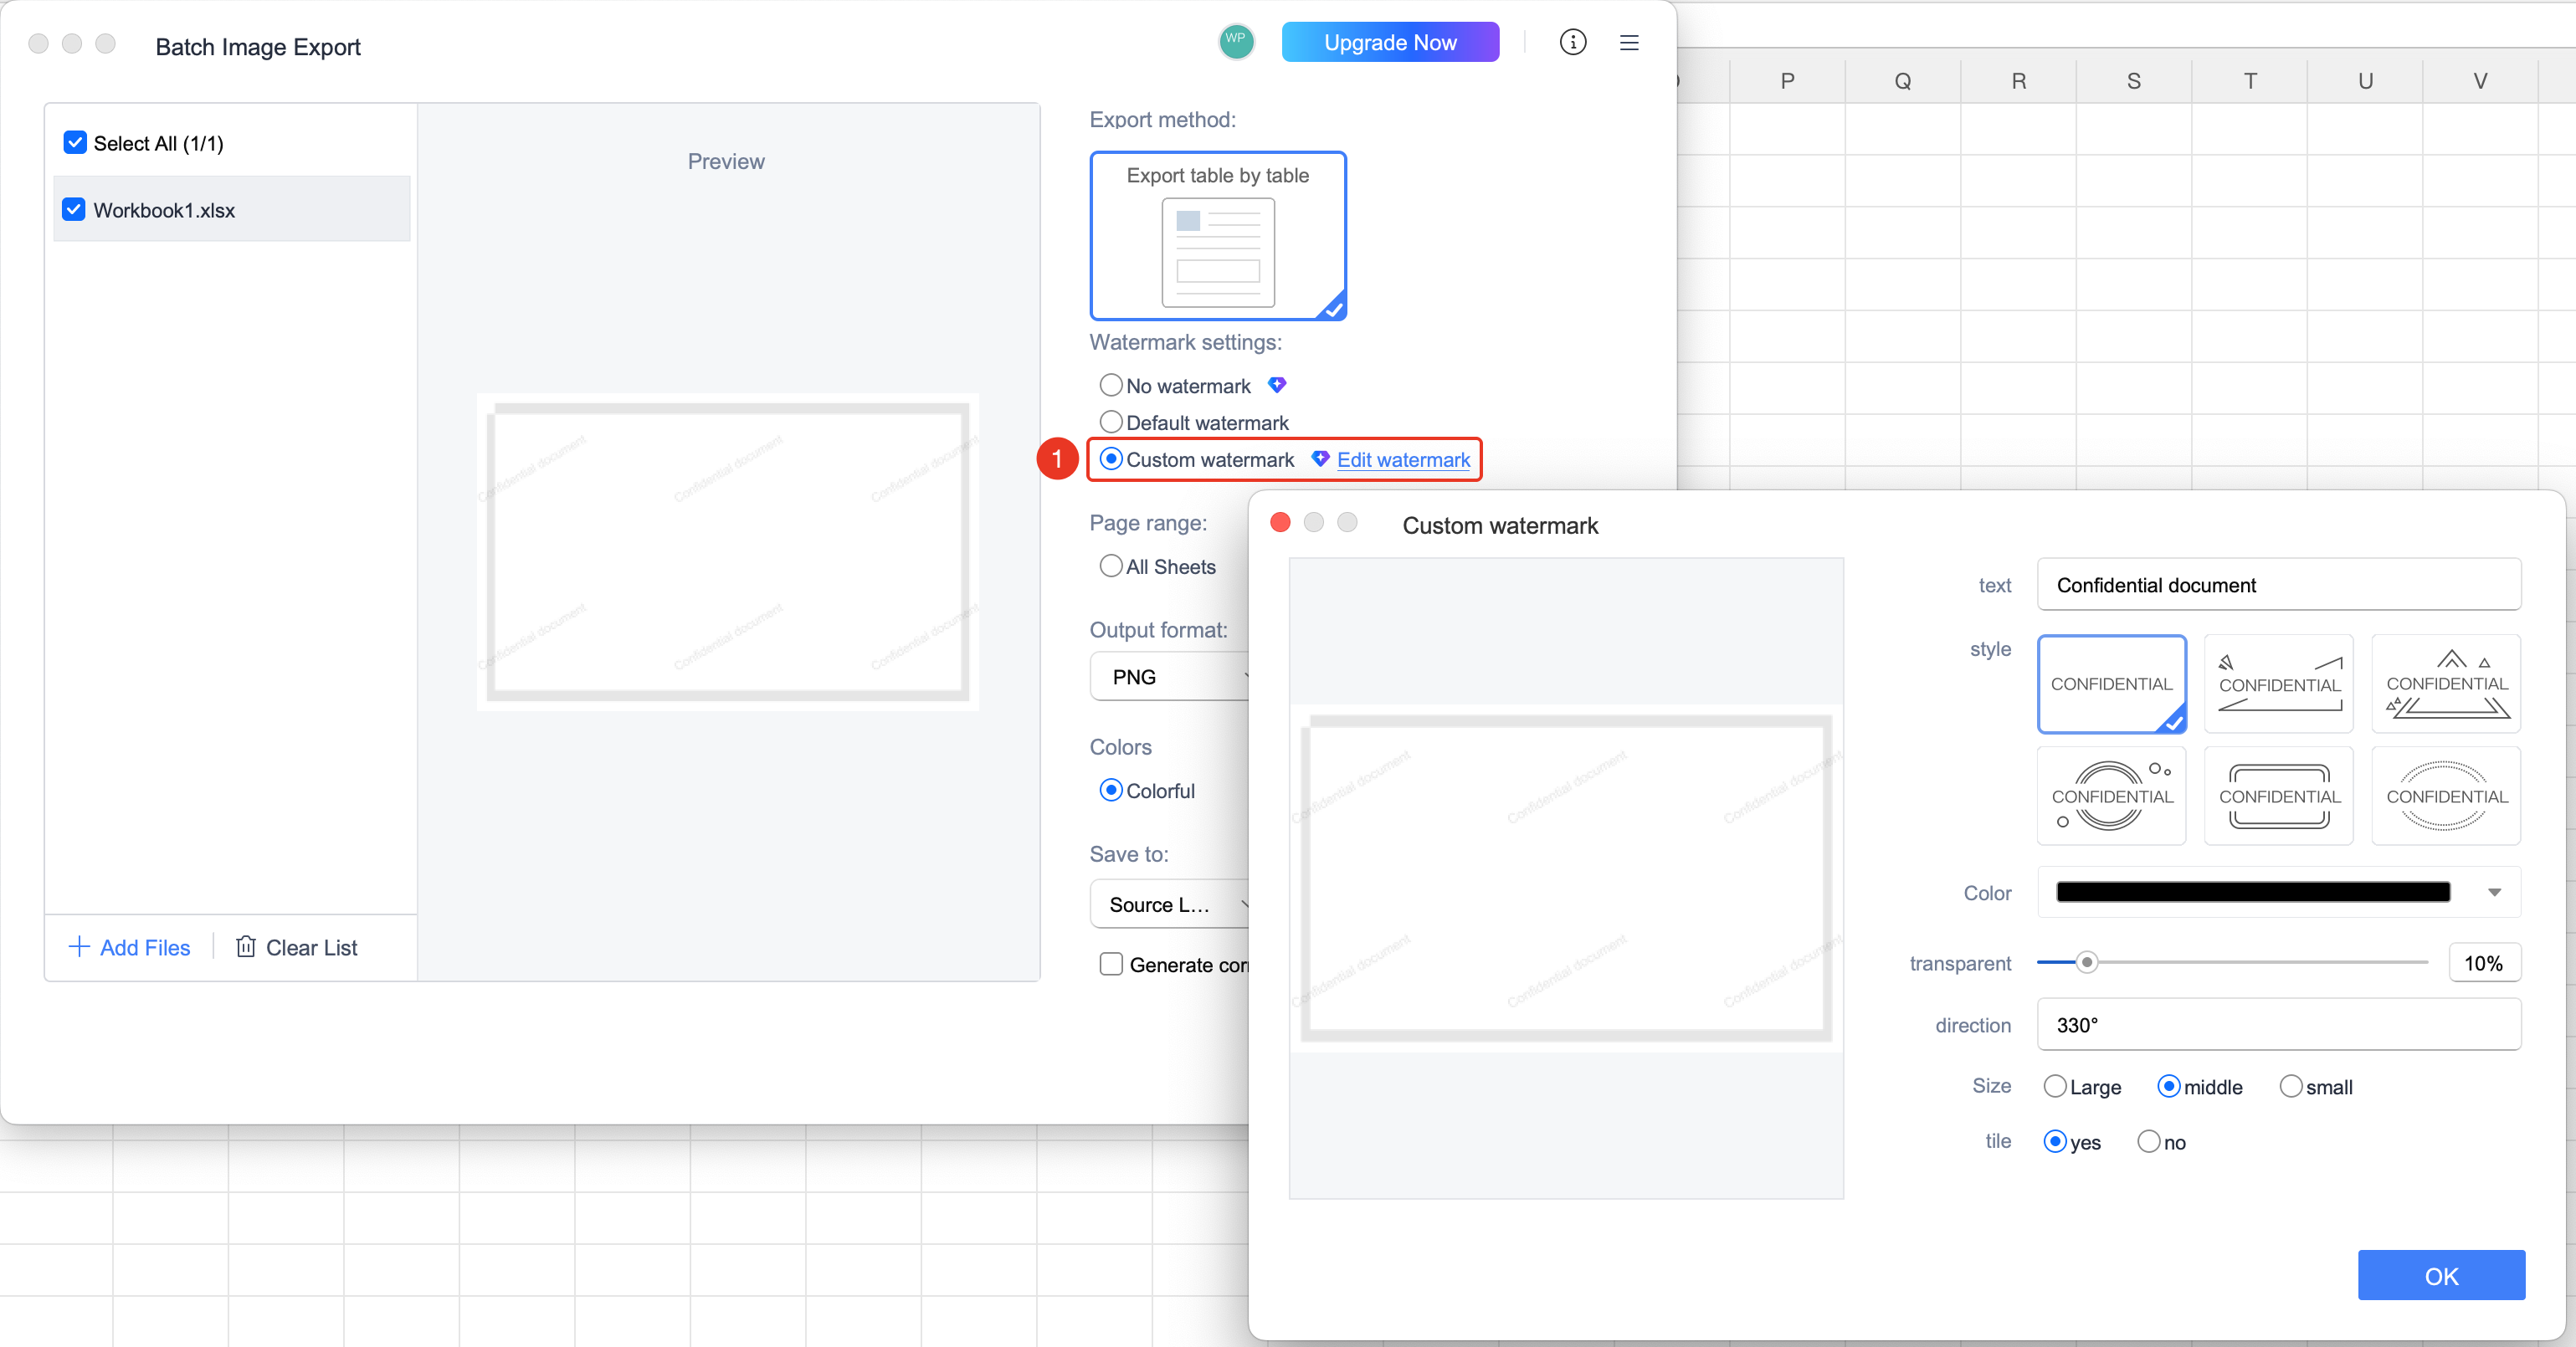
- In the export dialog box, check "Custom Watermark" → "Edit Watermark"
- Enter the watermark text (e.g., "WPS Academy")
- Set the watermark color and adjust the watermark transparency
- Select the watermark style, orientation, size, and tiling effect
- Click "OK" to apply the watermark settings
Batch Export (Membership Required)
- In the export dialog box, find the file list to be exported on the left, click "Add File" → "Open File"
Export Format and Quality
- Supports selecting the export format (e.g., JPG, PNG, and so on.)
- Set the export quality; members can export higher quality images
- Set the export directory, then click "Start Export" to complete
FAQ
Q1: What should I do if the exported image is not clear?
- Solution: Select a higher resolution in the export settings.
Q2: What should I do if the exported image has a watermark?
- Solution: Non-member users' exports contain watermarks; activating a membership can remove them.
Notes
- You can preview the effect before exporting
- Image formats do not support data editing