Feature Summary
「Screen Recording」can record screen activity and send it in chat as GIF or MP4. You can select the recording area, with a maximum duration of 5 minutes.
Feature Description
| Feature Dimension | Description |
|---|---|
| Membership Restriction | No membership restriction |
| Version Restriction | No version restriction |
Steps
Trigger Screen Recording via Toolbar
Feature Entry
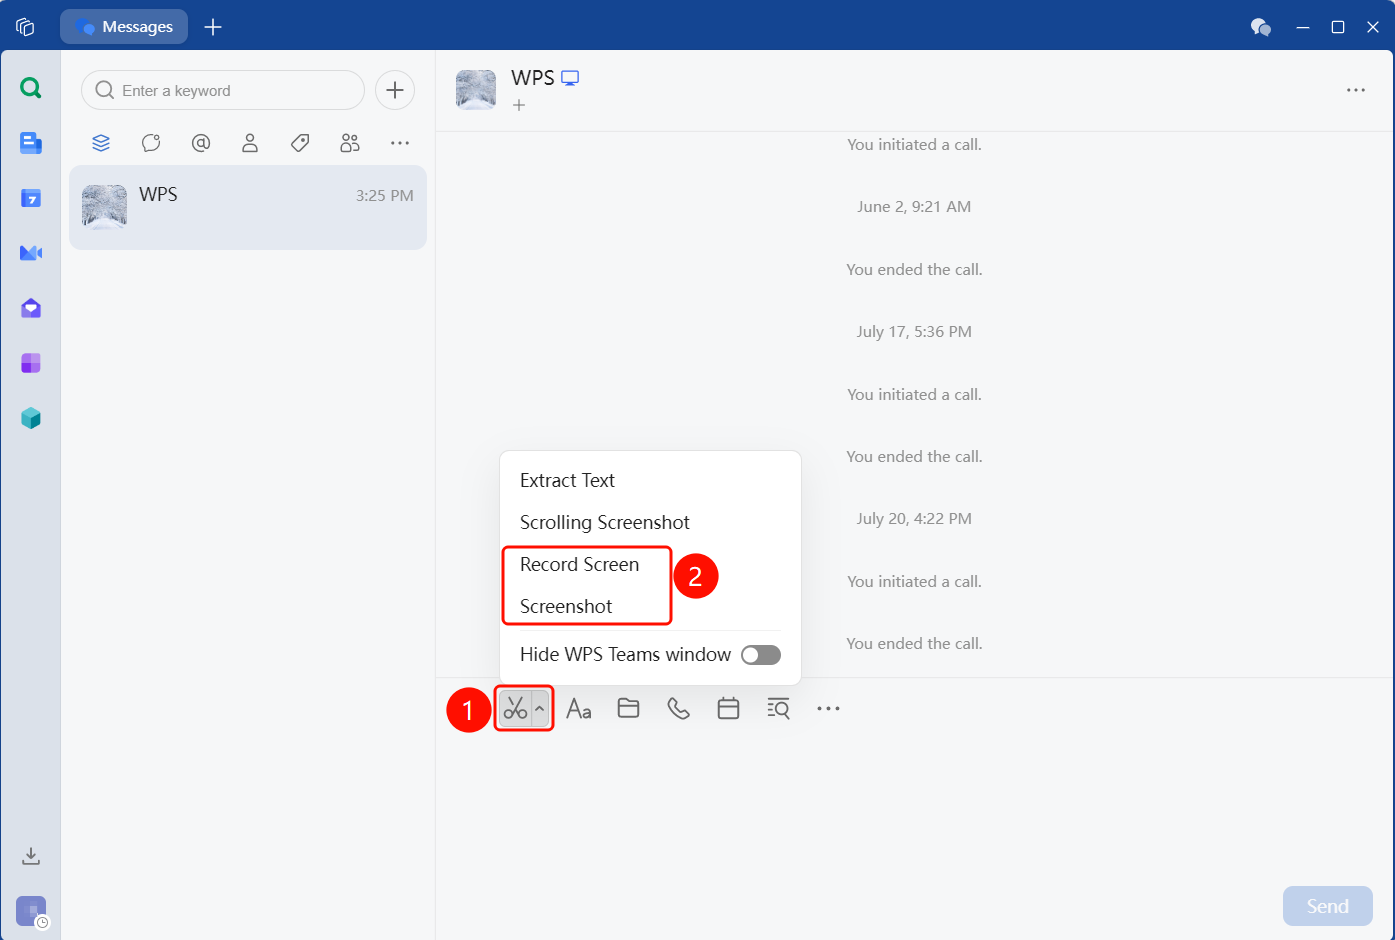
Message compose bar toolbar → ✂ button → 「Screen Recording」
- In the toolbar of the message compose bar at the bottom of the chat interface, click the ✂ icon (Screenshot button).
- A dropdown menu appears with the following options:
| Menu Option | Win-Shortcut | Mac-Shortcut | Description |
|---|---|---|---|
| Screenshot | Ctrl + Shift + A |
Cmd + Shift + A |
Capture a specified area of the screen |
| Screenshot hiding current window | — | Hide the WPS window and capture the screen behind it | |
| Screen Recording | Ctrl + Alt + R |
Cmd + Option + R |
Record a specified area of the screen |
| Screen Recording hiding current window | — | Hide the WPS window and record the screen |
- Select 「Screen Recording」(or Screen Recording hiding current window) to enter the recording area selection mode.
Select Recording Area
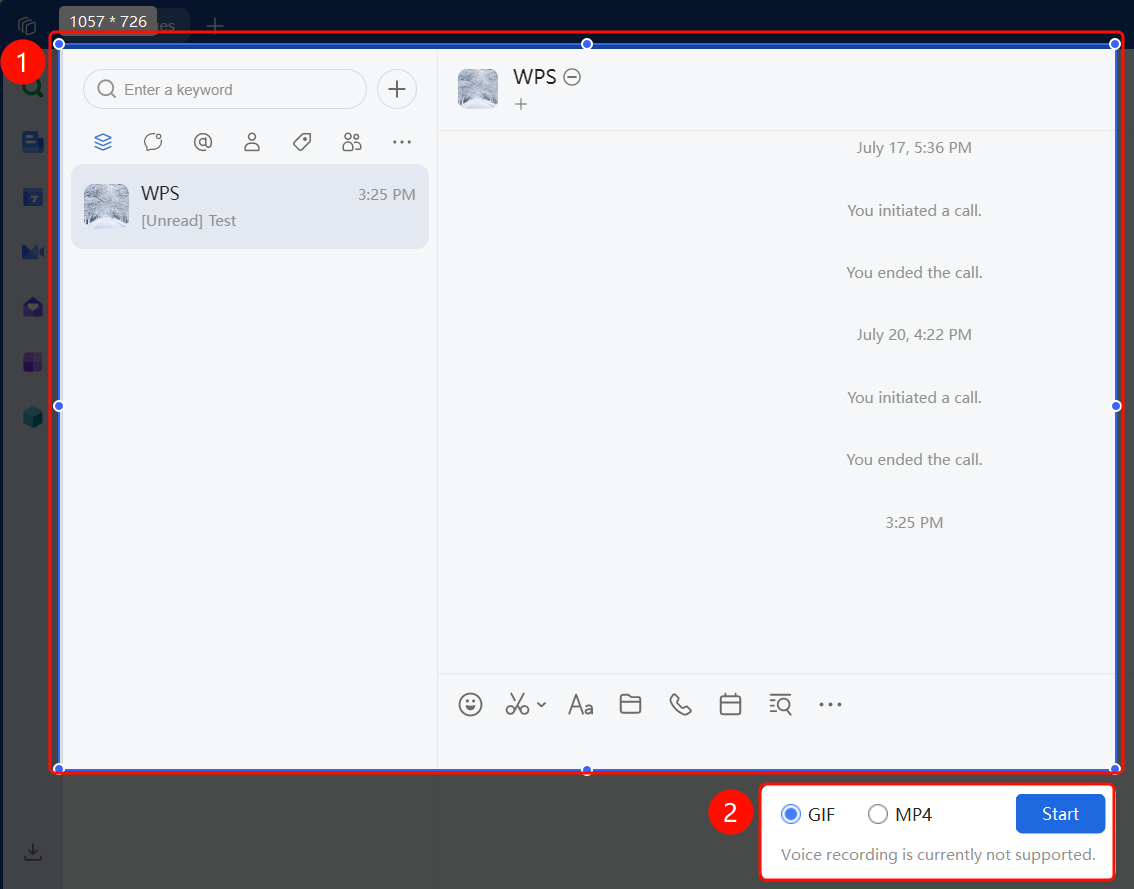
- The cursor changes to a crosshair. Drag to select the screen area you want to record.
- After releasing the mouse, the selected area is marked with a blue dashed box, with circular control points at the four corners (drag to resize).
- The current area dimensions are displayed in real-time at the top-left corner of the selection (e.g., 779 × 583 pixels).
- A recording control panel appears below the selection, including:
| Control | Description |
|---|---|
| GIF | Select recording format as GIF (animated image) |
| MP4 | Select recording format as MP4 (video, audio recording not currently supported) |
| 「Start」button | Click to start recording |
Start Recording
Feature Entry
Recording control panel → 「Start」button
- After selecting the recording format (GIF or MP4), click the 「Start」button.
- Recording begins immediately, and the bottom control bar changes to show recording progress.
- During recording, a progress bar is displayed at the bottom, with the elapsed time / maximum duration and the 「End」button shown on the right.
End Recording and Send
Feature Entry
Recording control bar → 「End」button
- Click the red 「End」button to stop recording.
- A recording result preview window pops up, where you can view the recorded GIF/MP4 content.
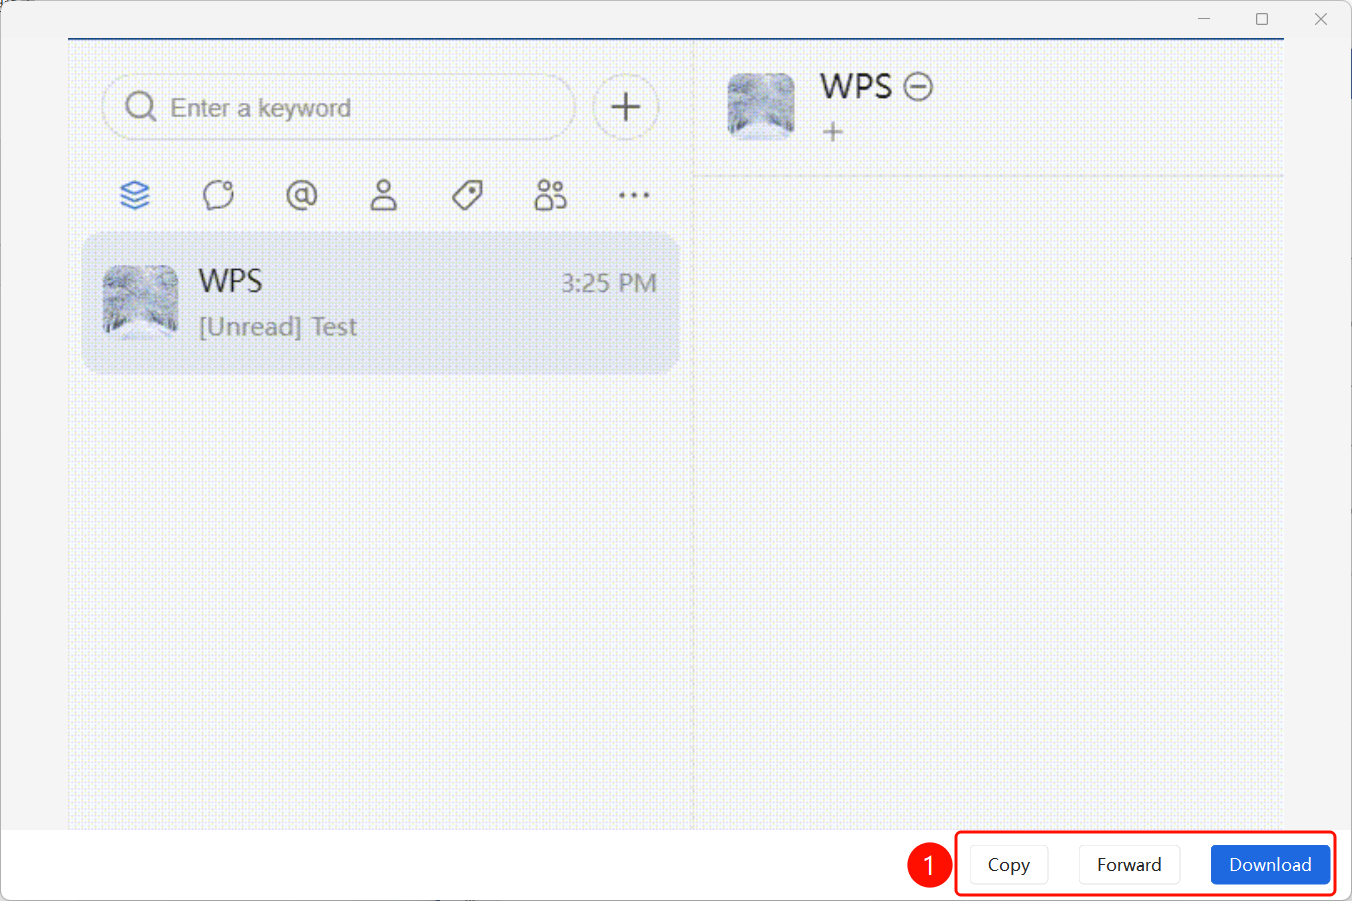
- Three action options are provided at the bottom of the preview window:
| Action Button | Description |
|---|---|
| Copy | Copy the recorded file to the clipboard and paste it into any chat or editor |
| Forward | Select a target conversation and forward the recorded file to others |
| Download | Save the recorded file to local disk |
- Select the corresponding action to complete sending the screen recording.
Hide WPS Teams window
Feature Entry
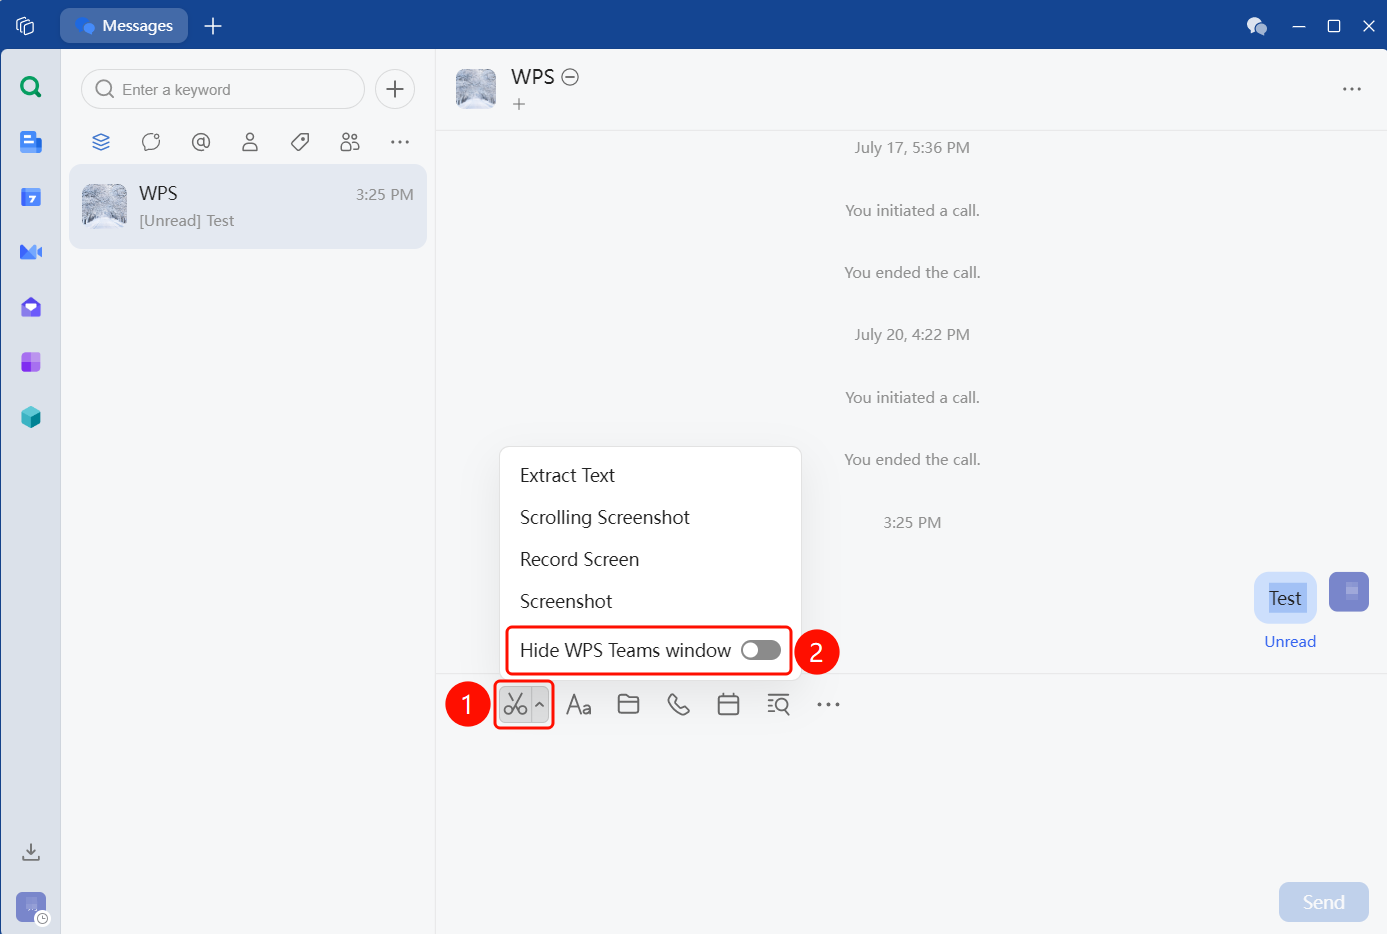
Message compose bar toolbar → ✂ button → 「Hide WPS Teams window」
Click the ✂ icon in the toolbar to open the dropdown menu.
Select 「Hide WPS Teams window」, and the WPS window will automatically hide.
Trigger Screen Recording via Shortcut
Feature Entry
Win-Shortcut: Ctrl + Alt + R
Mac-Shortcut: Cmd + Option + R
- Press
Ctrl + Alt + R/Cmd + Option + Ron any screen to directly enter the recording area selection mode (no need to open the menu). - Drag to select the recording area, and subsequent steps are the same as 「Start Recording」and 「End Recording and Send」.
FAQ
Question 1: What formats are supported for screen recording?
- Solution: Both GIF (animated image, no audio) and MP4 (video, audio recording not currently supported) formats are supported. The current version does not support audio recording.
Question 2: Is there a time limit for screen recording?
- Solution: A single recording can last up to 5 minutes (00:05:00). It will automatically stop and generate the recording file when the time limit is reached.
Question 3: How do I choose who to send the recording to after it's finished?
- Solution: In the preview window after recording ends, the 'Forward' button lets you select a target conversation to send to; 'Copy' allows you to paste it into any chat box; 'Download' saves it locally.
Notes
- The screen recording feature requires a network connection. Please ensure a good network status.
- The current version does not support audio recording; only the screen image is recorded.
- The GIF format is suitable for sharing short animated clips, while the MP4 format is suitable for longer recording content.